21 minutes
Using Terraform and Cloud-Init to deploy and automatically monitor Proxmox instances - Windows
In the last post I covered deploying Linux-based Proxmox instances using Terraform, leveraging Cloud-Init and cloud-config to register these instances with SaltStack.
The instances in the previous post were both Linux distributions (Debian and Fedora). This is because Cloud-Init was initially built for Linux, and then ported to other Unix-like systems (e.g. FreeBSD, OpenBSD and more).
Thanks to a company called Cloudbase Solutions an equivalent of Cloud-Init is also available for Windows, known as Cloudbase-Init.
Cloudbase-Init
Cloudbase-Init is written in Python, and was originally developed to allow customization of Windows images on OpenStack. However it also supports a number of different metadata services (everything from AWS and Azure to VMware).
Cloudbase-Init also supports a subset of the cloud-config format, including write_files (i.e. creating files on the instance), users, groups, runcmd (i.e. running arbitrary commands) and more.
Preparing the template machine
The first step before creating your instances is to create a template Windows image. This image can then be used as a base image for other instances (using cloning).
Cloudbase Solutions provide tools to build Windows images ready to be deployed with Cloudbase-Init installed, but they rely on Hyper-V on Windows. If you do not have access to a Windows machine to generate the images, do not have access to Hyper-V, or simply want to go through the process yourself, then you can install Cloudbase-Init in a Windows instance yourself.
Installing Windows
In this post, I am using Windows Server Core 2019 (i.e. without the Desktop Experience installed). As Proxmox uses KVM as its underlying hypervisor, you will also need to download the VirtIO-Win ISO. This contains all the necessary drivers for Windows for VirtIO-based NICs, storage and serial devices. Without this, you would need use emulated devices (i.e. emulated SATA or network devices), which are less efficient than the VirtIO equivalents.
First, download the VirtIO ISO and place it in the /var/lib/vz/templates/iso directory on your Proxmox host. This is where Proxmox expects to find all ISO images by default.
After this, place the ISO for your Windows version of choice in the same directory. If you already have the ISOs, then use something like scp or rsync to place it on the Proxmox server. Alternatively, you can download trial versions of Windows from the Microsoft Evaluation Center. These trial versions can be activated later with the appropriate license key and service contract with Microsoft.
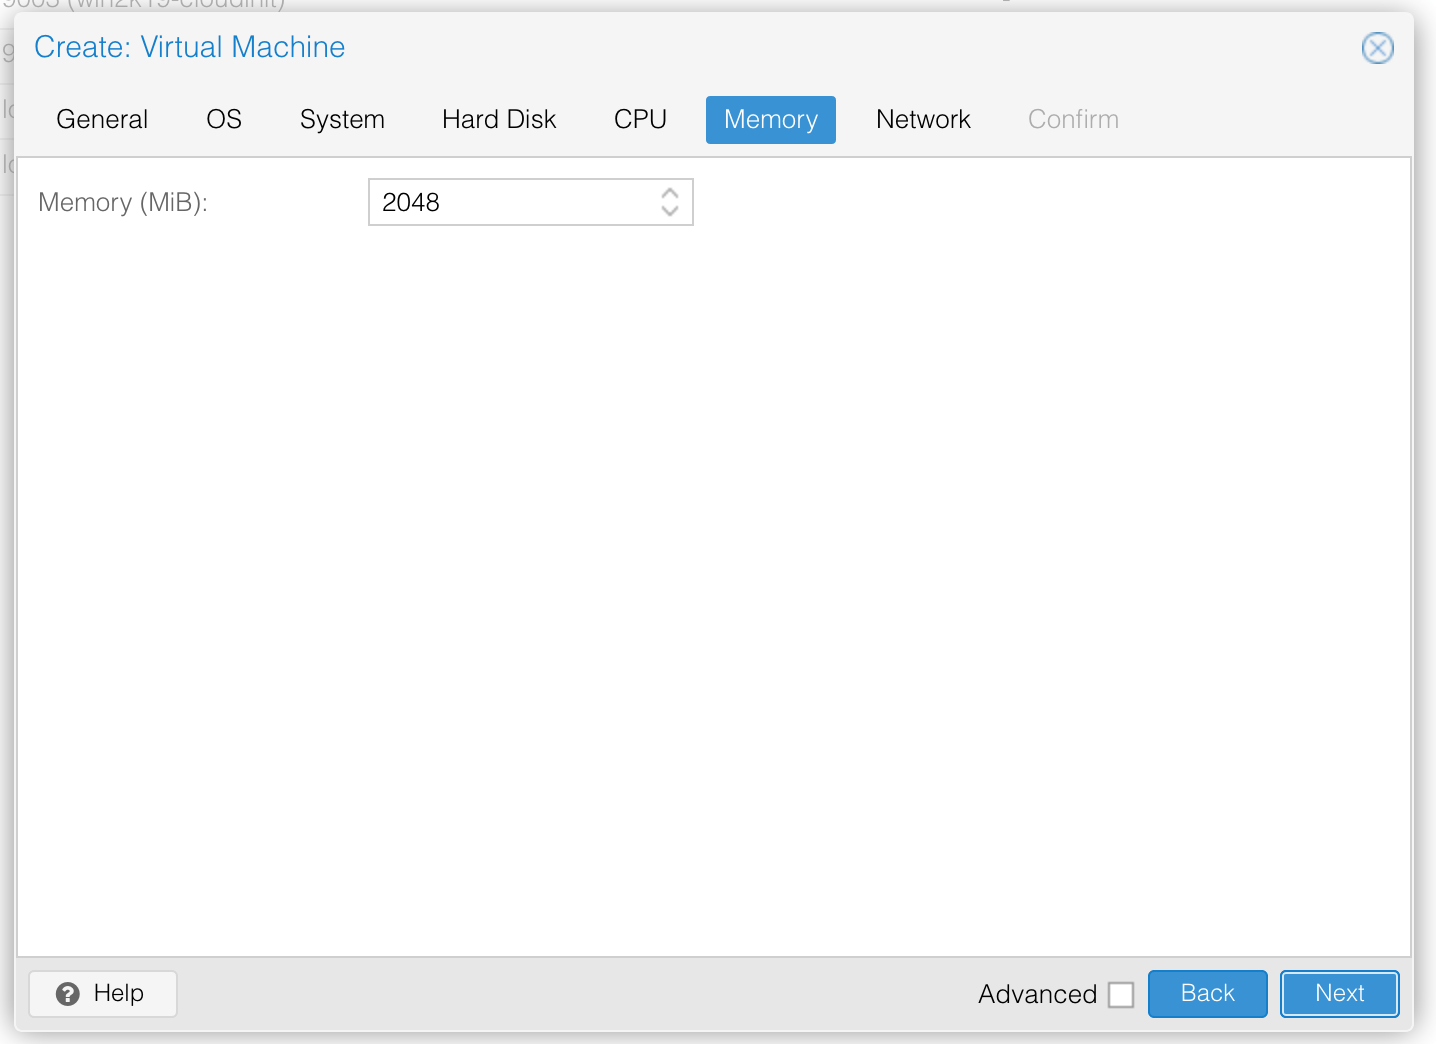
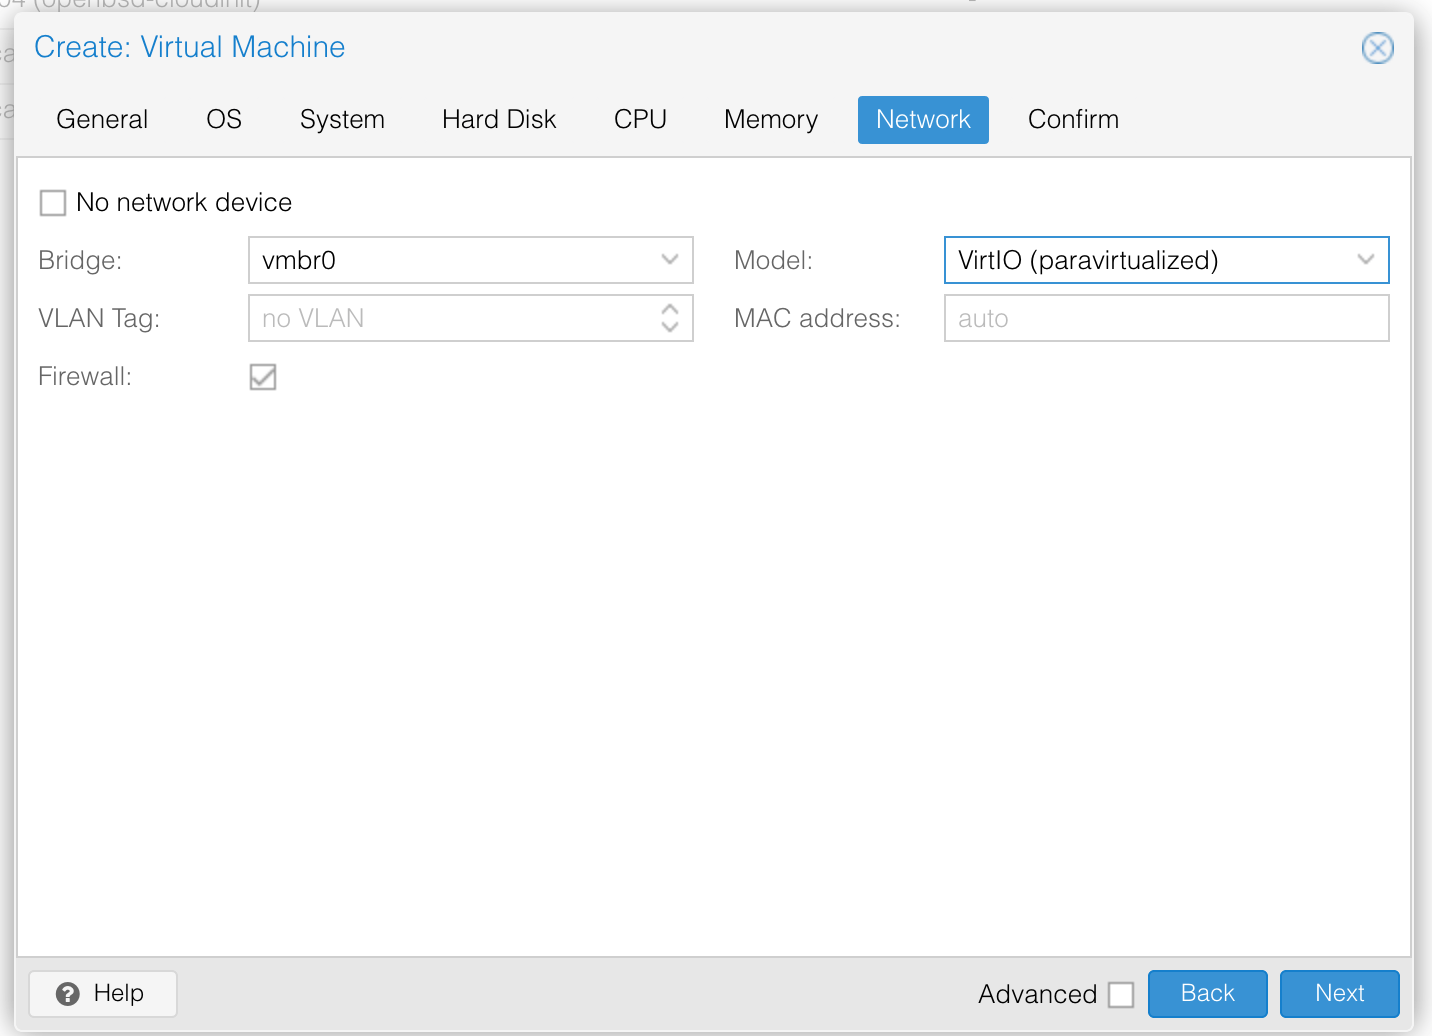
Now create the instance. The settings in the below images should work on a default Proxmox install, but you may need to change them if your environment differs (e.g. using Ceph/ZFS for storage, OpenVSwitch for networking): -
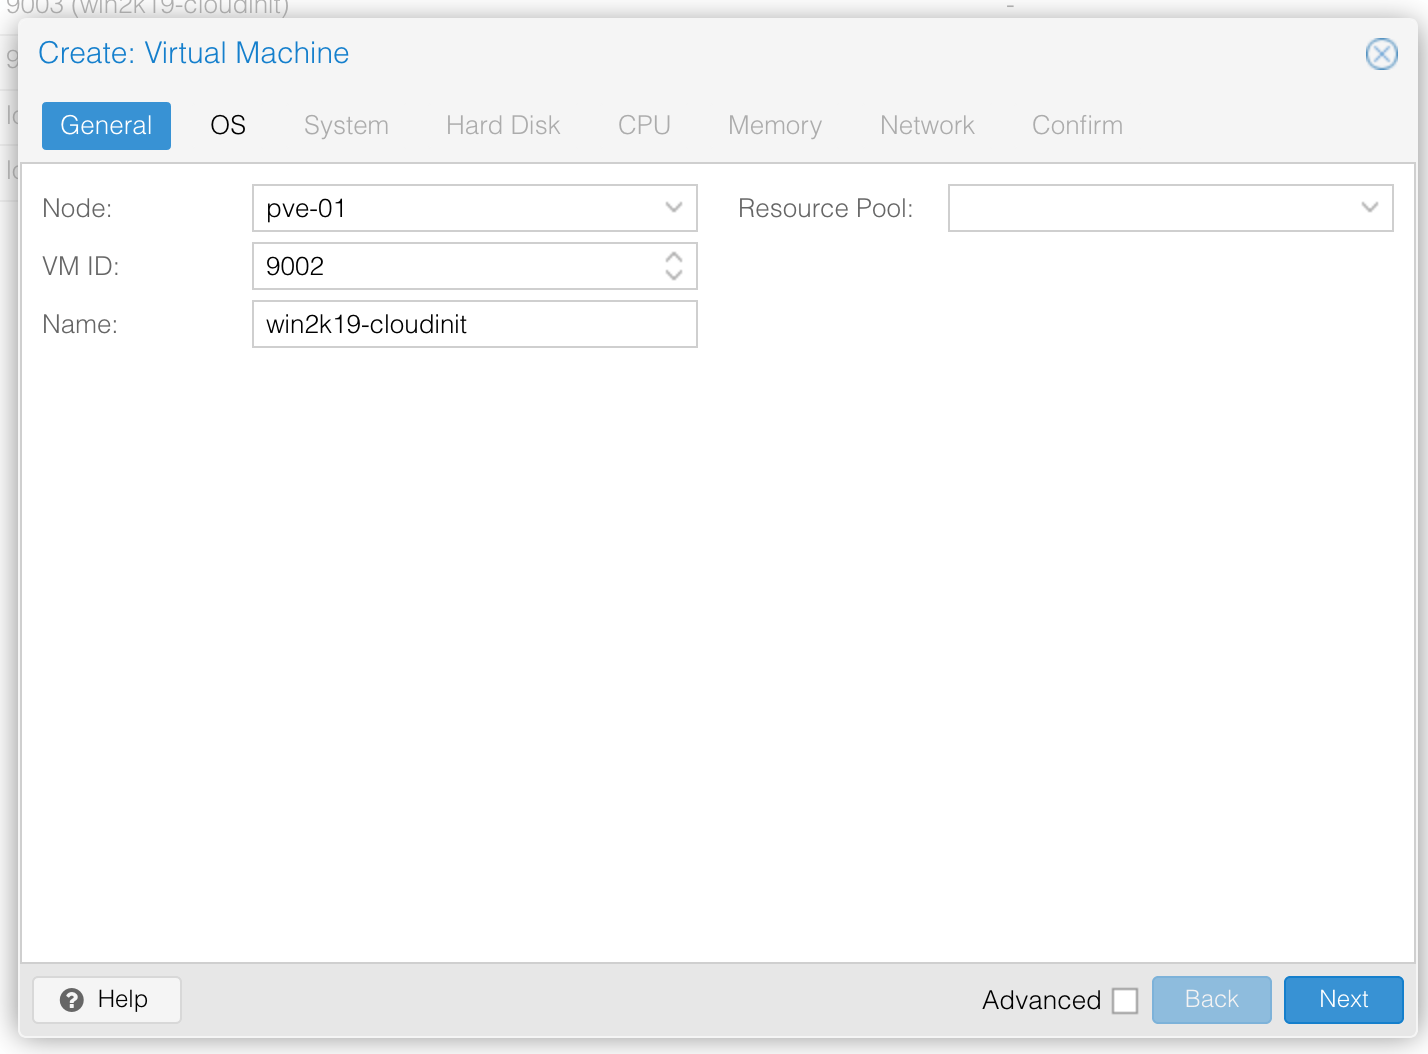
Create the VM

General Options
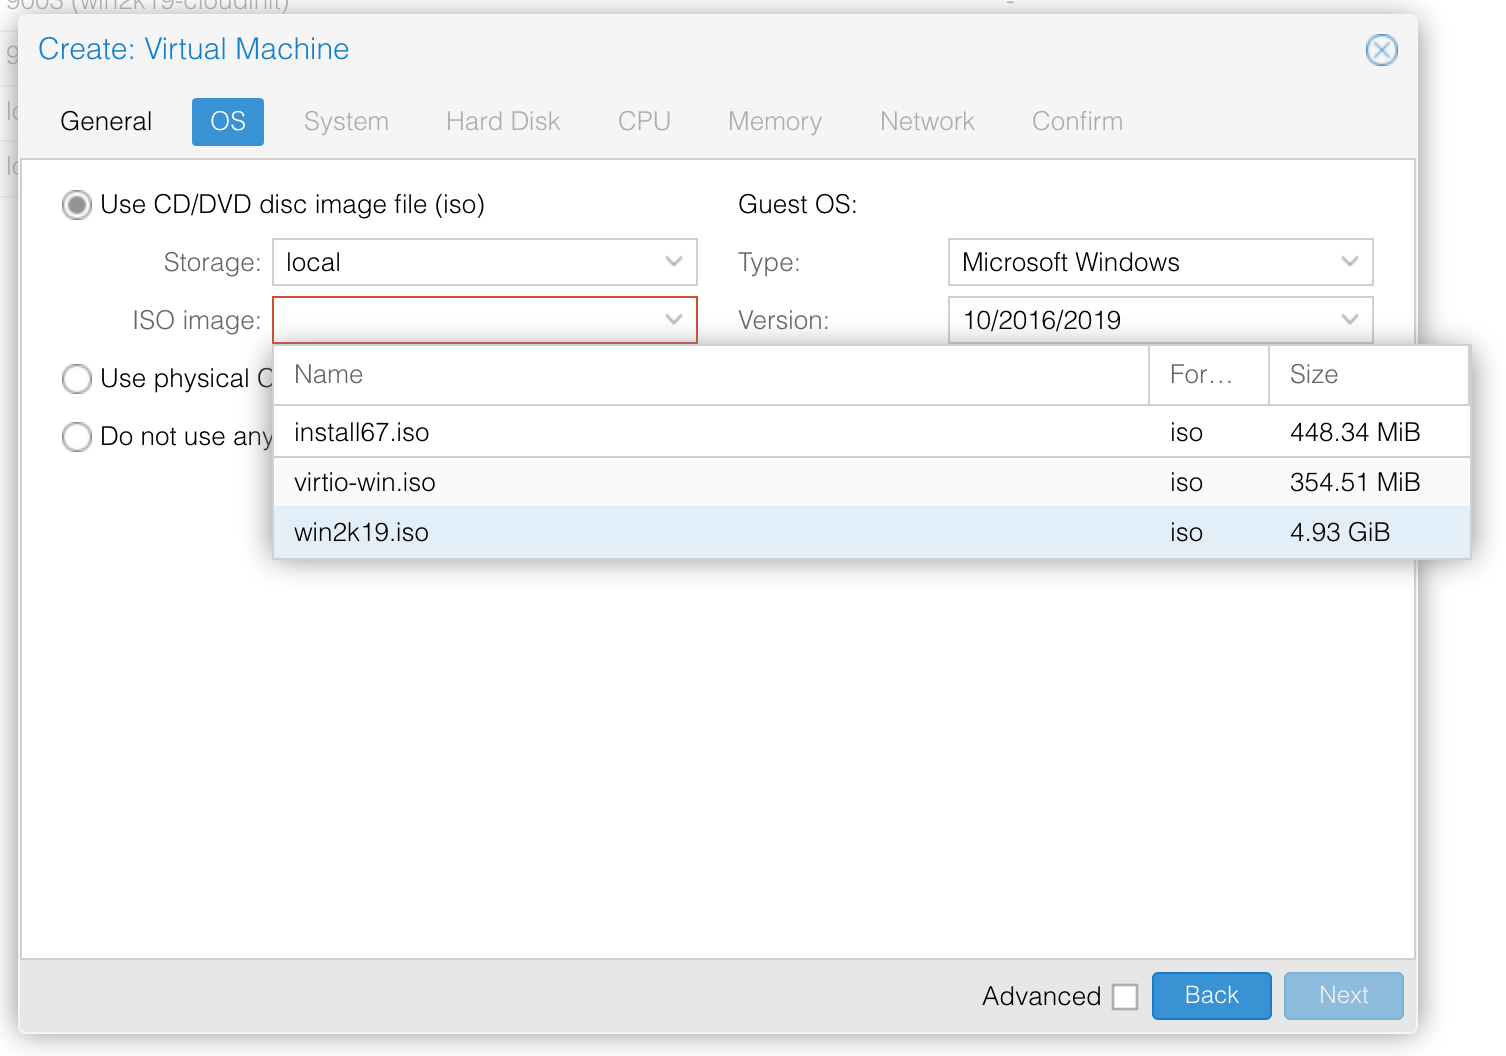
Choose the OS
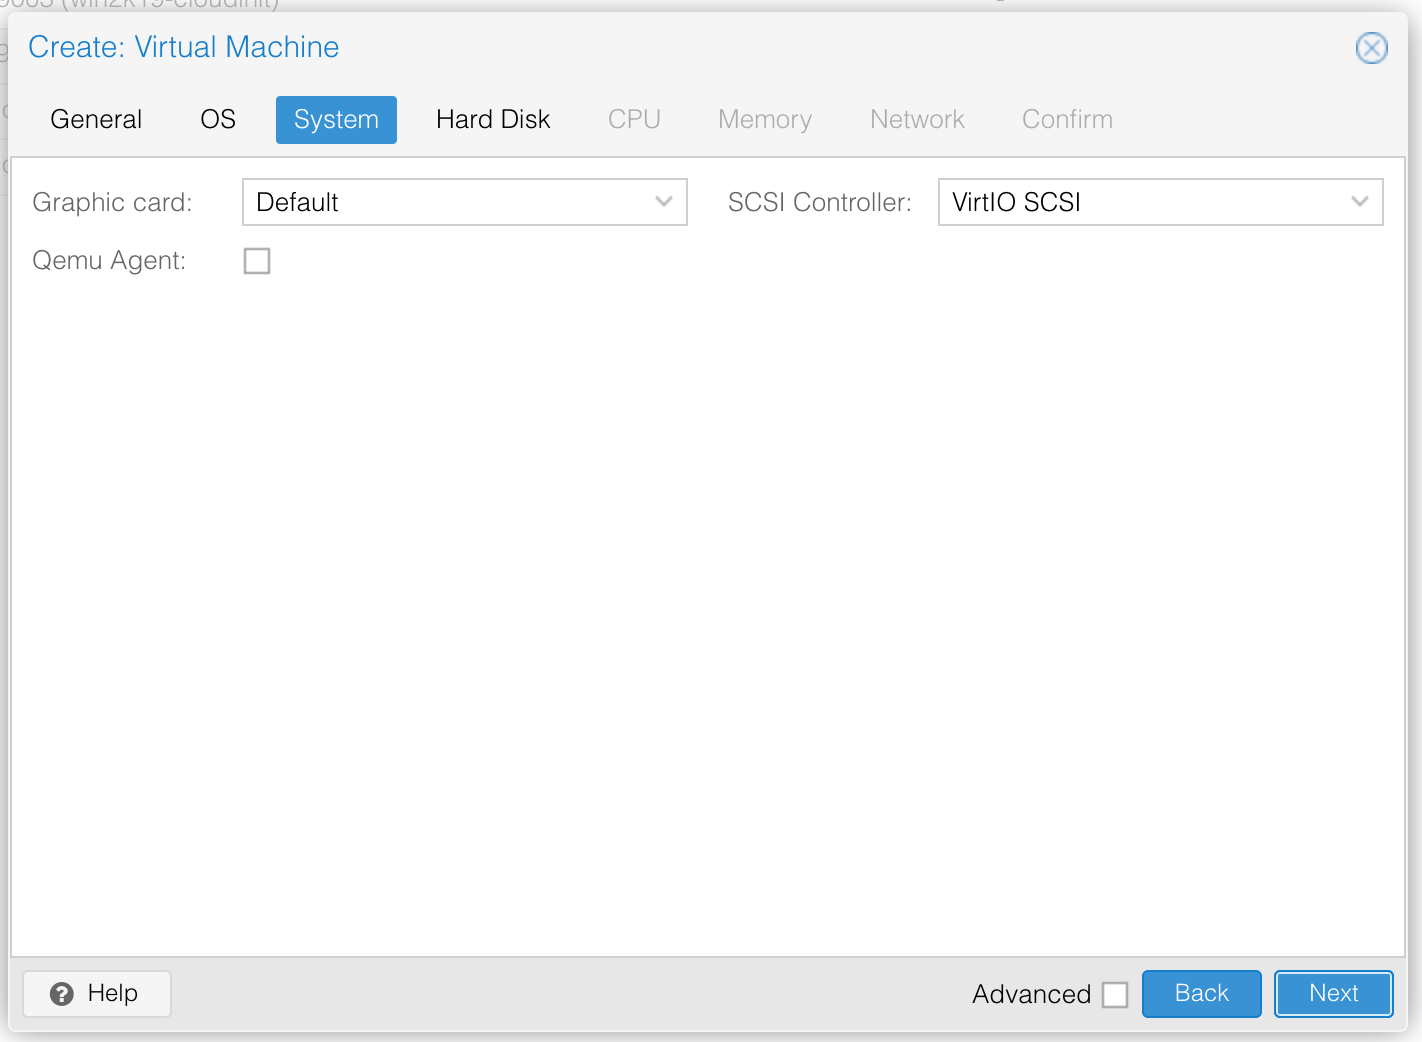
System hardware (Disk controller and graphics
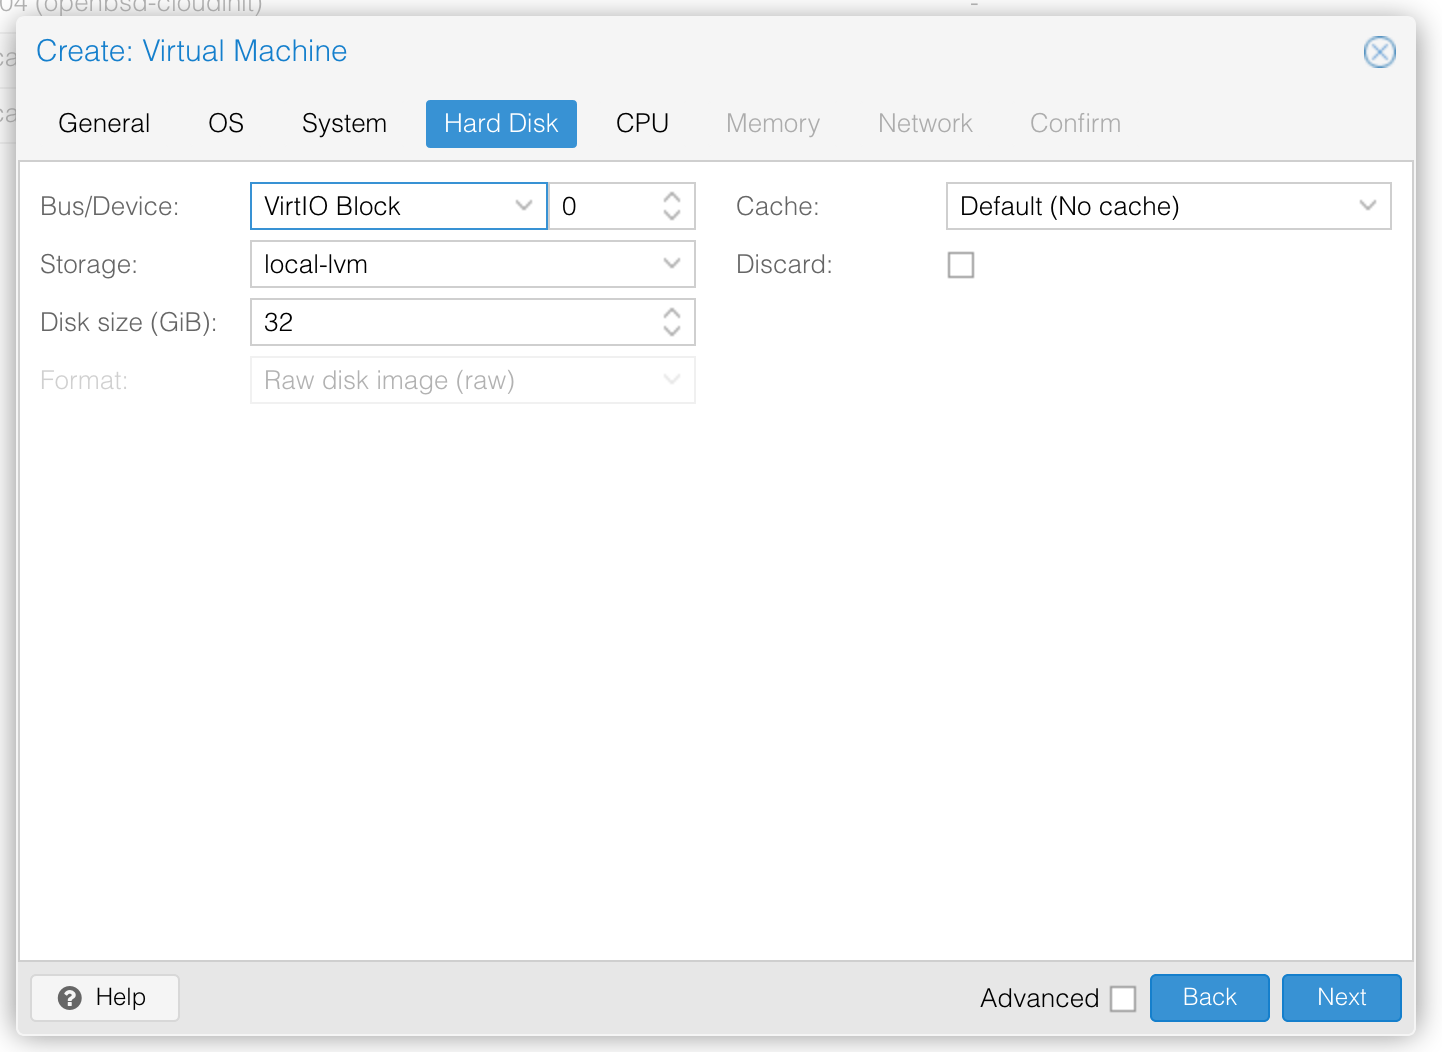
Create the disk
Choose the CPU and core count

Choose the amount of memory
Choose the network
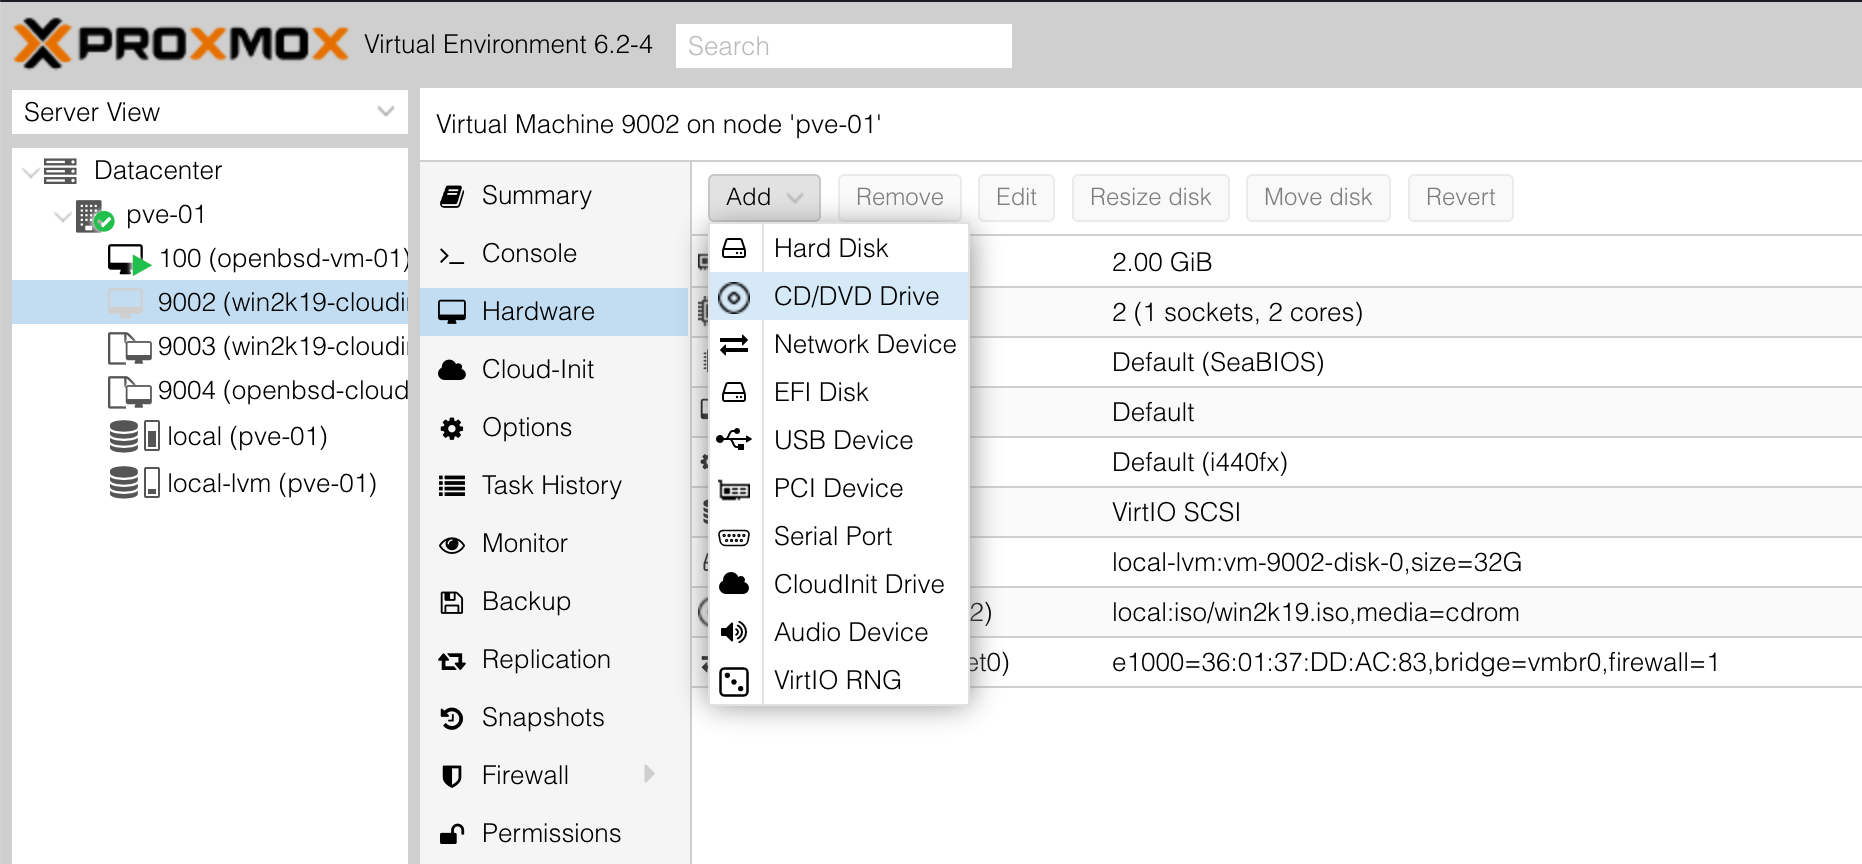
After creating the instance, select it, go to Hardware, and then add a CD-ROM drive: -
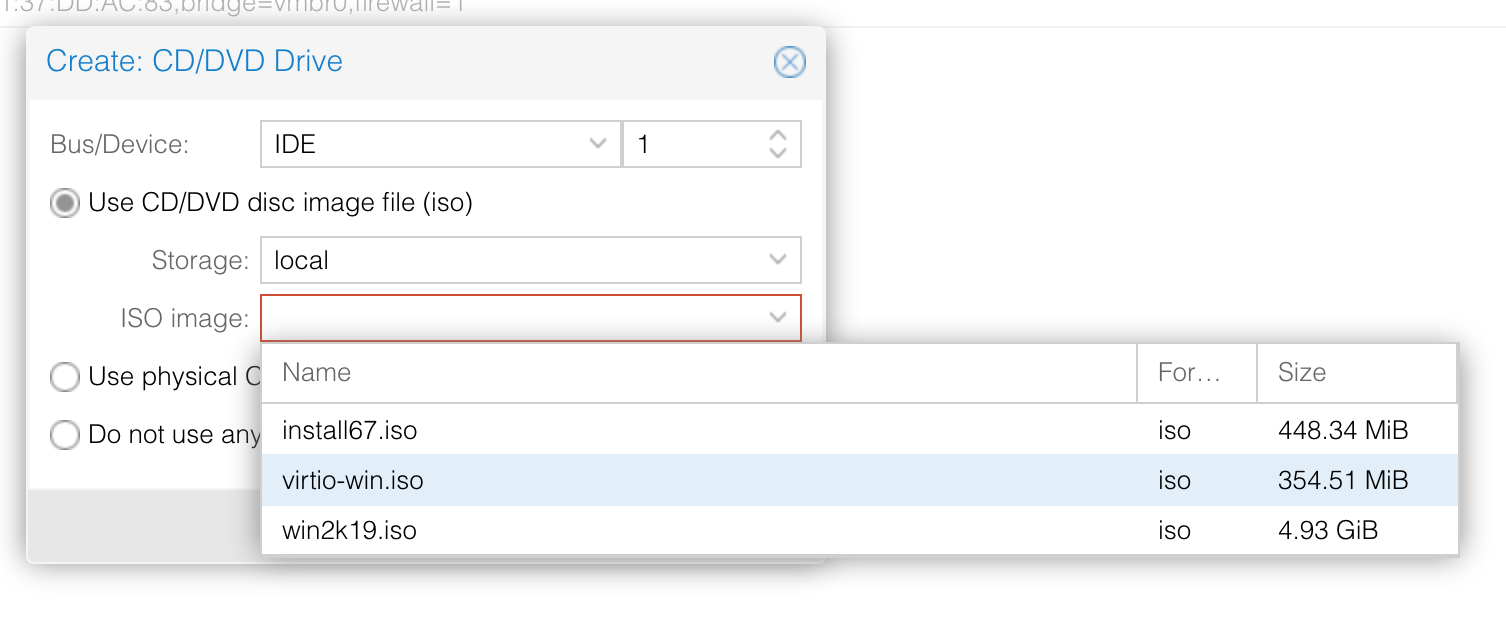
Choose the virtio-win.iso - this contains all the necessary Windows drivers: -
When you start the machine, you should now be presented with the following: -
Loading files
Booting

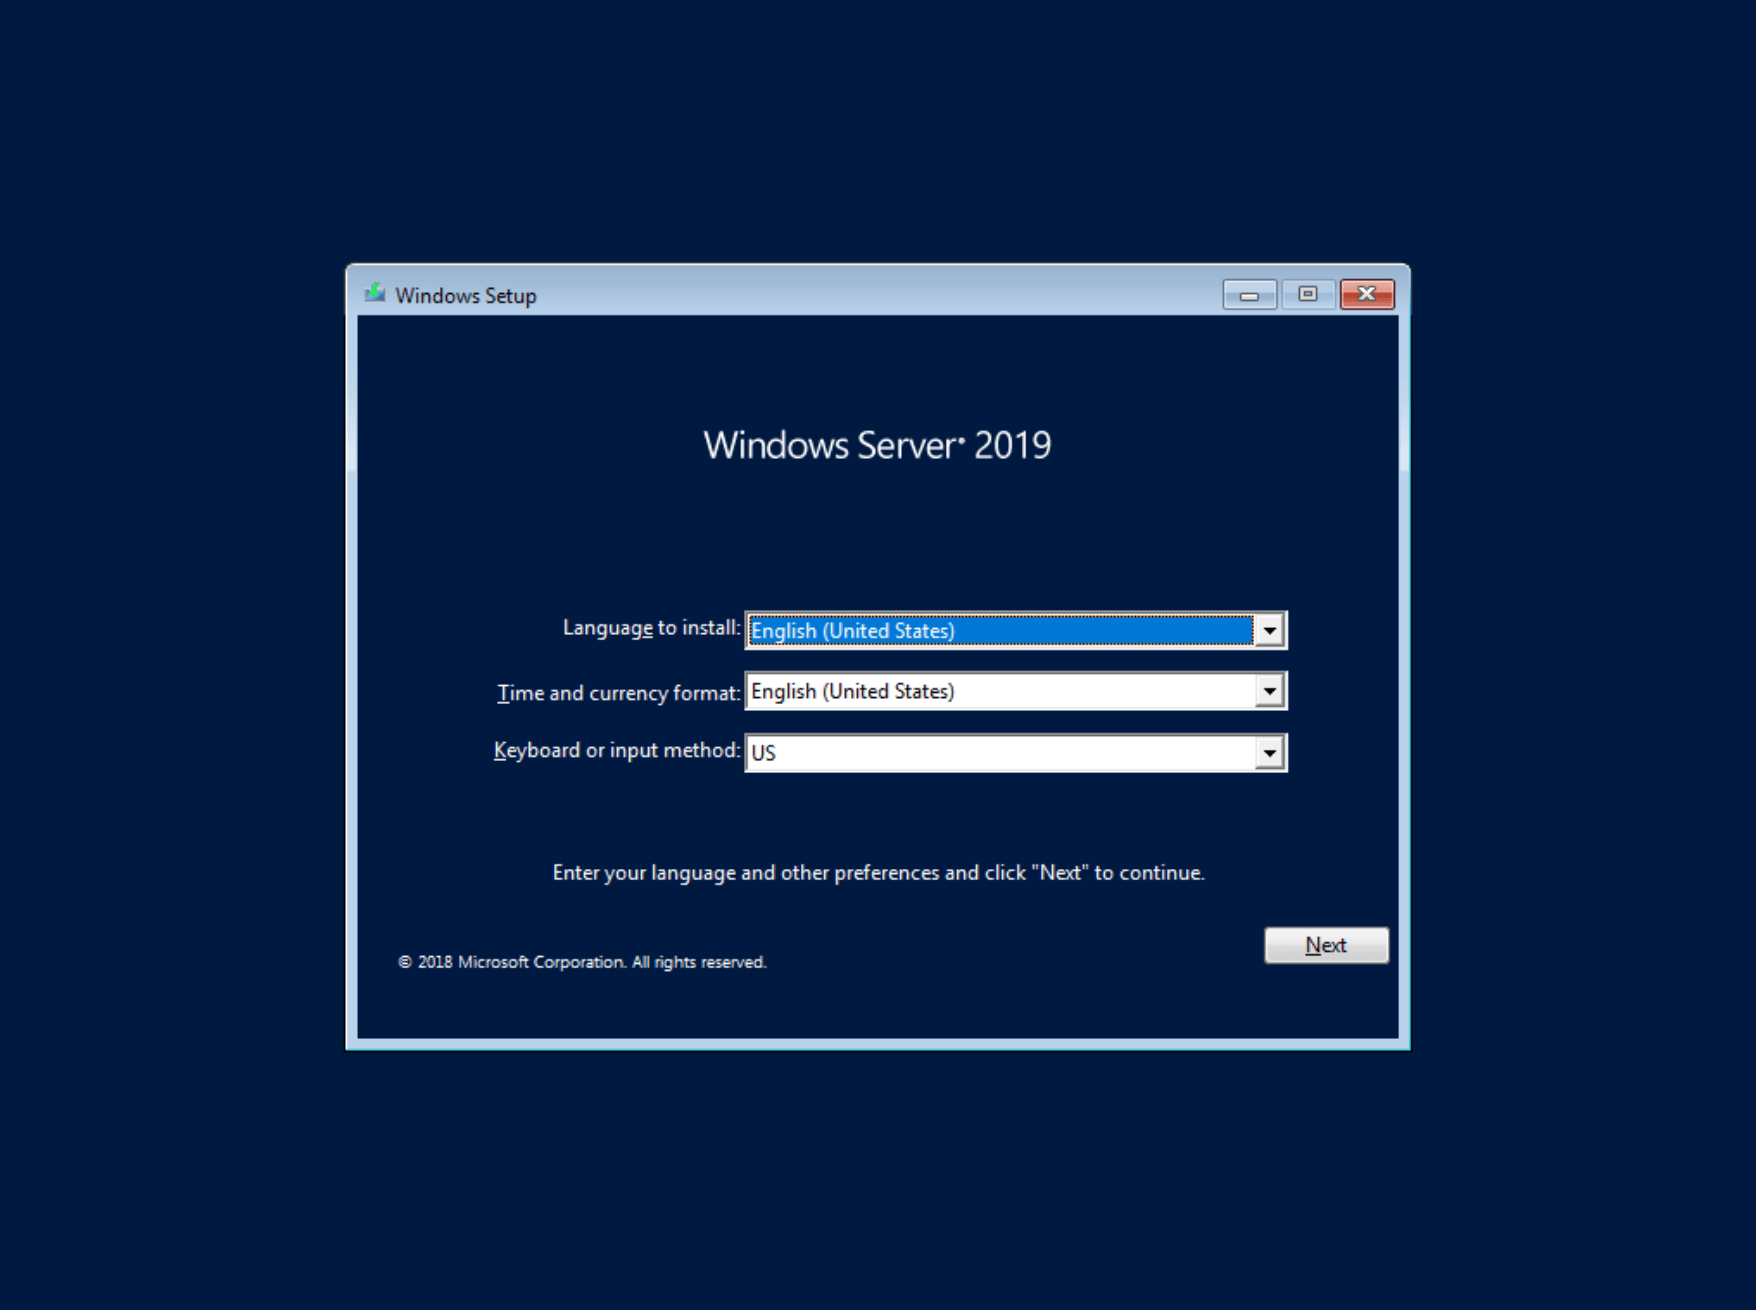
Choose your language and timezone
Click Install Now
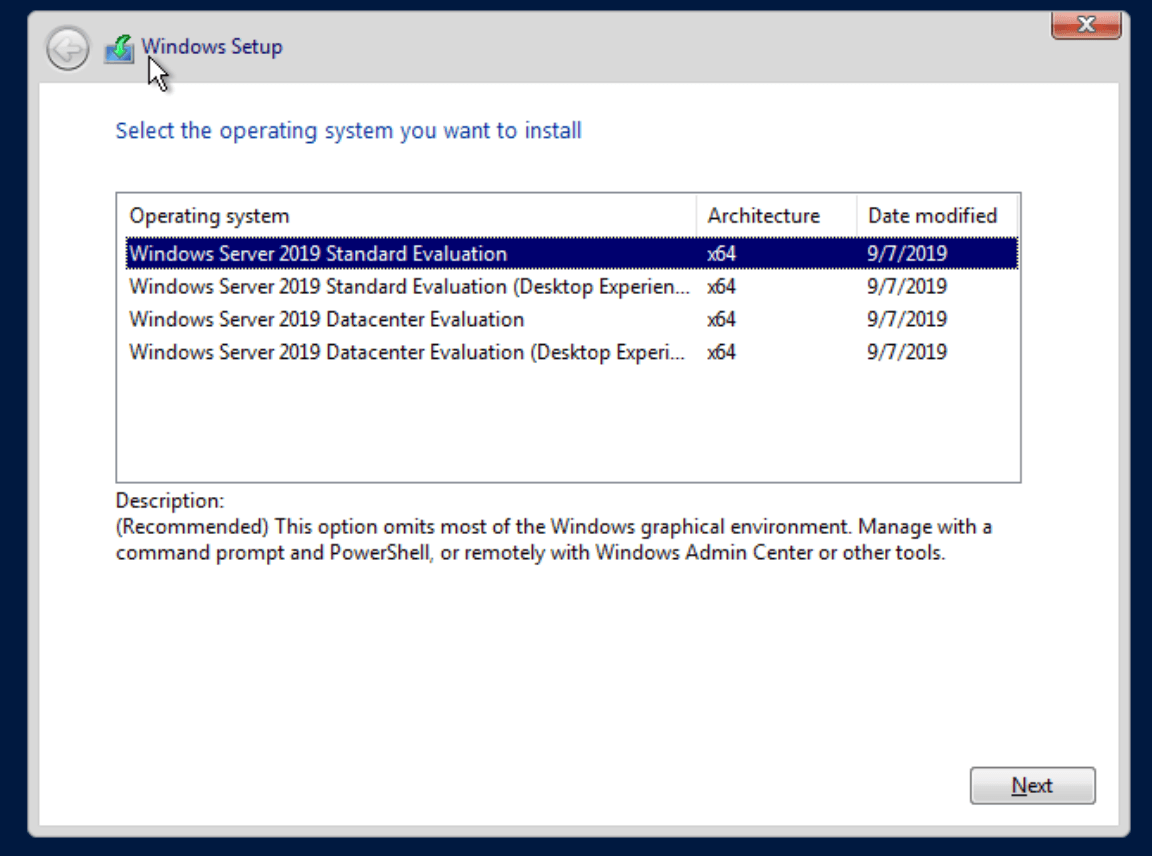
Choose which version (Desktop Experience = GUI)
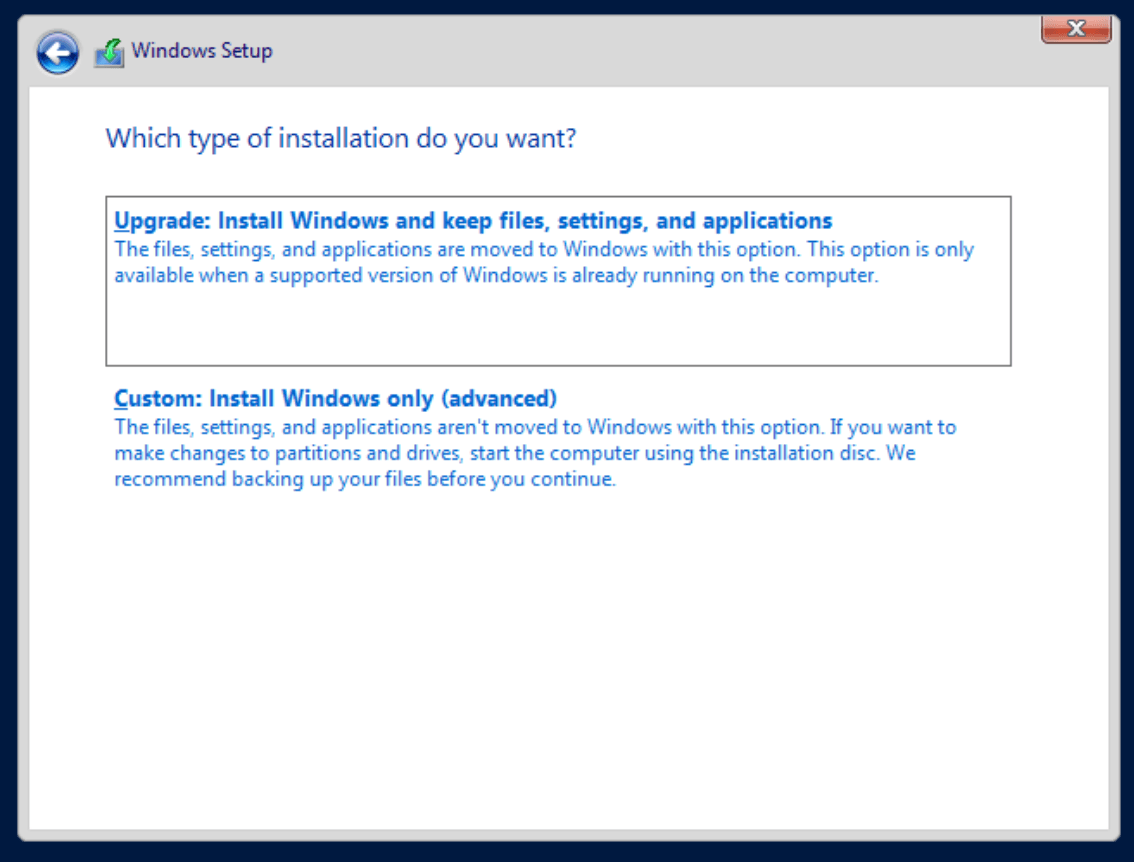
Choose Custom installation (because there is no existing installation to upgrade)
At this point, you will see that there is no hard disk to install to. This is because Windows does not include the VirtIO drivers by default: -
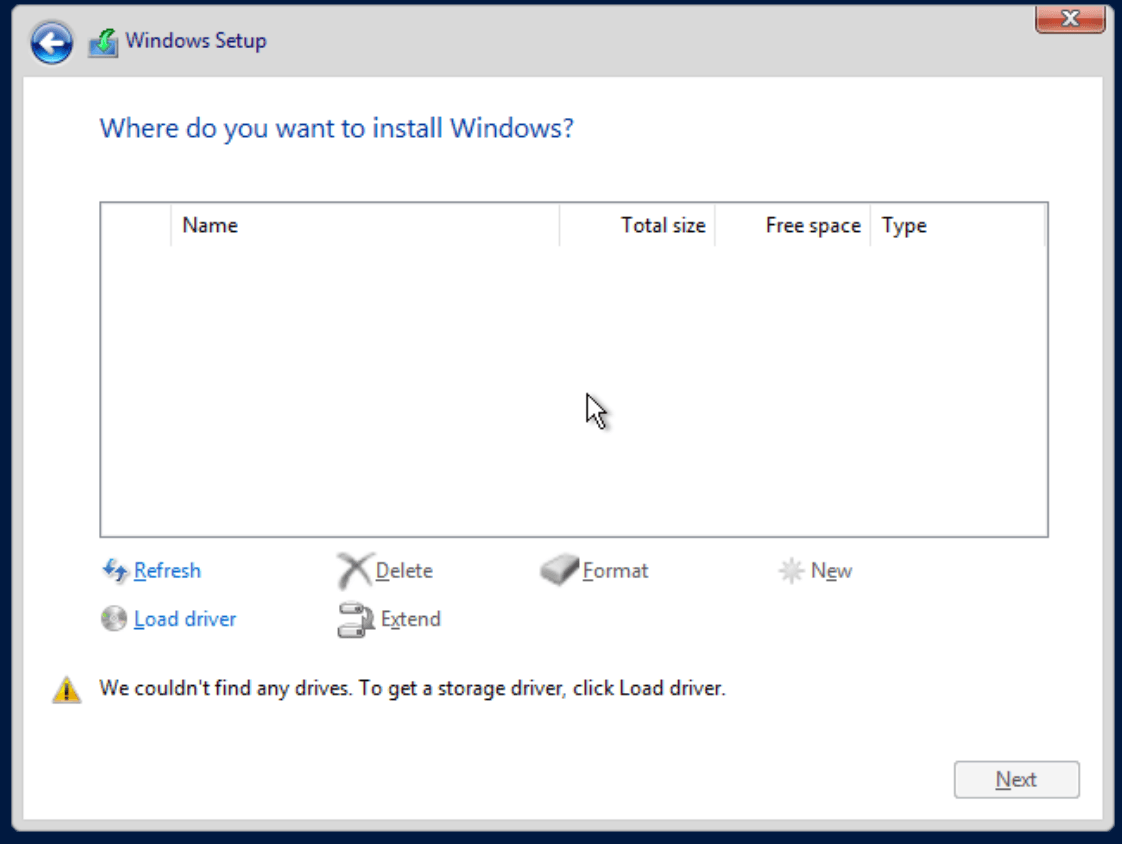
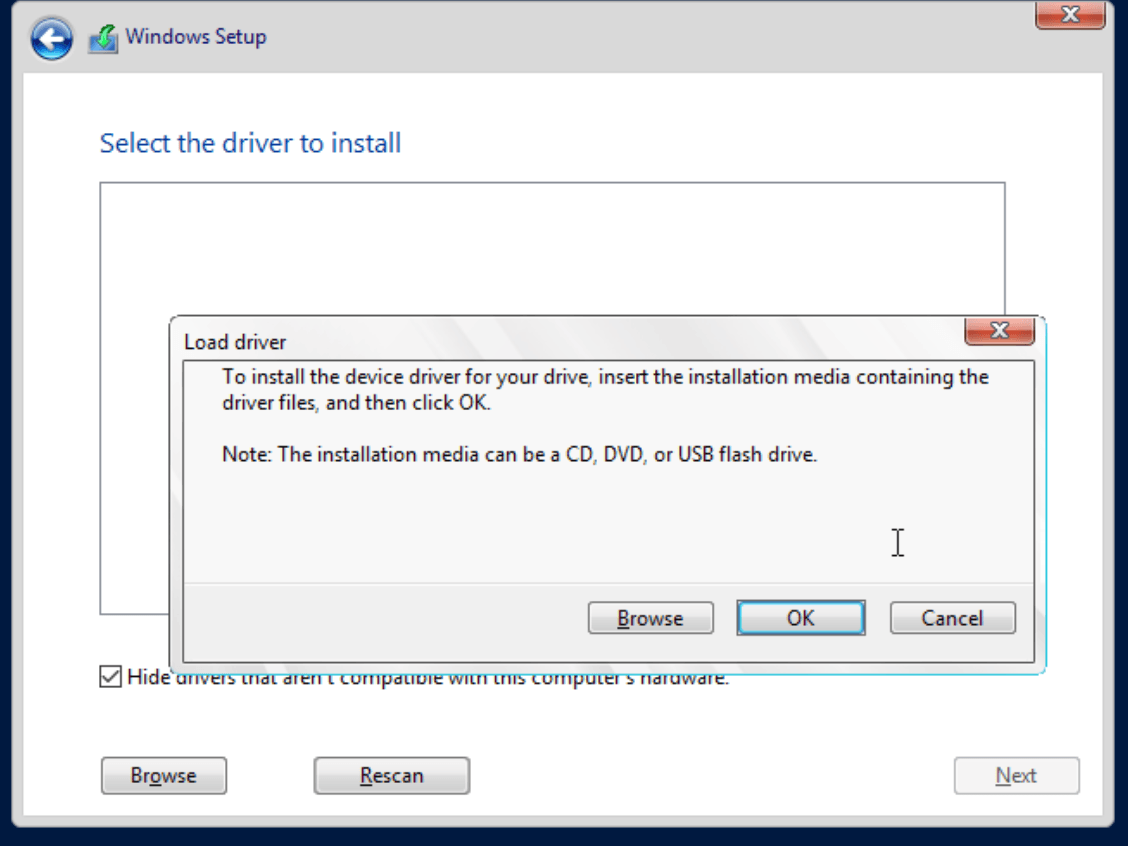
We can resolve this by clicking on Load Driver, which will give the option to browse for drivers: -
Navigate to the driver with the virtio-win-0.x.x ISO: -
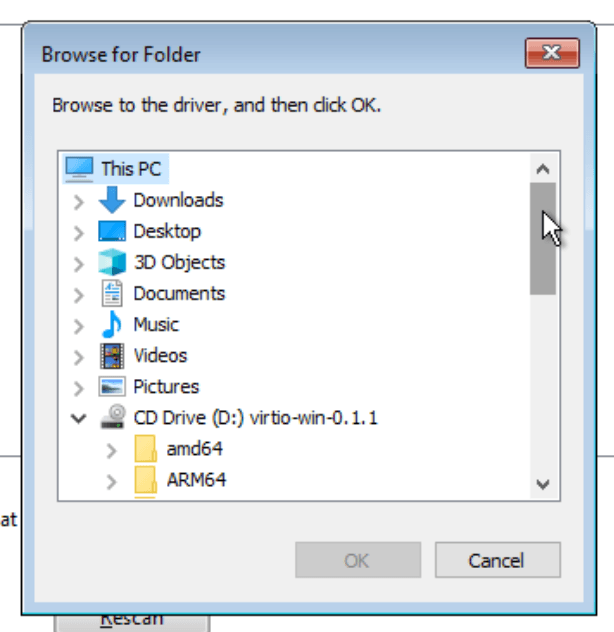
Scroll down to viostor: -

Select the driver and click on Next: -
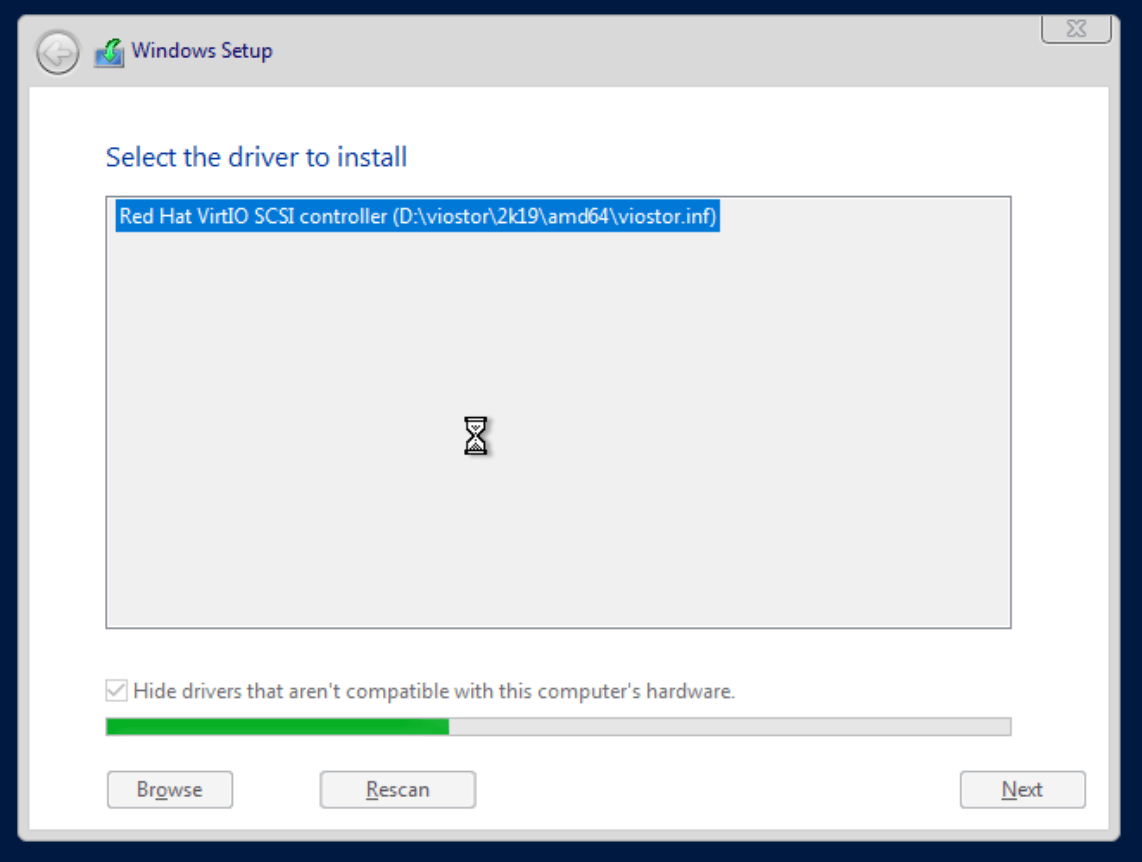
You should now see the disk to install to: -
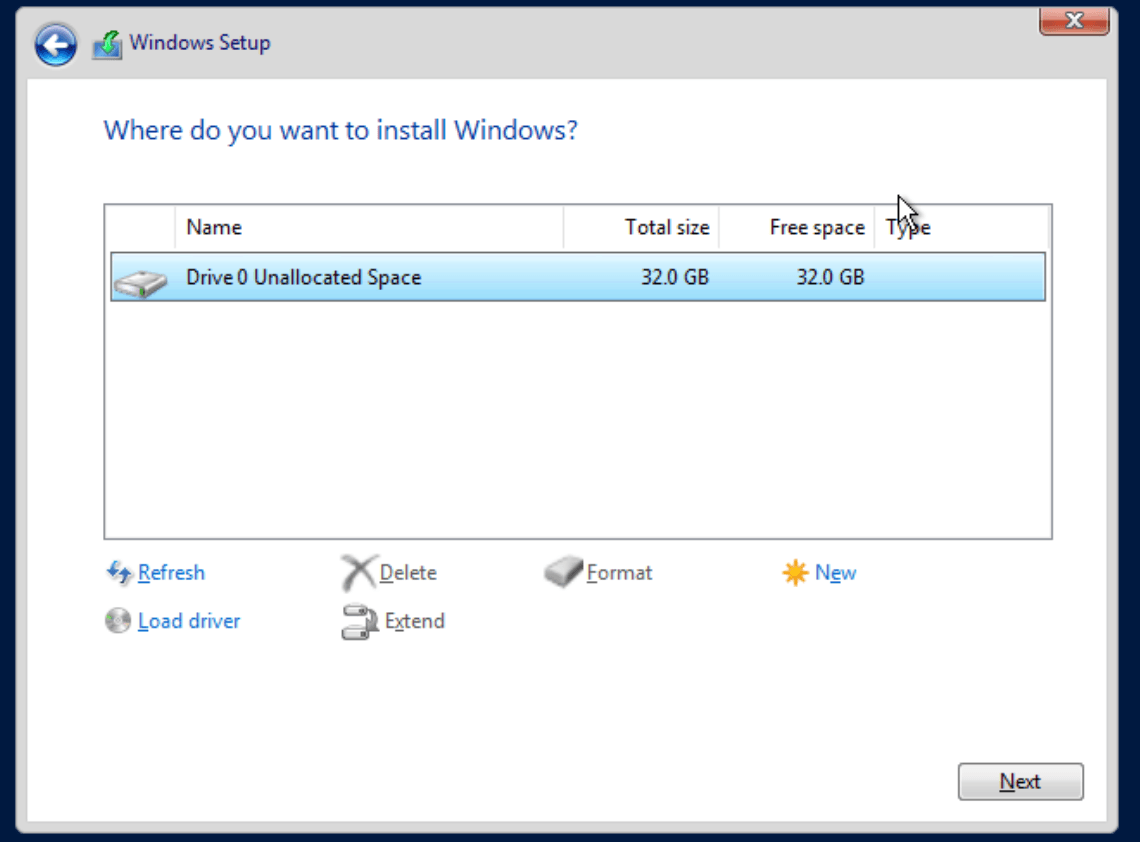
At this point, you can either click Next and finish the installation, or you can click Load Driver to add more VirtIO drivers. The main ones to install are: -
- Balloon - This allows for dynamic memory management, optimizing memory usage where appropriate
- NetKVM - This installs the network drivers for the VirtIO network card
- qxldod - If you require graphics drivers
- vioserial - This installs serial drivers, which we will need to use later for Cloudbase-Init (mainly for logging)
You can choose to install the drivers later, using either the GUI if you chose the desktop experience, or using pnputil if using Server Core.
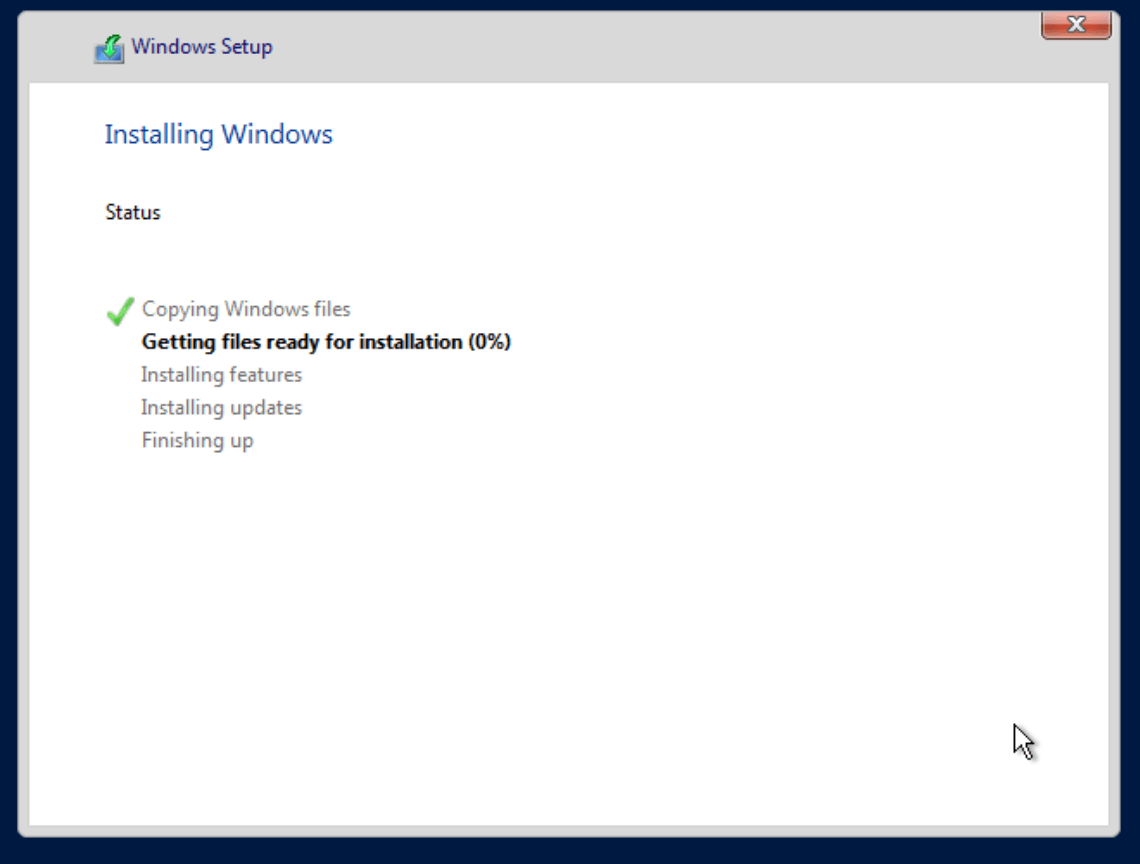
Once done, click Next to finish the installation: -
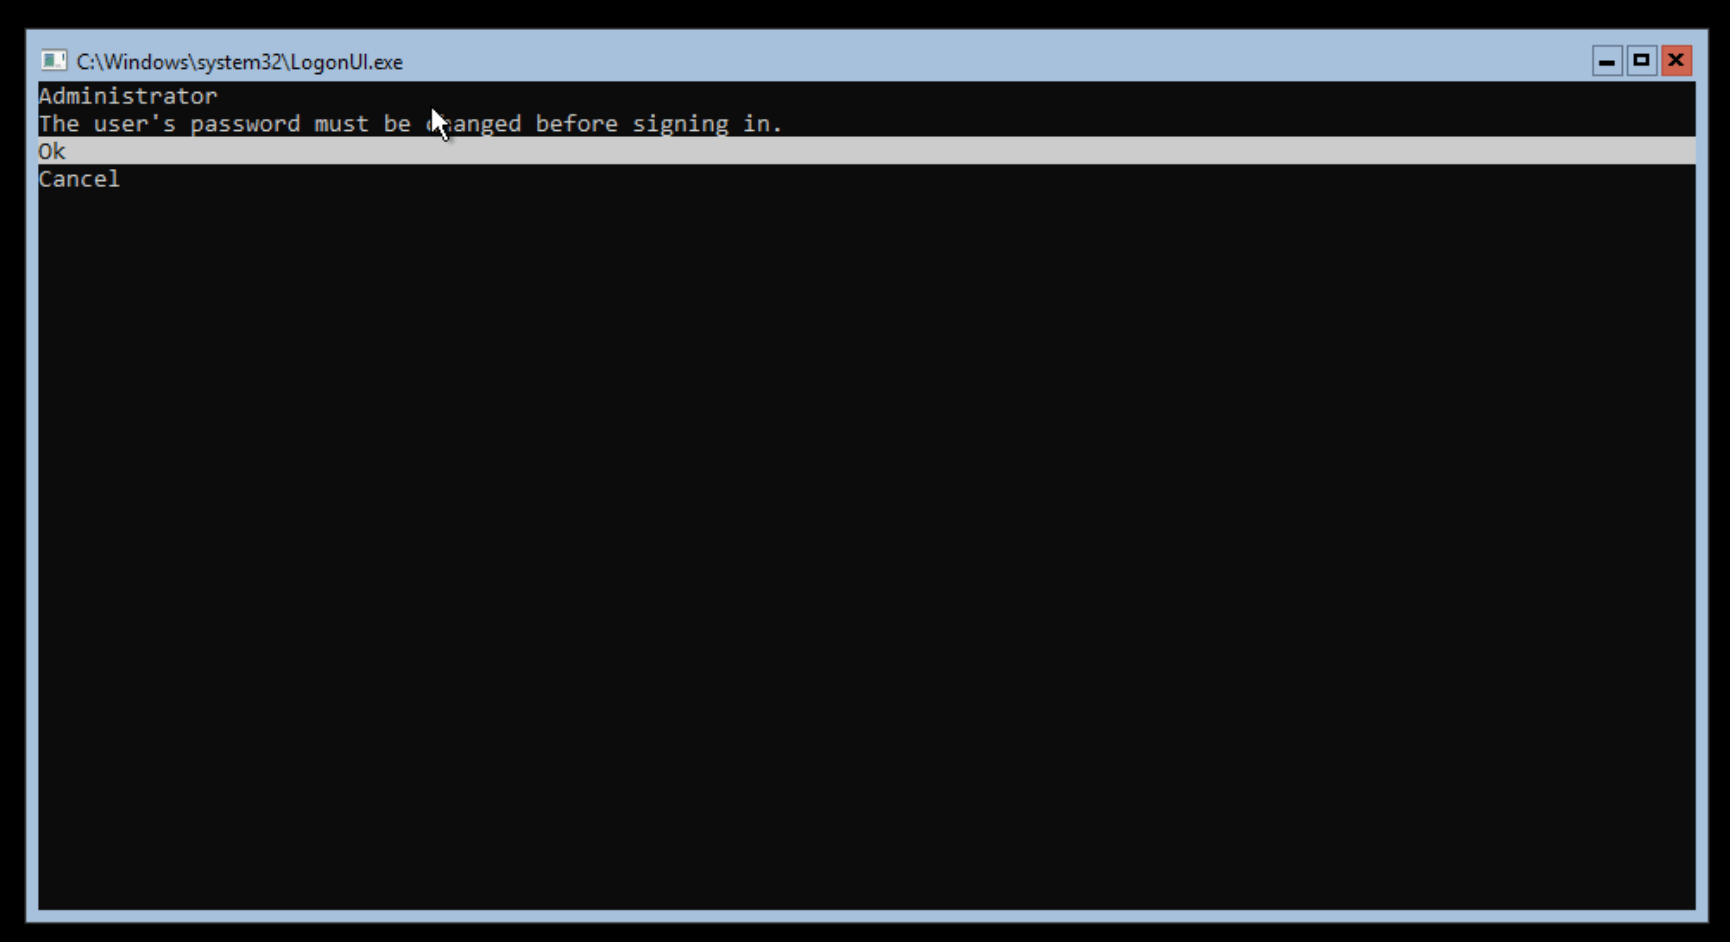
Once Windows is installed and restarted, you will be given the option to create a password for the Administrator user: -
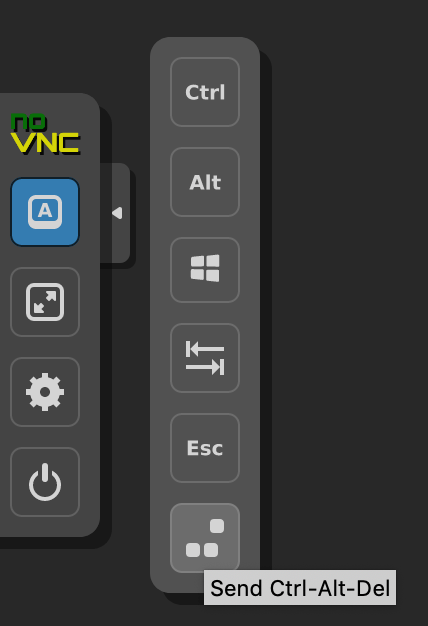
Unlock the instance (using Ctrl, Alt and Delete
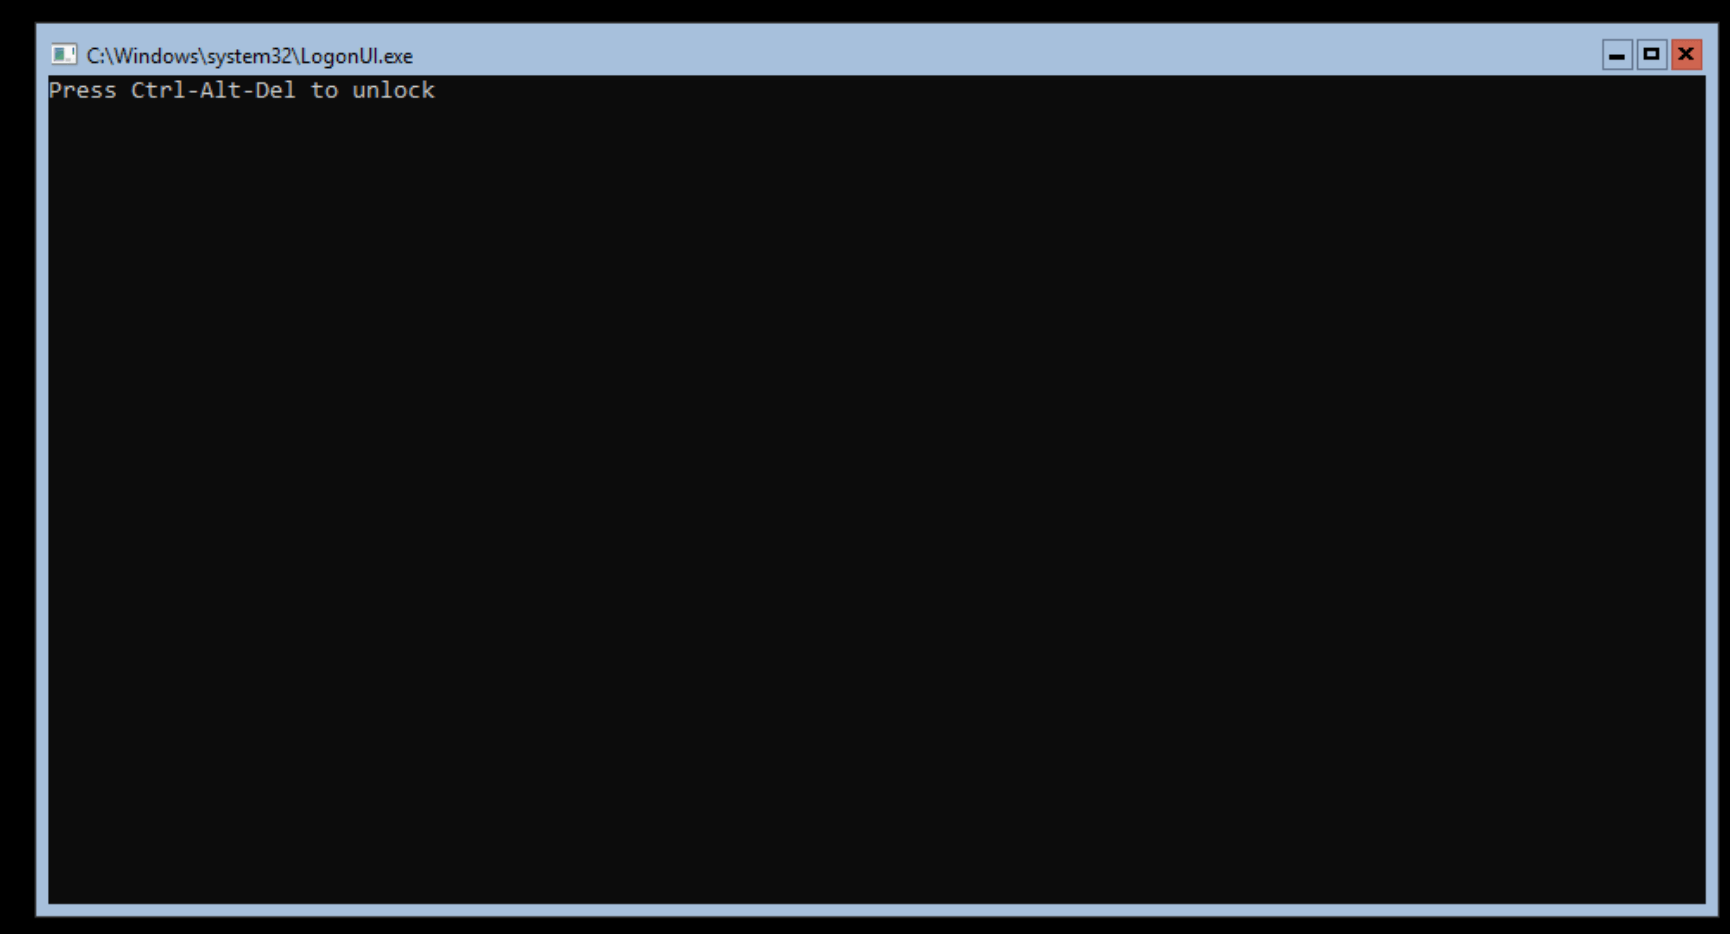
Proxmox Ctrl, Alt and Delete in NoVNC
Confirm changing of the password
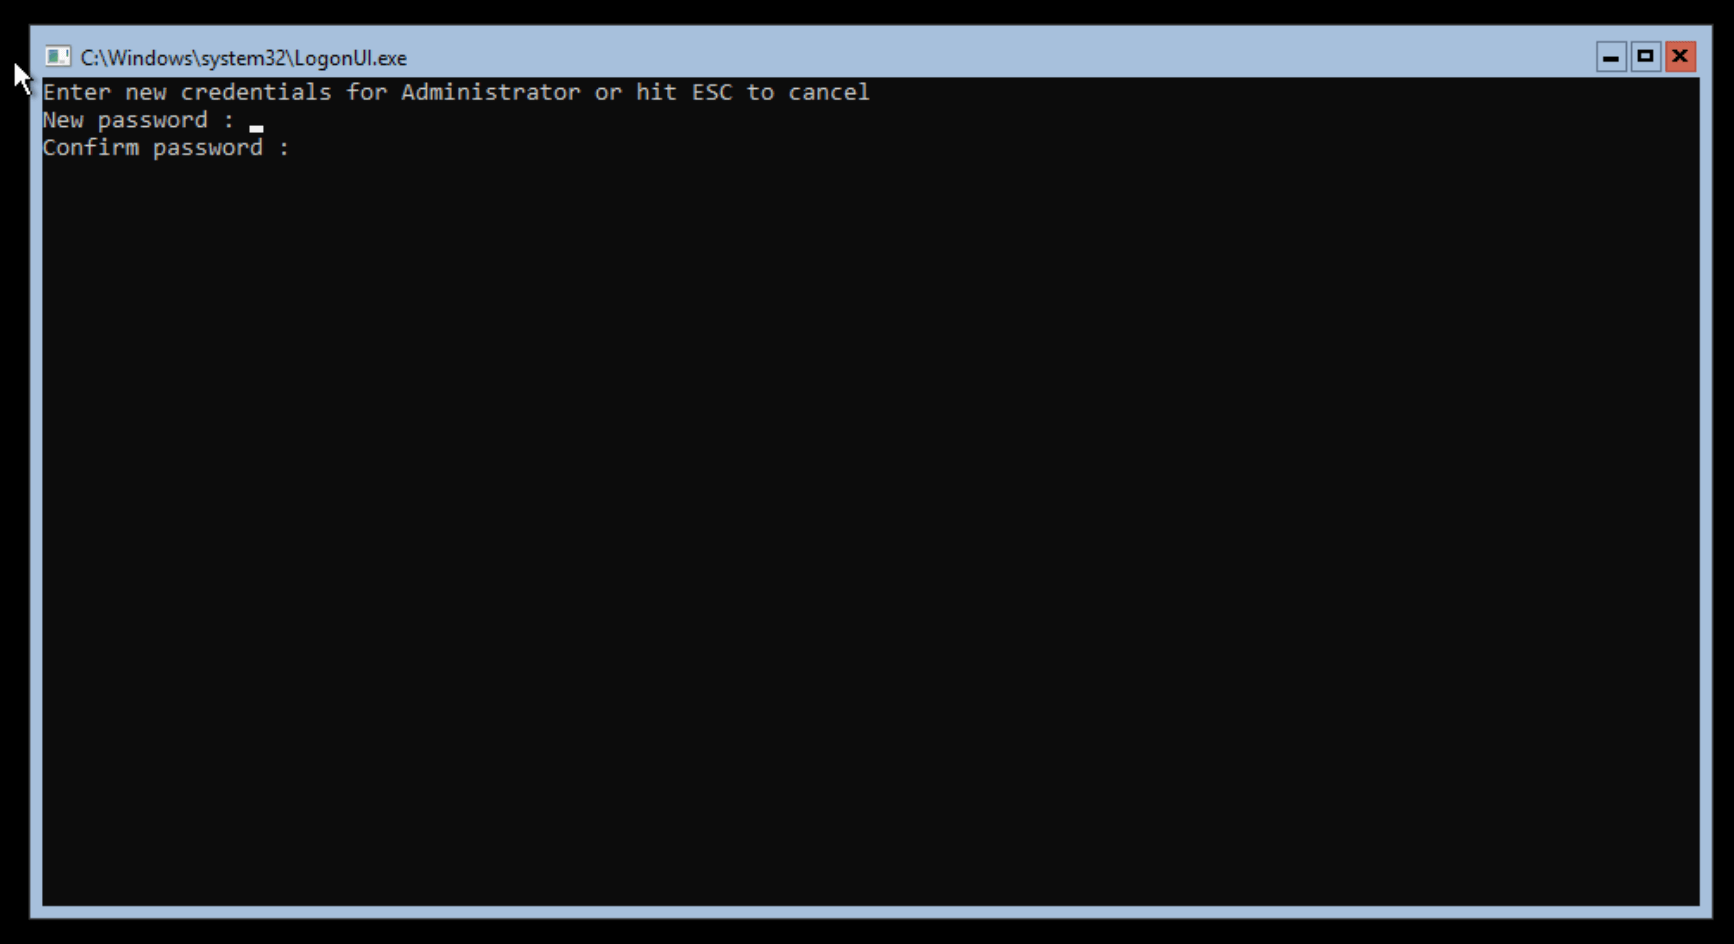
Change the password
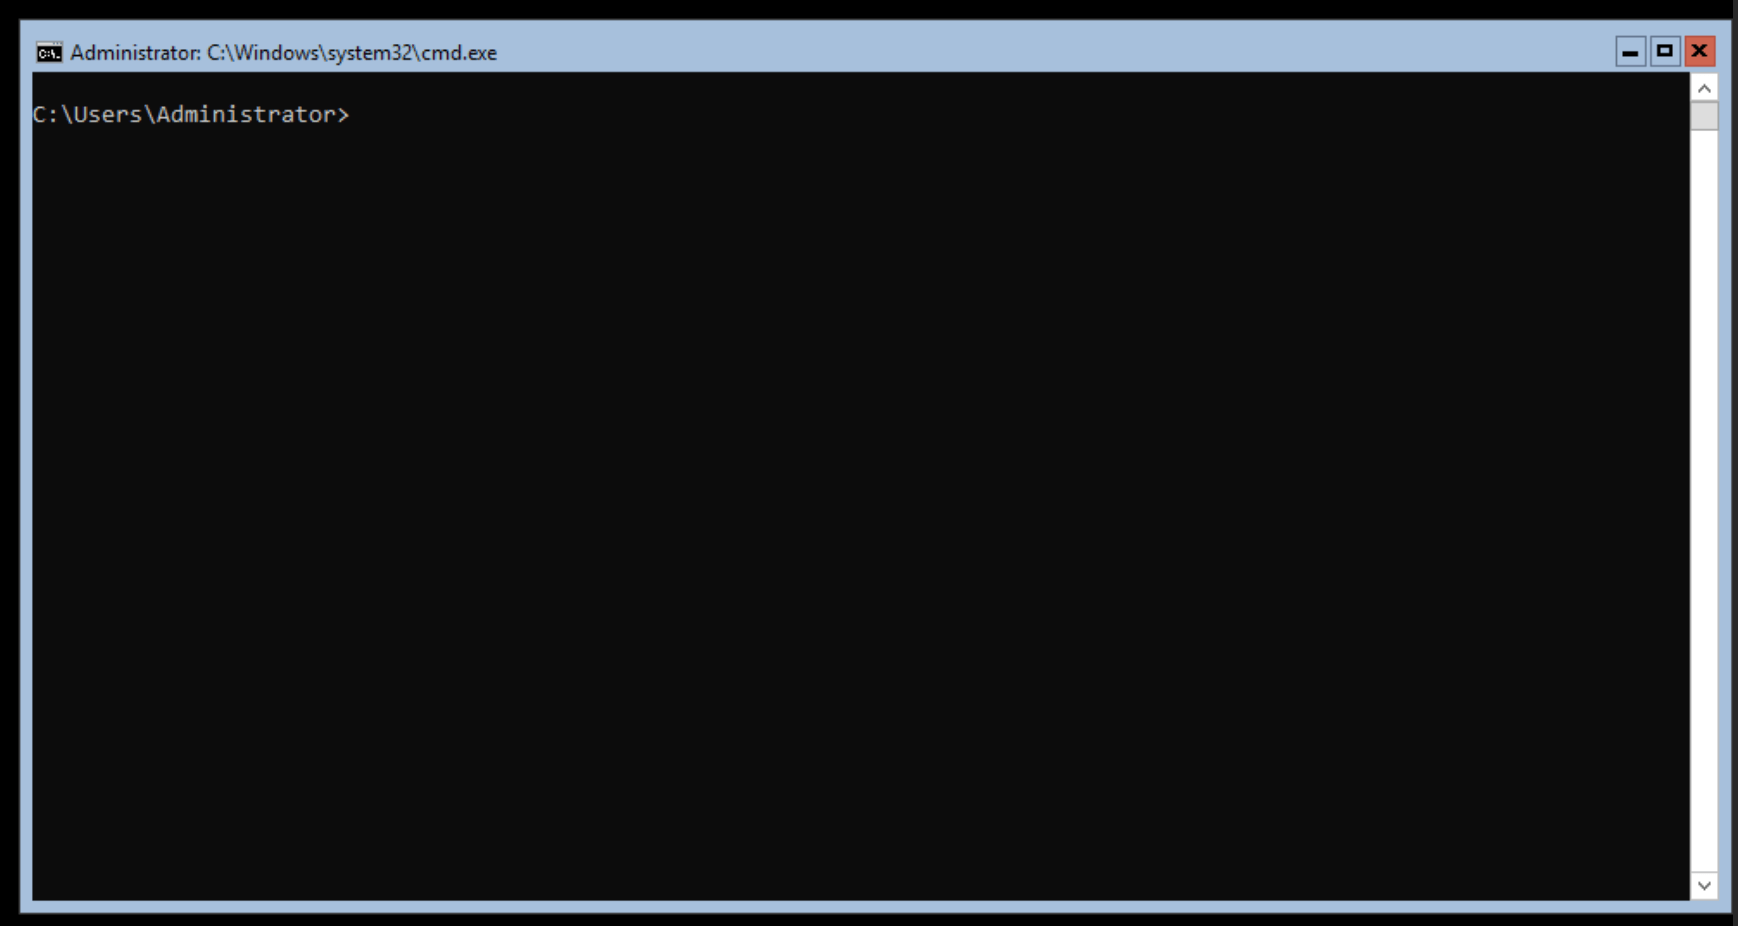
Logged in as the Administrator
At this point, we are now ready to customize the image.
Customization
To prepare the image, the minimum we require for Cloud-Init is the Cloudbase-Init utility. Before installing Cloudbase-Init I also do the following: -
- Install OpenSSH Server for remote management
- Install Salt
- Disable the firewall and enable RDP
The reason for disabling the firewall is that in the environments I work in, host-based firewalls are not used. Instead, they are managed either via network firewalls or via security groups (if used within a cloud provider). If you require the firewall to be enabled, then you will need to customize the firewall rules to match your environment.
Installing OpenSSH Server
To install the OpenSSH Server on Windows 2019, you can follow the steps in this post. We are then able to SSH into the machine: -
$ ssh [email protected]
[email protected]'s password:

Microsoft Windows [Version 10.0.17763.737]
(c) 2018 Microsoft Corporation. All rights reserved.

administrator@WIN2019-01 C:\Users\Administrator>
Install Salt
To install the Salt Minion, again you can follow the steps in this post. However, do not follow the steps for updating the minion configuration post-install. The minion configuration will be customized by Cloudbase-Init based upon the provided User Data.
Disable the firewall and enable RDP
While most tasks can be completed using Powershell in Windows Core, there is no inbuilt text editor. You can either install something like ViM or you can use RDP so that notepad.exe is available for file editing.
We also disable the firewall at this point, as otherwise we will need to add an RDP-specific rule to the firewall to allow us to access the machine.
# Disable the firewall
Set-NetFirewallProfile -Profile Domain,Public,Private -Enabled false

# Enable RDP
Set-ItemProperty -Path 'HKLM:\System\CurrentControlSet\Control\Terminal Server' -name "fDenyTSConnections" -value 0
You can also use the sconfig tool to enable RDP as well: -
PS C:\Users\Administrator> sconfig

Microsoft (R) Windows Script Host Version 5.812
Copyright (C) Microsoft Corporation. All rights reserved.

Inspecting system...


===============================================================================
                         Server Configuration
===============================================================================

1) Domain/Workgroup:                    Workgroup:  WORKGROUP
2) Computer Name:                       TEST
3) Add Local Administrator
4) Configure Remote Management          Enabled

5) Windows Update Settings:             DownloadOnly
6) Download and Install Updates
7) Remote Desktop:                      Disabled

8) Network Settings
9) Date and Time
10) Telemetry settings                  Unknown
11) Windows Activation

12) Log Off User
13) Restart Server
14) Shut Down Server
15) Exit to Command Line

Enter number to select an option: 7


(E)nable or (D)isable Remote Desktop? (Blank=Cancel) E

1) Allow only clients running Remote Desktop with Network Level Authentication (more secure)

2) Allow clients running any version of Remote Desktop (less secure)

Enter selection: 2

Enabling Remote Desktop...
Installing Cloudbase-Init
To install Cloudbase-Init, go to the Cloudbase-Init product page, scroll down to Downloads, and choose the version appropriate for your environment. I am running Windows 2019 on a 64-bit x86 processor, so I chose the Stable Cloudbase-init x64 version.
The following steps will download and then install Cloudbase-Init: -
# Download the file
PS C:\Users\Administrator> Invoke-WebRequest -uri https://cloudbase.it/downloads/CloudbaseInitSetup_Stable_x64.msi -outfile cloudbase-init.msi

# Install the MSI file non-interactively
PS C:\Users\Administrator> msiexec /i cloudbase-init.msi /qn /l*v log.txt
You can install Cloudbase-Init interactively and follow the on-screen instructions to customize the configuration. However we will need to change some options within the Cloudbase-Init configuration anyway, so there is little to benefit in using the GUI installer to configure the Cloudbase-Init service.
We can check that it is installed using: -
PS C:\Users\Administrator> Get-Service cloudbase-init

Status   Name               DisplayName
------   ----               -----------
Stopped  cloudbase-init     cloudbase-init
Configuring Cloudbase-Init
The default configuration files for Cloudbase-Init enable a number of different metadata services, most of which are not applicable to Proxmox.
We also need to enable the User-Data plugin otherwise Cloudbase-Init will not be able access any configuration we provide via Cloud-Init. The User Data can be in the form of Batch scripts (i.e. cmd.exe), Powershell, BASH (if it is installed natively under Windows), Python and cloud-config.
The following configuration files tell Cloudbase-Init to use the ConfigDrive2 format for user-data (the default format for a Windows guest on Proxmox), and enables the plugins required to make changes to the network, files and source changes from user-data: -
C:\Program Files\Cloudbase Solutions\cloudbase-init\conf\cloudbase-init.conf
[DEFAULT]
username=Admin
groups=Administrators
inject_user_password=true
config_drive_raw_hhd=true
config_drive_cdrom=true
config_drive_vfat=true
bsdtar_path=C:\Program Files\Cloudbase Solutions\Cloudbase-Init\bin\bsdtar.exe
mtools_path=C:\Program Files\Cloudbase Solutions\Cloudbase-Init\bin\
verbose=true
debug=true
logdir=C:\Program Files\Cloudbase Solutions\Cloudbase-Init\log\
logfile=cloudbase-init.log
default_log_levels=comtypes=INFO,suds=INFO,iso8601=WARN,requests=WARN
logging_serial_port_settings=COM1,115200,N,8
mtu_use_dhcp_config=true
ntp_use_dhcp_config=true
local_scripts_path=C:\Program Files\Cloudbase Solutions\Cloudbase-Init\LocalScripts\
check_latest_version=true
metadata_services=cloudbaseinit.metadata.services.configdrive.ConfigDriveService
plugins=cloudbaseinit.plugins.common.networkconfig.NetworkConfigPlugin,
    cloudbaseinit.plugins.common.setuserpassword.SetUserPasswordPlugin,
    cloudbaseinit.plugins.common.userdata.UserDataPlugin,
    cloudbaseinit.plugins.common.sethostname.SetHostNamePlugin,
    cloudbaseinit.plugins.common.mtu.MTUPlugin,
    cloudbaseinit.plugins.windows.extendvolumes.ExtendVolumesPlugin
C:\Program Files\Cloudbase Solutions\cloudbase-init\conf\cloudbase-init-unattend.conf
[DEFAULT]
username=Admin
groups=Administrators
inject_user_password=true
config_drive_raw_hhd=true
config_drive_cdrom=true
config_drive_vfat=true
bsdtar_path=C:\Program Files\Cloudbase Solutions\Cloudbase-Init\bin\bsdtar.exe
mtools_path=C:\Program Files\Cloudbase Solutions\Cloudbase-Init\bin\
verbose=true
debug=true
logdir=C:\Program Files\Cloudbase Solutions\Cloudbase-Init\log\
logfile=cloudbase-init-unattend.log
default_log_levels=comtypes=INFO,suds=INFO,iso8601=WARN,requests=WARN
logging_serial_port_settings=COM1,115200,N,8
mtu_use_dhcp_config=true
ntp_use_dhcp_config=true
local_scripts_path=C:\Program Files\Cloudbase Solutions\Cloudbase-Init\LocalScripts\
check_latest_version=false
metadata_services=cloudbaseinit.metadata.services.configdrive.ConfigDriveService
plugins=cloudbaseinit.plugins.common.mtu.MTUPlugin,
    cloudbaseinit.plugins.common.sethostname.SetHostNamePlugin,
    cloudbaseinit.plugins.windows.extendvolumes.ExtendVolumesPlugin,
    cloudbaseinit.plugins.common.networkconfig.NetworkConfigPlugin,
    cloudbaseinit.plugins.common.userdata.UserDataPlugin
allow_reboot=false
stop_service_on_exit=false
You can either edit these files in notepad, or you can use SCP (as we enabled SSH already) to transfer the files from another machine.
We also set all Cloudbase-Init logs to be exposed on the Serial port, allowing us to see the changes being made by Cloudbase-Init (as well as any errors/warnings) separately from the boot and login process itself on screen/VNC.
After this is done, you can then run sysprep, which “generalizes” a Windows image. This removes install-specific information (e.g. passwords, unique IDs etc) in preparation for the image to be reused/cloned. The Cloudbase-Init installation also includes an Unattend answer file. This is similar to a Kickstart or PXE script in the Linux world, providing answers to questions usually presented to users during initial setup.
The included Unattend file looks like the below: -
<?xml version="1.0" encoding="utf-8"?>
<unattend xmlns="urn:schemas-microsoft-com:unattend">
<settings pass="generalize">
<component name="Microsoft-Windows-PnpSysprep" processorArchitecture="amd64" publicKeyToken="31bf3856ad364e35" language="neutral" versionScope="nonSxS" xm
lns:wcm="http://schemas.microsoft.com/WMIConfig/2002/State" xmlns:xsi="http://www.w3.org/2001/XMLSchema-instance">
<PersistAllDeviceInstalls>true</PersistAllDeviceInstalls>
</component>
</settings>
<settings pass="oobeSystem">
<component name="Microsoft-Windows-Shell-Setup" processorArchitecture="amd64" publicKeyToken="31bf3856ad364e35" language="neutral" versionScope="nonSxS" x
mlns:wcm="http://schemas.microsoft.com/WMIConfig/2002/State">
<OOBE>
<HideEULAPage>true</HideEULAPage>
<NetworkLocation>Work</NetworkLocation>
<ProtectYourPC>1</ProtectYourPC>
<SkipMachineOOBE>true</SkipMachineOOBE>
<SkipUserOOBE>true</SkipUserOOBE>
</OOBE>
</component>
</settings>
<settings pass="specialize">
<component name="Microsoft-Windows-Deployment" processorArchitecture="amd64" publicKeyToken="31bf3856ad364e35" language="neutral" versionScope="nonSxS" xm
lns:wcm="http://schemas.microsoft.com/WMIConfig/2002/State" xmlns:xsi="http://www.w3.org/2001/XMLSchema-instance">
<RunSynchronous>
<RunSynchronousCommand wcm:action="add">
<Order>1</Order>
<Path>cmd.exe /c ""C:\Program Files\Cloudbase Solutions\Cloudbase-Init\Python\Scripts\cloudbase-init.exe" --config-file "C:\Program Files\Cloudbase
Solutions\Cloudbase-Init\conf\cloudbase-init-unattend.conf" && exit 1 || exit 2"</Path>
<Description>Run Cloudbase-Init to set the hostname</Description>
<WillReboot>OnRequest</WillReboot>
</RunSynchronousCommand>
</RunSynchronous>
</component>
</settings>
</unattend>
To start the sysprep process using this Unattend file, run: -
# Go to the Cloudbase-Init directory
PS C:\> cd 'C:\Program Files\Cloudbase Solutions\Cloudbase-Init\conf'

# Run sysprep using the unattend.xml
PS C:\Program Files\Cloudbase Solutions\Cloudbase-Init\conf> c:\Windows\System32\Sysprep\sysprep.exe /generalize /oobe  /unattend:Unattend.xml
This will prepare the instance and tell the system to run cloudbase-init.exe on boot.
Creating a template
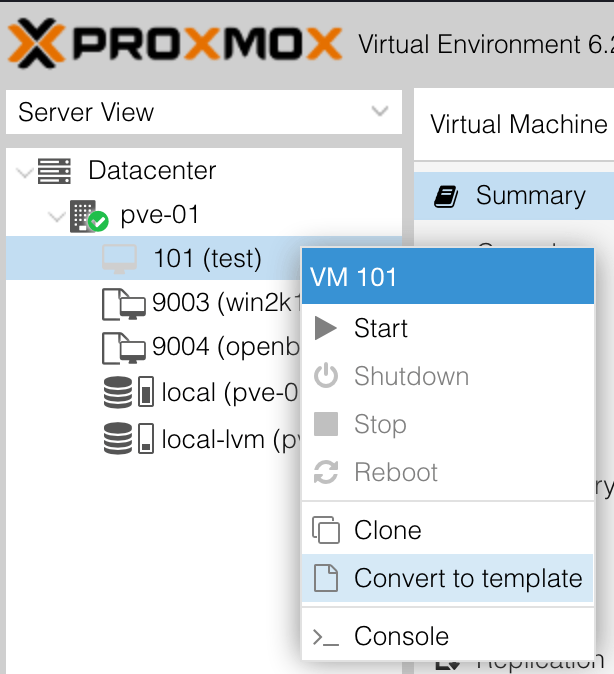
There are two ways to convert the machine into a template in Proxmox. The first is to right click on the created machine, and select Convert to template: -
The other is to find the ID of the machine in the Proxmox CLI, and then do the following: -
# Retrieve the ID
root@pve-01:~# qm list
      VMID NAME                 STATUS     MEM(MB)    BOOTDISK(GB) PID
      9003 win2k19-cloudinit    stopped    2048              32.00 0

# Convert to a template
root@pve-01:~# qm template 9003
We can now use this template when defining an instance within Terraform
Terraform
Create the Cloud-Init template
The first step to building an instance using Terraform is to prepare the Cloud-Init template.
There are some caveats to be aware of before we start: -
- Currently not all
cloud-configmodules are supported in Cloudbase-Init - The format that Proxmox provides some of the Cloud-Init data is not 100% compatible with Cloudbase-Init
In regards to the first, Cloudbase-Init supports the following cloud-config modules (at the time of writing): -
write_files- Creating files (e.g. configuration files)set_timezoneset_hostnamegroups- Creating local groups on the machine, as well as assigning existing users to themusers- Creating local usersntp- Setting NTP serversruncmd- Running a set of arbitrary commands, executed withcmd.exe(not Powershell)
In regards to the latter, there is an issue with how Proxmox provides the DNS Nameservers. Proxmox provides dns_nameservers as the option, whereas Cloudbase-Init expects dns-nameservers (associated GitHub Issue). This issue, combined with Cloudbase-Init not supporting cloud-config network module (to customize our network configuration) means that we must rely on DHCP.
In most cloud environments, IP addressing normally ephemeral (i.e. not persistent). If you treat the instance in this manner, then DHCP provides the same sort of functionality. However if you are expecting to be able to use static addressed instances, then you may need to look at other methods than cloud-config.
The basic template we are going to use looks like the below: -
Content-Type: multipart/mixed; boundary="===============1598784645116016685=="
MIME-Version: 1.0

--===============1598784645116016685==
Content-Type: text/cloud-config; charset="us-ascii"
MIME-Version: 1.0
Content-Transfer-Encoding: 7bit
Content-Disposition: attachment; filename="cloud-config"


write_files:
  - path: c:\salt\conf\minion
    content: |
       master: salt-master.${domain}
       id: ${hostname}.${domain}
       nodename: ${hostname}
       startup_states: highstate

--===============1598784645116016685==
Content-Type: text/x-cfninitdata; charset="us-ascii"
MIME-Version: 1.0
Content-Transfer-Encoding: 7bit
Content-Disposition: attachment; filename="cfn-userdata"

#ps1

Restart-Service salt-minion
We use a feature called multi-part content to leverage both cloud-config and Powershell to configure the instance. You could extend this to use more complex Powershell scripts, setting the timezone, creating users and more. In our file, we update the Salt Minion configuration (using the write_files module in cloud-config), and then restart the salt-minion service (using Powershell).
Define the instance
The instance is defined similarly to the instances in the previous post: -
# Source the Cloud Init Config file
data "template_file" "cloud_init_win2k19_vm-01" {
  template  = "${file("${path.module}/files/cloud_init_win2k19.cloud_config")}"

  vars = {
    hostname = "win2k19-vm-01"
    domain = "yetiops.lab"
  }
}

# Create a local copy of the file, to transfer to Proxmox
resource "local_file" "cloud_init_win2k19_vm-01" {
  content   = data.template_file.cloud_init_win2k19_vm-01.rendered
  filename  = "${path.module}/files/user_data_cloud_init_win2k19_vm-01.cfg"
}

# Transfer the file to the Proxmox Host
resource "null_resource" "cloud_init_win2k19_vm-01" {
  connection {
    type    = "ssh"
    user    = "root"
    private_key = file("~/.ssh/id_rsa")
    host    = "pve-01.yetiops.lab"
  }

  provisioner "file" {
    source       = local_file.cloud_init_win2k19_vm-01.filename
    destination  = "/var/lib/vz/snippets/cloud_init_win2k19_vm-01.yml"
  }
}


# Create the VM
resource "proxmox_vm_qemu" "win2k19-vm" {
  ## Wait for the cloud-config file to exist

    depends_on = [
    null_resource.cloud_init_win2k19_vm-01
  ]

  name = "win2k19-vm-01"
  target_node = "pve-01"

  # Clone from debian-cloudinit template
  clone = "win2k19-cloudinit"
  #os_type = "cloud-init"

  # Cloud init options
  cicustom = "user=local:snippets/cloud_init_win2k19_vm-01.yml"
  ipconfig0 = "ip=dhcp"

  memory       = 2048
  agent        = 1

  # Set the boot disk paramters
  bootdisk = "scsi0"
  scsihw       = "virtio-scsi-pci"

  disk {
    id              = 0
    size            = 20
    type            = "scsi"
    storage         = "local-lvm"
    storage_type    = "lvm"
    iothread        = true
  }

  # Set the network
  network {
    id = 0
    model = "virtio"
    bridge = "vmbr0"
  }

  # Ignore changes to the network
  ## MAC address is generated on every apply, causing
  ## TF to think this needs to be rebuilt on every apply
  lifecycle {
     ignore_changes = [
       network
     ]
  }
}
One notable difference is that we set the ipconfig0 = "ip=dhcp" option. Without this, the Terraform provider will crash. We should be able to provide a static IP here, but as noted previously, the format Cloudbase-Init provides DNS nameservers in is not compatible with Cloudbase-Init, meaning that we would not be able to access any hostname-based service (e.g. our Salt server, or downloading dependencies).
Other than this, we should now be able to build a Windows instance.
Build the instance
Now that we have defined the instance within Terraform, we can go ahead and build it: -
$ terraform apply
data.template_file.cloud_init_win2k19_vm-01: Refreshing state...

An execution plan has been generated and is shown below.
Resource actions are indicated with the following symbols:
  + create

Terraform will perform the following actions:

  # local_file.cloud_init_win2k19_vm-01 will be created
  + resource "local_file" "cloud_init_win2k19_vm-01" {
      + content              = <<~EOT
            Content-Type: multipart/mixed; boundary="===============1598784645116016685=="
            MIME-Version: 1.0

            --===============1598784645116016685==
            Content-Type: text/cloud-config; charset="us-ascii"
            MIME-Version: 1.0
            Content-Transfer-Encoding: 7bit
            Content-Disposition: attachment; filename="cloud-config"


            write_files:
              - path: c:\salt\conf\minion
                content: |
                   master: salt-master.yetiops.lab
                   id: win2k19-vm-01.yetiops.lab
                   nodename: win2k19-vm-01
                   startup_states: highstate

            --===============1598784645116016685==
            Content-Type: text/x-cfninitdata; charset="us-ascii"
            MIME-Version: 1.0
            Content-Transfer-Encoding: 7bit
            Content-Disposition: attachment; filename="cfn-userdata"

            #ps1

            Restart-Service salt-minion
        EOT
      + directory_permission = "0777"
      + file_permission      = "0777"
      + filename             = "./files/user_data_cloud_init_win2k19_vm-01.cfg"
      + id                   = (known after apply)
    }

  # null_resource.cloud_init_win2k19_vm-01 will be created
  + resource "null_resource" "cloud_init_win2k19_vm-01" {
      + id = (known after apply)
    }

  # proxmox_vm_qemu.win2k19-vm will be created
  + resource "proxmox_vm_qemu" "win2k19-vm" {
      + agent        = 1
      + balloon      = 0
      + bios         = "seabios"
      + boot         = "cdn"
      + bootdisk     = "scsi0"
      + cicustom     = "user=local:snippets/cloud_init_win2k19_vm-01.yml"
      + clone        = "win2k19-cloudinit"
      + clone_wait   = 15
      + cores        = 1
      + cpu          = "host"
      + force_create = false
      + full_clone   = true
      + hotplug      = "network,disk,usb"
      + id           = (known after apply)
      + ipconfig0    = "ip=dhcp"
      + kvm          = true
      + memory       = 2048
      + name         = "win2k19-vm-01"
      + numa         = false
      + onboot       = true
      + preprovision = true
      + scsihw       = "virtio-scsi-pci"
      + sockets      = 1
      + ssh_host     = (known after apply)
      + ssh_port     = (known after apply)
      + target_node  = "pve-01"
      + vcpus        = 0
      + vlan         = -1
      + vmid         = 0

      + disk {
          + backup       = false
          + cache        = "none"
          + format       = "raw"
          + id           = 0
          + iothread     = true
          + mbps         = 0
          + mbps_rd      = 0
          + mbps_rd_max  = 0
          + mbps_wr      = 0
          + mbps_wr_max  = 0
          + replicate    = false
          + size         = "20"
          + storage      = "local-lvm"
          + storage_type = "lvm"
          + type         = "scsi"
        }

      + network {
          + bridge    = "vmbr0"
          + firewall  = false
          + id        = 0
          + link_down = false
          + macaddr   = (known after apply)
          + model     = "virtio"
          + queues    = -1
          + rate      = -1
          + tag       = -1
        }
    }

Plan: 3 to add, 0 to change, 0 to destroy.

Do you want to perform these actions?
  Terraform will perform the actions described above.
  Only 'yes' will be accepted to approve.

  Enter a value: yes

local_file.cloud_init_win2k19_vm-01: Creating...
local_file.cloud_init_win2k19_vm-01: Creation complete after 0s [id=66f7140731ba60729758ed365fed0ba7a10f3766]
null_resource.cloud_init_win2k19_vm-01: Creating...
null_resource.cloud_init_win2k19_vm-01: Provisioning with 'file'...
null_resource.cloud_init_win2k19_vm-01: Creation complete after 0s [id=219014806438120636]
proxmox_vm_qemu.win2k19-vm: Creating...
proxmox_vm_qemu.win2k19-vm: Still creating... [10s elapsed]
proxmox_vm_qemu.win2k19-vm: Still creating... [20s elapsed]
proxmox_vm_qemu.win2k19-vm: Still creating... [30s elapsed]
proxmox_vm_qemu.win2k19-vm: Still creating... [40s elapsed]
proxmox_vm_qemu.win2k19-vm: Still creating... [50s elapsed]
proxmox_vm_qemu.win2k19-vm: Still creating... [1m0s elapsed]
proxmox_vm_qemu.win2k19-vm: Still creating... [1m10s elapsed]
proxmox_vm_qemu.win2k19-vm: Still creating... [1m20s elapsed]
proxmox_vm_qemu.win2k19-vm: Still creating... [1m30s elapsed]
proxmox_vm_qemu.win2k19-vm: Still creating... [1m40s elapsed]
proxmox_vm_qemu.win2k19-vm: Still creating... [1m50s elapsed]
proxmox_vm_qemu.win2k19-vm: Still creating... [2m0s elapsed]
proxmox_vm_qemu.win2k19-vm: Still creating... [2m10s elapsed]
proxmox_vm_qemu.win2k19-vm: Still creating... [2m20s elapsed]
proxmox_vm_qemu.win2k19-vm: Still creating... [2m30s elapsed]
proxmox_vm_qemu.win2k19-vm: Still creating... [2m40s elapsed]
proxmox_vm_qemu.win2k19-vm: Still creating... [2m50s elapsed]
proxmox_vm_qemu.win2k19-vm: Still creating... [3m0s elapsed]
proxmox_vm_qemu.win2k19-vm: Still creating... [3m10s elapsed]
proxmox_vm_qemu.win2k19-vm: Still creating... [3m20s elapsed]
proxmox_vm_qemu.win2k19-vm: Still creating... [3m30s elapsed]
proxmox_vm_qemu.win2k19-vm: Still creating... [3m40s elapsed]
proxmox_vm_qemu.win2k19-vm: Still creating... [3m50s elapsed]
proxmox_vm_qemu.win2k19-vm: Still creating... [4m0s elapsed]

Error: error unmarshalling result Could not parse fe80::dc7e:d119:c72d:dbac%2 as IP

  on win-vm.tf line 34, in resource "proxmox_vm_qemu" "win2k19-vm":
  34: resource "proxmox_vm_qemu" "win2k19-vm" {
The last part of this is due to running the Qemu Guest Agent. Proxmox sees that the IP address return is an IPv6 address, and returns it to the Terraform provider. Unfortunately the provider is expecting either an IPv4 address, or an IPv6 address without %2 at the end of it. However if we look in the Terraform state, we are still managing this machine: -
$ terraform state list
data.template_file.cloud_init_win2k19_vm-01
local_file.cloud_init_win2k19_vm-01
null_resource.cloud_init_win2k19_vm-01
proxmox_vm_qemu.win2k19-vm
We can also verify it exists in the Proxmox console: -
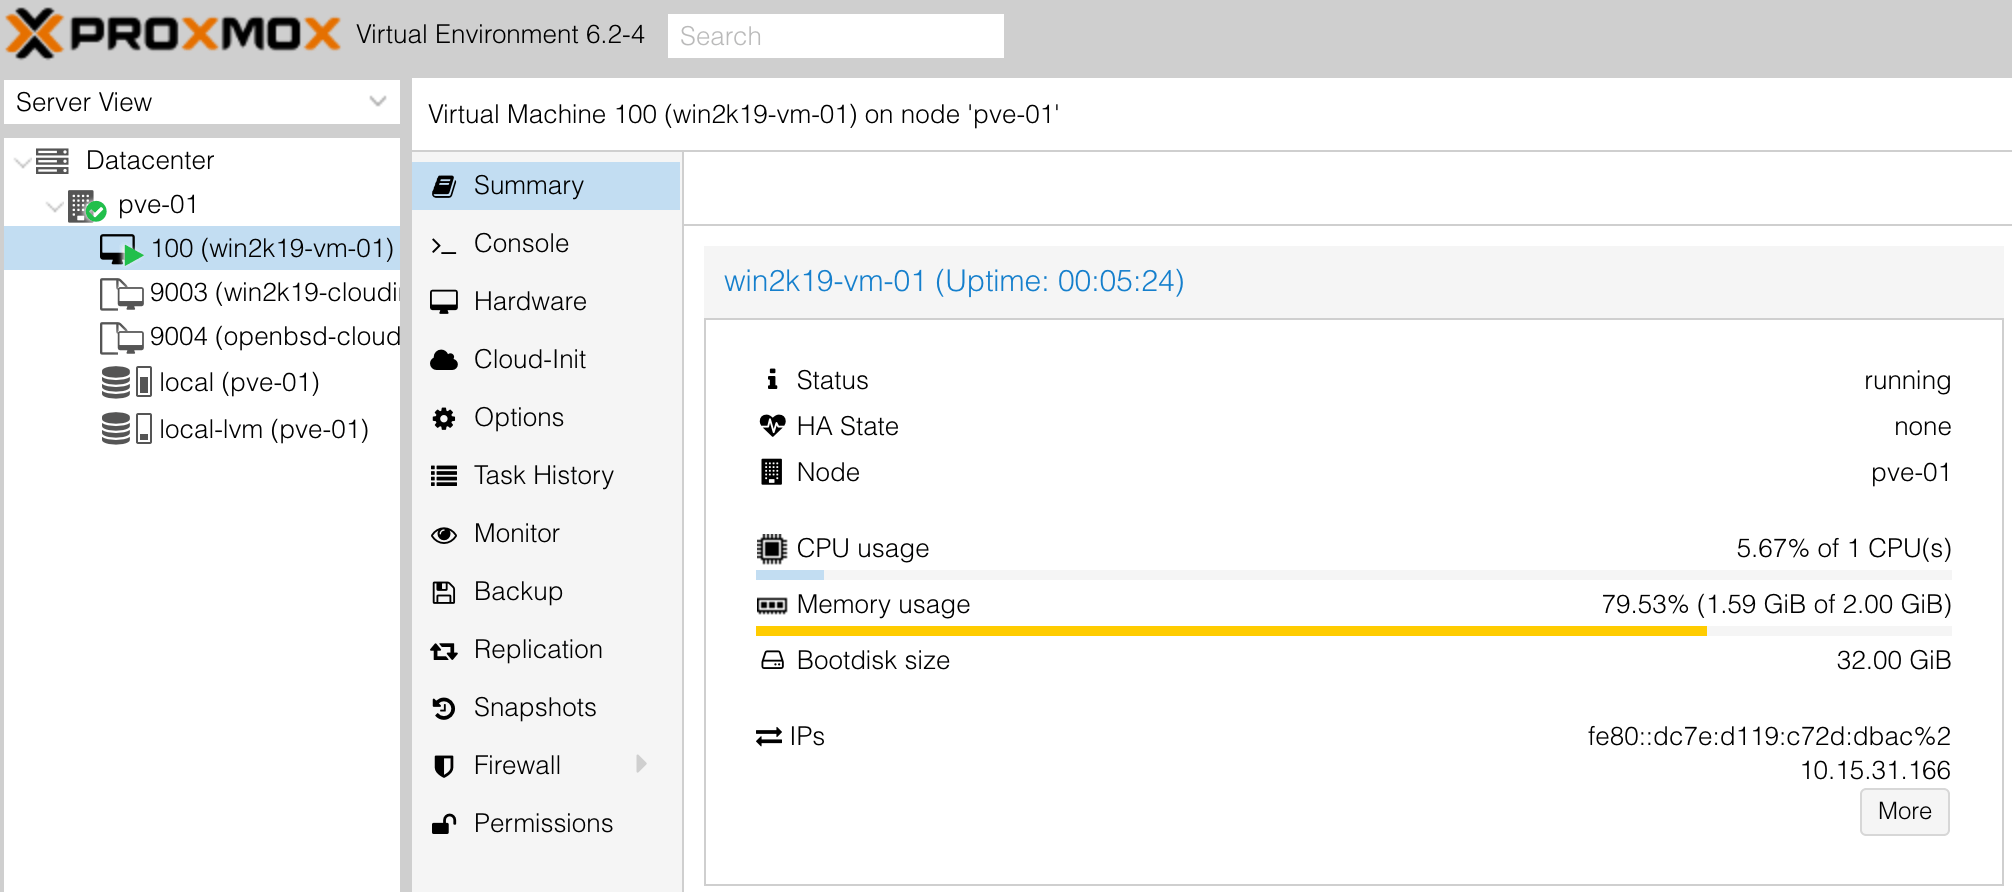
It appears that while the terraform apply operation produces an error, it is after all configuration has taken place. Terraform does however mark the instance as tainted (i.e. required to be destroyed and rebuilt). To avoid rebuilding the instance on your next terraform apply, run terraform untaint proxmox_vm_qemu.win2k19-vm to untaint it. You can then verify with a terraform plan that instance matches what we defined: -
# Untaint the instance
$ terraform untaint proxmox_vm_qemu.win2k19-vm
Resource instance proxmox_vm_qemu.win2k19-vm has been successfully untainted.

# Run a plan to ensure no changes are required
$ terraform plan
Refreshing Terraform state in-memory prior to plan...
The refreshed state will be used to calculate this plan, but will not be
persisted to local or remote state storage.

data.template_file.cloud_init_win2k19_vm-01: Refreshing state...
local_file.cloud_init_win2k19_vm-01: Refreshing state... [id=66f7140731ba60729758ed365fed0ba7a10f3766]
null_resource.cloud_init_win2k19_vm-01: Refreshing state... [id=219014806438120636]
proxmox_vm_qemu.win2k19-vm: Refreshing state... [id=pve-01/qemu/100]
Alternatively, if you do not install the Qemu Guest Agent, then the Terraform provider will complete without issues. It is worthwhile running the Guest Agent (safer shutdowns, exposes information to the hypervisor regarding the instance), but it is not necessary to the day to day running of the machine.
Salt
The Salt setup and states are the same as we used in this post. We use Salt to: -
- Deploy Consul as an agent
- Register with the Consul server (the Salt server)
- Deploy the Windows Exporter so that Prometheus can monitor the instance
As per the previous post, we also run a highstate (i.e. all applicable Salt states) when the Minion is accepted by the Salt server.
Accept the key
To accept the minion on the master, we need to check that it has registered first: -
$ sudo salt-key -L
Accepted Keys:
pve-01.yetiops.lab
salt-master.yetiops.lab
Denied Keys:
Unaccepted Keys:
win2k19-vm-01.yetiops.lab
Rejected Keys:
Now we can accept the key: -
$ sudo salt-key -a 'win2k19*'
The following keys are going to be accepted:
Unaccepted Keys:
win2k19-vm-01.yetiops.lab
Proceed? [n/Y] y
Key for minion win2k19-vm-01.yetiops.lab accepted.
We can check what states will be applied to this minion as well: -
$ sudo salt 'win2k19-vm-01*' state.show_states
win2k19-vm-01.yetiops.lab:
    - consul.windows
    - exporters.windows_exporter.win_exporter
    - exporters.windows_exporter.windows_exporter
Verify the highstate
As mentioned, the Minion configuration specifies that it will run a highstate when the key is accepted. We can verify this seeing if the instance has registered with Consul and that the Windows Exporter is running: -
$ consul members
Node             Address            Status  Type    Build  Protocol  DC       Segment
salt-master      10.15.31.249:8301  alive   server  1.8.1  2         yetiops  <all>
WIN-75R8JQ6IARE  10.15.31.166:8301  alive   client  1.7.2  2         yetiops  <default>
pve-01           10.15.31.7:8301    alive   client  1.8.1  2         yetiops  <default>

$ curl 10.15.31.166:9182/metrics | grep -i 2019
windows_os_info{product="Microsoft Windows Server 2019 Standard Evaluation",version="10.0.17763"} 1
Looks like they are working! It is worth nothing that we do not set a hostname in cloud-config for our machine, so it uses a randomly generated hostname instead.
As a last step of verification, we can run another highstate to ensure that no configuration files change, or any other packages are due to be installed: -
$ sudo salt 'win2k19*' state.highstate
win2k19-vm-01.yetiops.lab:
----------
          ID: consul_user
    Function: user.present
        Name: Consul
      Result: True
     Comment: User Consul is present and up to date
     Started: 20:04:56.229276
    Duration: 29925.002 ms
     Changes:
----------
          ID: consul_base_dir
    Function: file.directory
        Name: C:\consul
      Result: True
     Comment: Directory C:\consul updated
     Started: 20:05:26.157279
    Duration: 24.024 ms
     Changes:
              ----------
              grant_perms:
                  ----------
                  Users:
                      ----------
                      perms:
                          full_control
              perms:
                  ----------
                  Users:
                      ----------
                      grant:
                          full_control
----------
          ID: consul_conf_dir
    Function: file.directory
        Name: C:\consul\conf
      Result: True
     Comment: Directory C:\consul\conf updated
     Started: 20:05:26.181303
    Duration: 25.994 ms
     Changes:
              ----------
              grant_perms:
                  ----------
                  Users:
                      ----------
                      perms:
                          full_control
              perms:
                  ----------
                  Users:
                      ----------
                      grant:
                          full_control
----------
          ID: consul_data_dir
    Function: file.directory
        Name: C:\consul\data
      Result: True
     Comment: Directory C:\consul\data updated
     Started: 20:05:26.208305
    Duration: 13.041 ms
     Changes:
              ----------
              grant_perms:
                  ----------
                  Users:
                      ----------
                      perms:
                          full_control
              perms:
                  ----------
                  Users:
                      ----------
                      grant:
                          full_control
----------
          ID: c:\consul\conf\consul.hcl
    Function: file.managed
      Result: True
     Comment: File c:\consul\conf\consul.hcl is in the correct state
     Started: 20:05:26.227289
    Duration: 795.02 ms
     Changes:
----------
          ID: modify_consul_service
    Function: module.run
        Name: service.modify
      Result: True
     Comment: Module function service.modify executed
     Started: 20:05:27.022309
    Duration: 23.919 ms
     Changes:
              ----------
              ret:
                  ----------
                  BinaryPath:
                      "c:\consul\consul.exe" agent -config-dir=c:\consul\conf
                  DisplayName:
                      HashiCorp Consul Client Agent
                  StartType:
                      Auto
----------
          ID: running_consul_service
    Function: service.running
        Name: consul
      Result: True
     Comment: The service consul is already running
     Started: 20:05:27.046228
    Duration: 5.0 ms
     Changes:
----------
          ID: c:\consul\conf\windows_exporter.hcl
    Function: file.managed
      Result: True
     Comment: File c:\consul\conf\windows_exporter.hcl is in the correct state
     Started: 20:05:27.051228
    Duration: 96.359 ms
     Changes:
----------
          ID: consul_reload_windows_exporter
    Function: cmd.run
        Name: c:\consul\consul.exe reload
      Result: True
     Comment: Command "c:\consul\consul.exe reload" run
     Started: 20:05:27.149588
    Duration: 6710.107 ms
     Changes:
              ----------
              pid:
                  1208
              retcode:
                  0
              stderr:
              stdout:
                  Configuration reload triggered
----------
          ID: exporter_user
    Function: user.present
        Name: exporter
      Result: True
     Comment: User exporter is present and up to date
     Started: 20:05:33.859695
    Duration: 93.698 ms
     Changes:
----------
          ID: exporter_base_dir
    Function: file.directory
        Name: C:\exporter
      Result: True
     Comment: Directory C:\exporter updated
     Started: 20:05:33.953393
    Duration: 15.64 ms
     Changes:
              ----------
              grant_perms:
                  ----------
                  Users:
                      ----------
                      perms:
                          full_control
              perms:
                  ----------
                  Users:
                      ----------
                      grant:
                          full_control
----------
          ID: exporter_textfile_dir
    Function: file.directory
        Name: C:\exporter\textfile
      Result: True
     Comment: Directory C:\exporter\textfile updated
     Started: 20:05:33.969033
    Duration: 15.618 ms
     Changes:
              ----------
              grant_perms:
                  ----------
                  Users:
                      ----------
                      perms:
                          full_control
              perms:
                  ----------
                  Users:
                      ----------
                      grant:
                          full_control
----------
          ID: windows_exporter_dir
    Function: file.directory
        Name: C:\exporter\windows_exporter
      Result: True
     Comment: Directory C:\exporter\windows_exporter updated
     Started: 20:05:33.984651
    Duration: 0.0 ms
     Changes:
              ----------
              grant_perms:
                  ----------
                  Users:
                      ----------
                      perms:
                          full_control
              perms:
                  ----------
                  Users:
                      ----------
                      grant:
                          full_control

Summary for win2k19-vm-01.yetiops.lab
-------------
Succeeded: 13 (changed=8)
Failed:     0
-------------
Total states run:     13
Total run time:   37.743 s
Everything looks good!
Prometheus
As noted in the previous post, we are using the same Prometheus setup as we do here.
Also, as we are using the same Salt states, we should expect to see the instance like we do in this post: -

There it is!
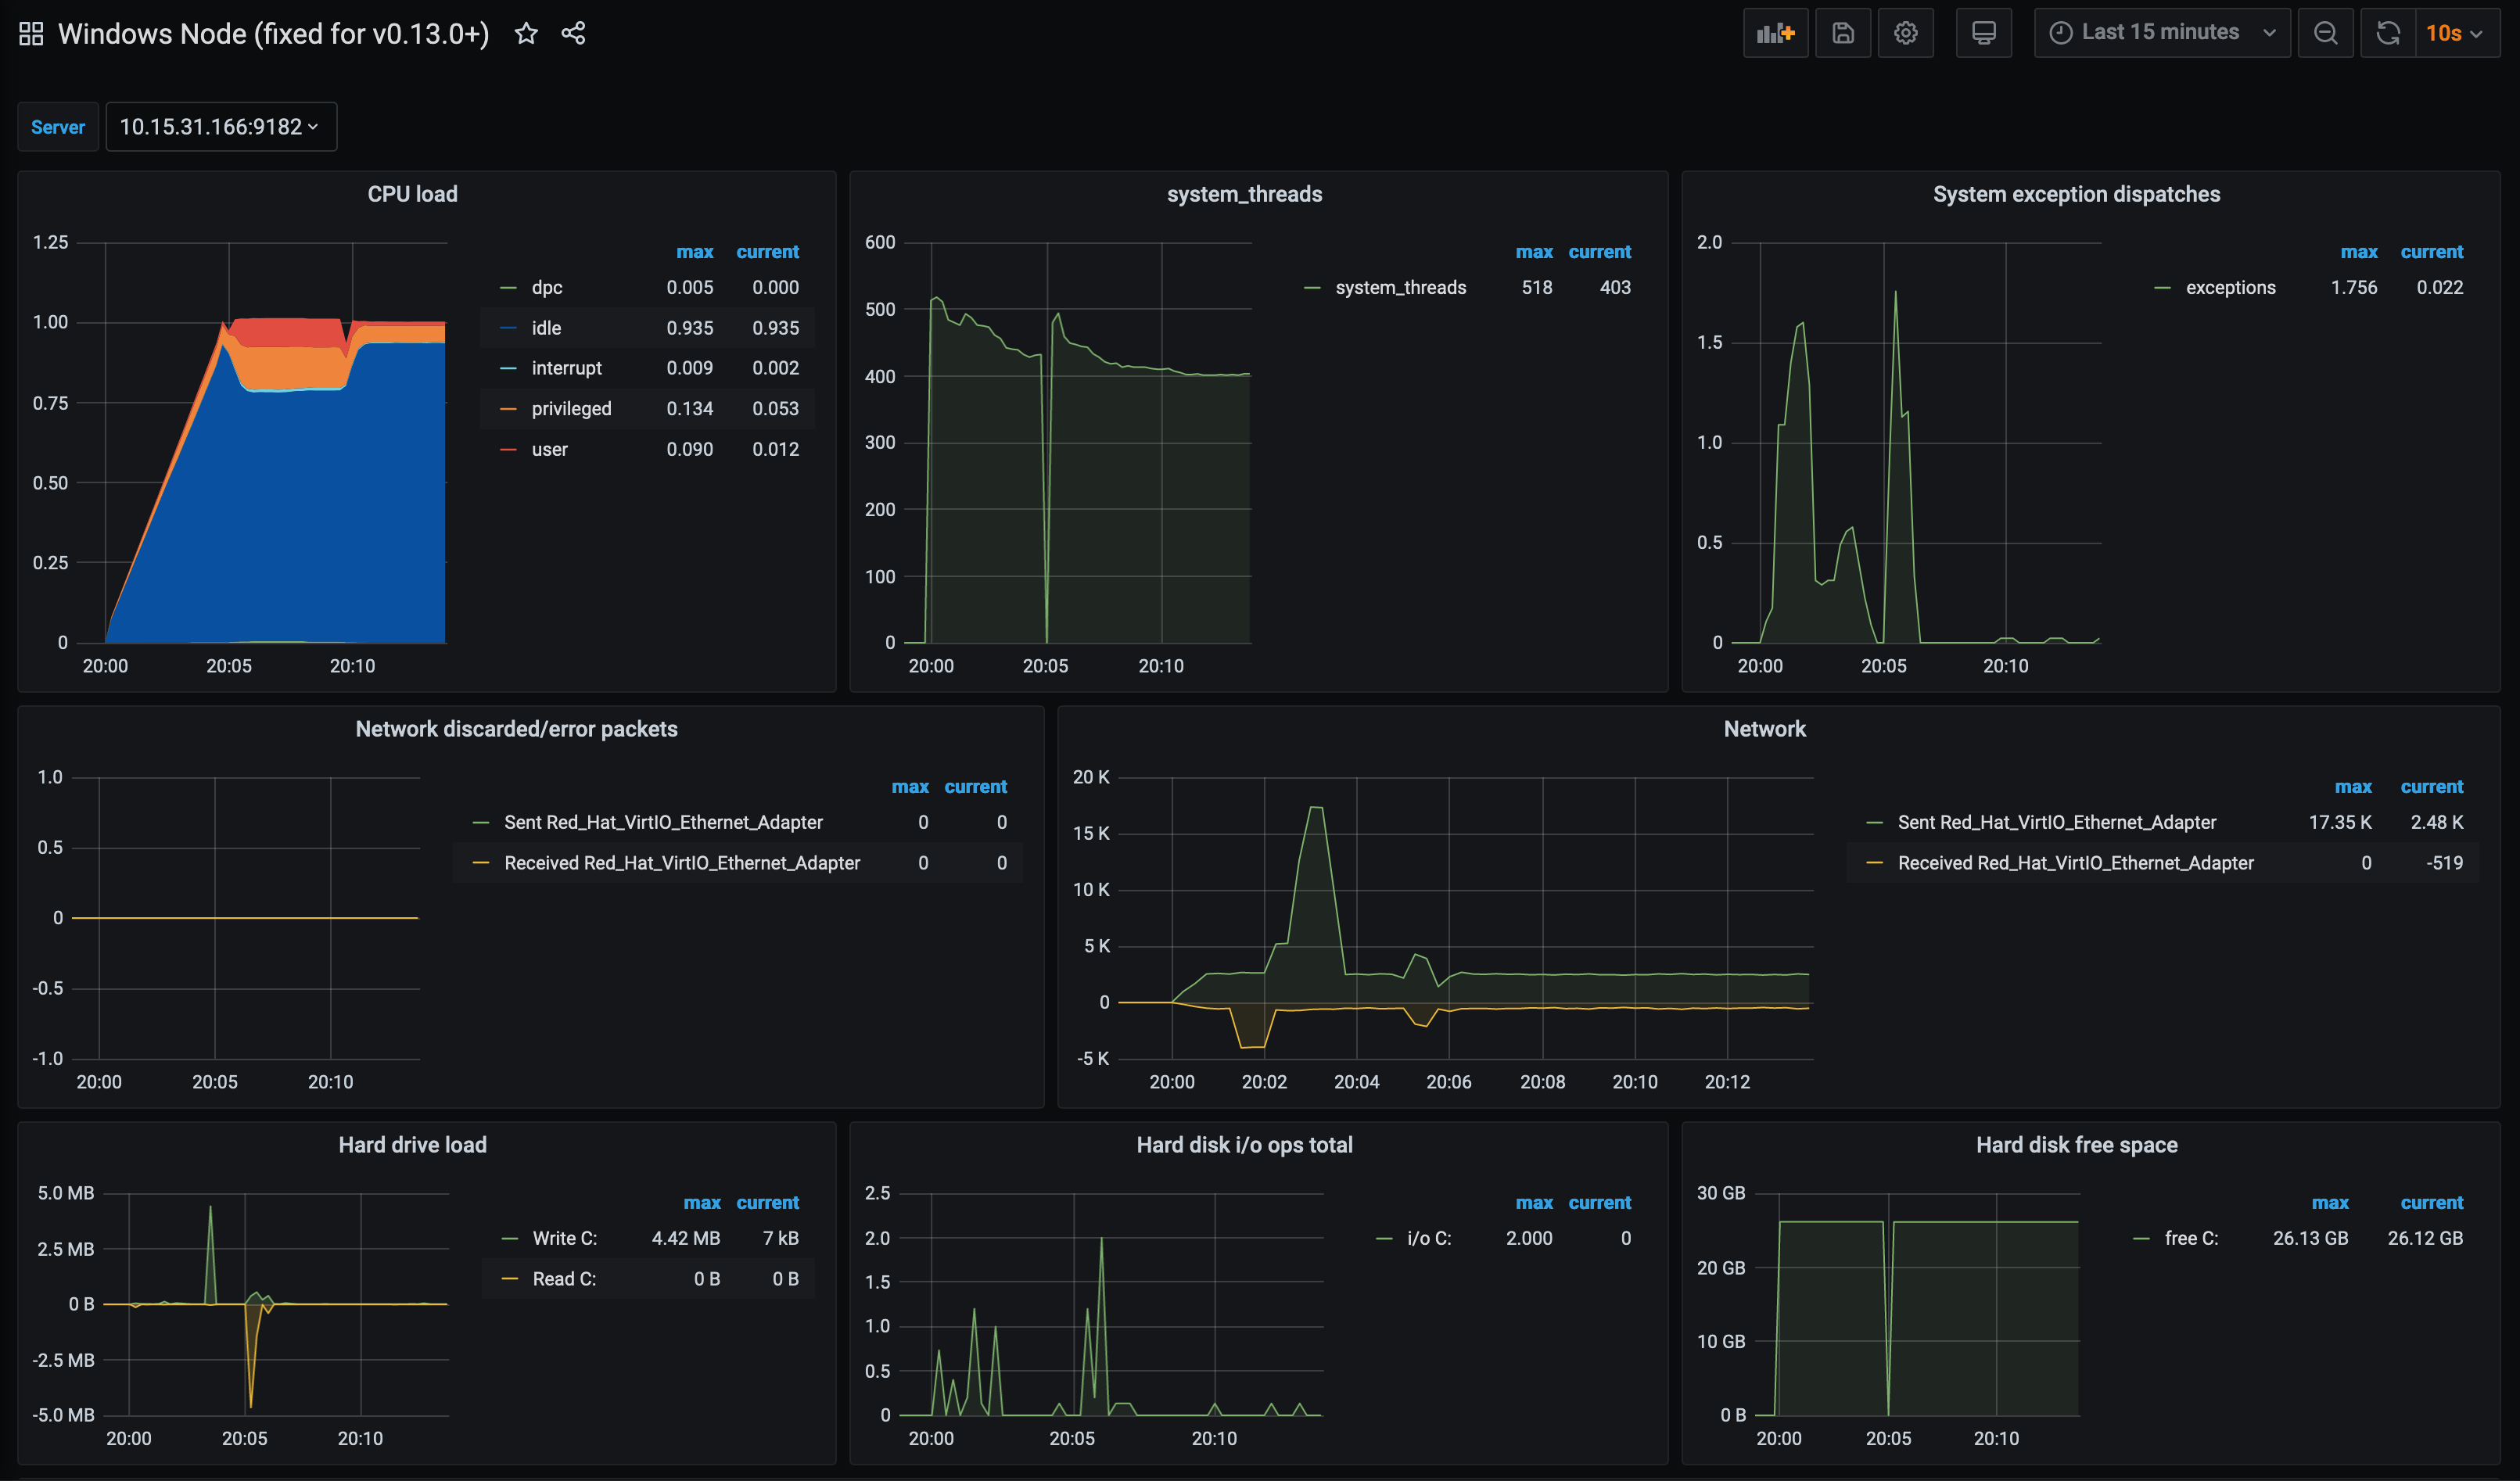
Grafana
Again, everything in this post regarding Grafana is applicable too. We can use the Windows Node Dashboard to verify the metrics: -
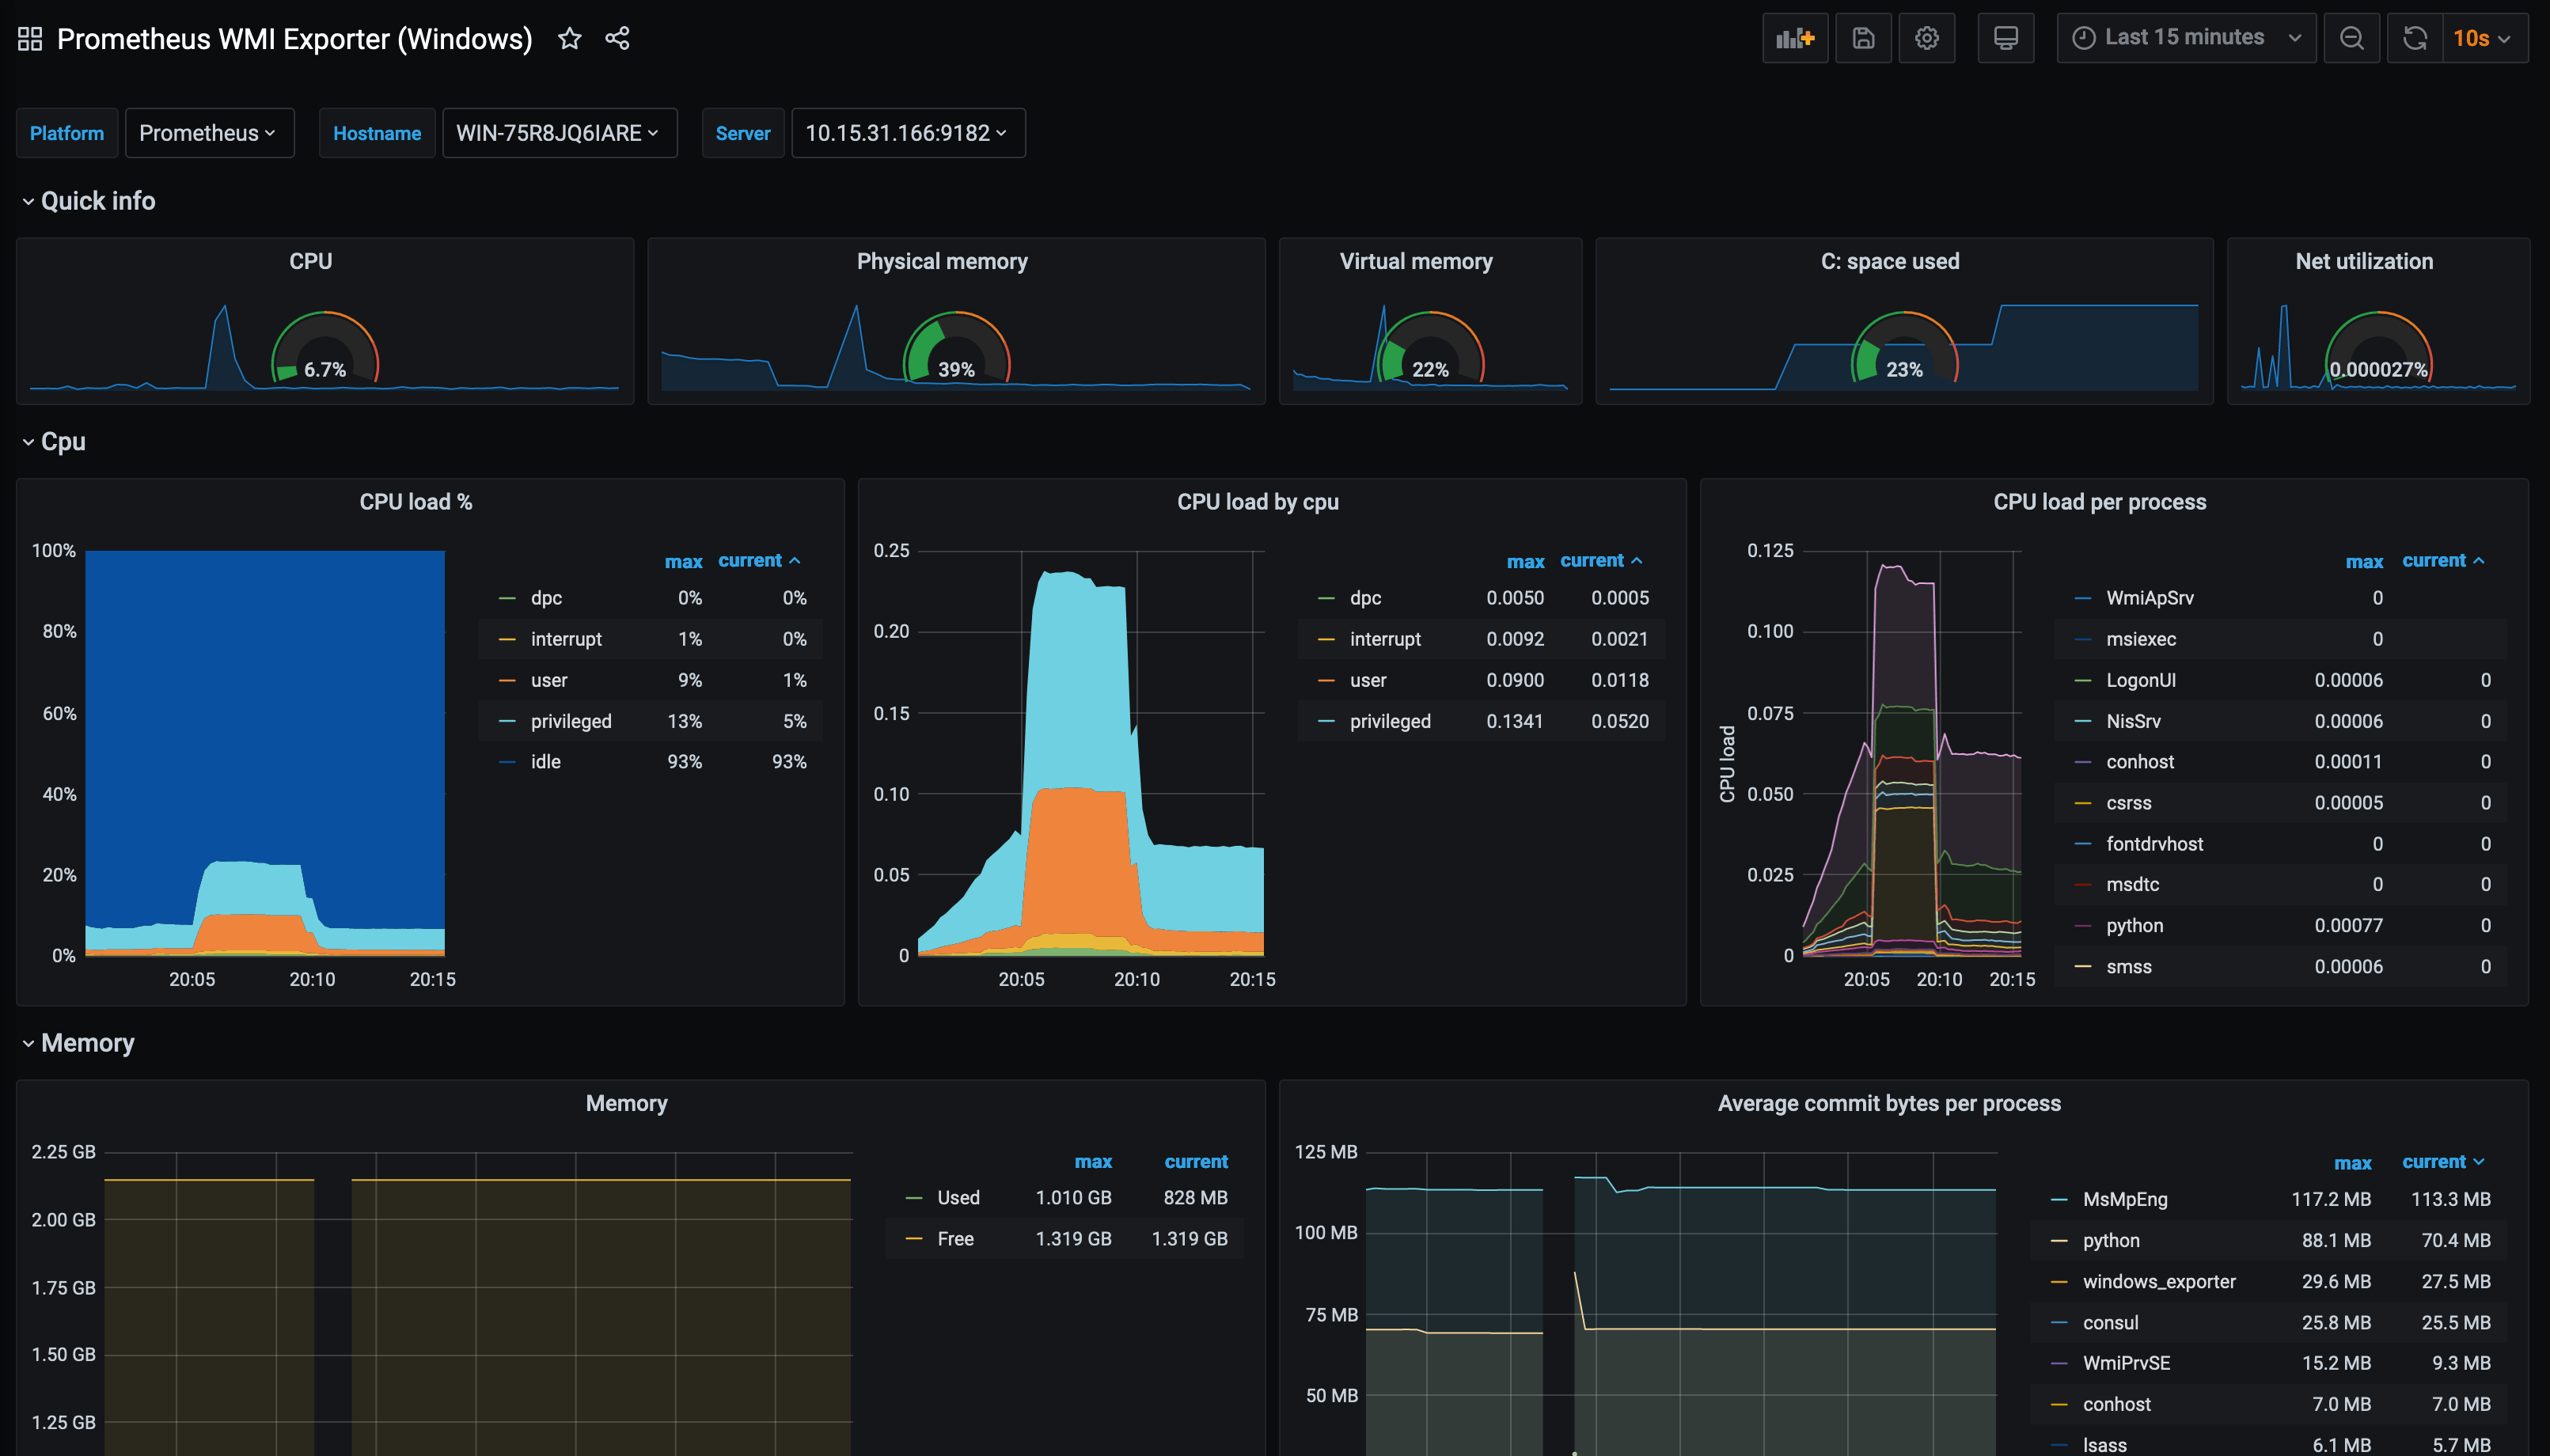
Alternatively you can use this dashboard, which has now been updated to use the Windows Exporter metric naming (i.e windows_ instead of wmi_, as the exporter changed from wmi_exporter to windows_exporter): -
Summary
Using Cloudbase-Init, it is possible to customize a Windows image when it starts for the first time, allowing you to bootstrap a machine ready to be used in your environment. This takes away the work of installing machines manually, while also being able to manage Windows in a similar way to Linux and Unix variants (e.g. FreeBSD, OpenBSD) that support Cloud-Init.
As we have also seen, it is not without caveats currently. Some of this is down to Proxmox in how it presents Cloud-Init data, some of it is down to the Cloudbase-Init utility that is expecting configuration in a certain format but could potentially be in multiple formats (i.e. both dns-nameservers and dns_nameservers are possible within Cloud-Init, but Cloudbase-Init currently understands the former), and some are down to the Terraform provider that does not seem to understand some of values presented by the Proxmox API (specifically the IPv6 addressing).
Over time these will improve, as issues have been raised for all of these cases. This should not discourage you from using any of these tools, as all of them together bring Windows deployment on Proxmox on par with Linux (in terms of bootstrapping and Terraform usage).
Cloudbase-Init was initially created for use with OpenStack, and the fact it works with other providers and infrastructure is a nice bonus.
devops monitoring prometheus consul saltstack terraform proxmox windows
technical prometheus monitoring config management
4414 Words
2020-09-03 11:18 +0000