50 minutes
Prometheus - Using Service Discovery with AWS, Azure and the Google Cloud Platform
Prometheus has multiple methods to discover services to monitor. You can use static configuration (i.e. specifying the IP and ports of services to monitor), discovery via DNS SRV records, files with targets listed in them, and Hashicorp’s Consul. You can leverage these to monitor resources on premise or in the cloud.
Prometheus can also use the APIs of some cloud providers to discover services. This means less operational overhead (e.g. no need for Consul clusters or updating DNS records), while still being able to discovering hosts and services dynamically.
Outline
In this post we will cover building a cloud instance in AWS (EC2), Azure (Virtual Machine) and the Google Cloud Platform (Compute Instance) using Terraform.
We will install the Prometheus Node Exporter on each instance, and then create a user that has enough API access for instance and service discovery.
Finally, we will configure a Prometheus instance with access to each platform, allowing it to discover and monitor the cloud instances.
Terraform
Terraform is an Infrastructure-as-Code tool, allowing you to define virtual machines, cloud applications and more. The configuration files can also be committed to a version control system. This means that if you need to rebuild your environment and create similar/identical environments you can take the Terraform files and recreate/update them for your needs. You can also look at changes in your infrastructure by looking through the commit history in your version control system (e.g. Git)
You can find more information about Terraform here.
The Terraform binaries (i.e. the application which will turn your Terraform configuration files into infrastructure) are available for Linux, macOS, Windows, FreeBSD, OpenBSD and Solaris.
Configure Terraform
Once the Terraform binary is installed, you can configure your Terraform environment.
First, I create a Terraform directory and turn it into a Git repository: -
# Create the directory
$ mkdir terraform

# Go into the directory
$ cd terraform

# Initialize git
$ git init

# Create a directory for creating virtual machines
$ mkdir basic-vms

# Create a directory for the Prometheus users
$ mkdir prometheus-access
You can choose to layout your Terraform directory however you want. You could have all files in one directory, directories per cloud provider, directories per environment, or directories by resource type. For this, I have chosen to have a directory for the cloud instances (for all providers) and another for the Prometheus user/role access.
AWS
Cloud Instances within AWS are known as EC2s, ranging from small virtual machines with 512M of memory with single vCPUs, all the way bare metal with hundreds of gigabytes of memory and tens of CPU cores.
You can sign up for an AWS account here. This comes with a years access to their free tier, which includes their t2.micro (1 vCPU and 1G of memory) and t3.micro (the same specs as the t2.micro, but on a newer generation of hardware) EC2 instances.
Once you have signed up, you’ll need to install the AWS CLI tool. Terraform uses the credentials and configuration files that the AWS CLI generates.
Install the AWS CLI
The AWS CLI can be installed via your platforms package manager (e.g. apt install awscli or brew install awscli).
Alternatively you can use Python’s PIP command. PIP will get you the latest stable version, rather than what is packaged in your operating systems repository. You can install with PIP by using pip install awscli (or pip3 for the Python 3 version).
Configure your credentials
To configure your credentials, use the aws configure command. This will give the following options: -
$ aws configure
AWS Access Key ID [None]: ###ACCESS_KEY###
AWS Secret Access Key [None]: ###SECRET_KEY###
Default region name [None]: eu-west-2 ### Replace this with whatever region you prefer (eg us-east-1, ap-southeast-1)
Default output format [None]:
Access Key and Secret Key
The Access Key and Secret Key can be obtained from the AWS Console. This can either be for your AWS account’s root user, or an IAM (Identity & Access Management) User (i.e. a user created within the account). Typically you should use an IAM user, so that permissions can be restricted to only what is necessary. However for the purposes of this article, I am going to use the root user.
Log into the AWS Console, go to the right hand corner and click on your username: -
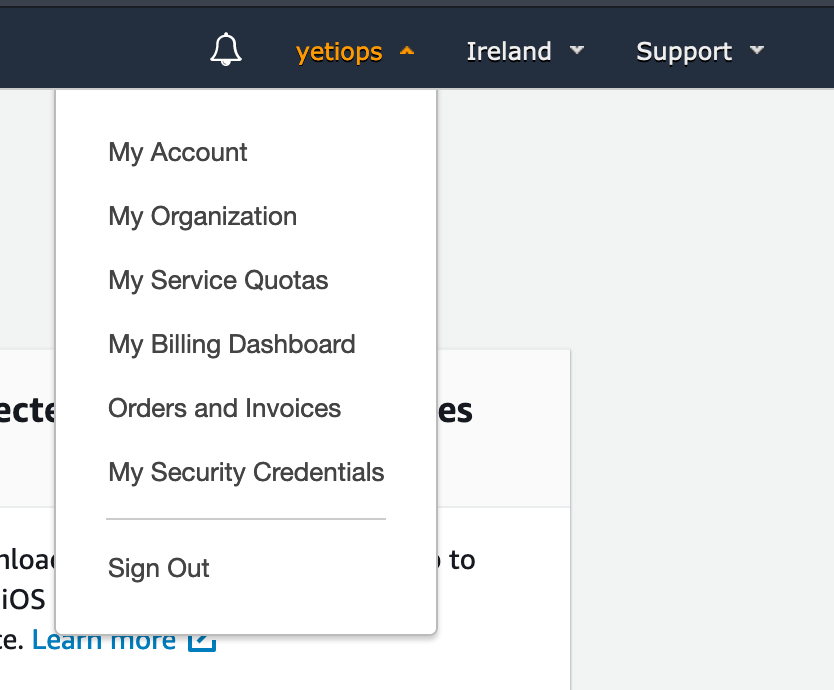
Click on My Security Credentials, then Access Keys (access key ID and secret access key) and then Create New Access Key. You’ll be presented with a pop-up that has the Access Key and Secret Access Key. Make sure you save these, as the Secret Key is not shown again.
Configure Terraform - EC2s
Now that you have generated the correct configuration with the AWS CLI, you can use Terraform with AWS.
Navigate to the Terraform directory we created earlier, and then the basic-vms directory (cd terraform/basic-vms).
In here, create a providers.tf file. This tells Terraform that we are going to configure resources in AWS, and what our default region is: -
# AWS Provider
provider "aws" {
  region  = "eu-west-2"
}
After this, run terraform init. This downloads the AWS Terraform provider binary: -
$ terraform init

Initializing the backend...

Initializing provider plugins...
- Checking for available provider plugins...
- Downloading plugin for provider "aws" (hashicorp/aws) 2.67.0...

The following providers do not have any version constraints in configuration,
so the latest version was installed.

To prevent automatic upgrades to new major versions that may contain breaking
changes, it is recommended to add version = "..." constraints to the
corresponding provider blocks in configuration, with the constraint strings
suggested below.

* provider.aws: version = "~> 2.67"

Terraform has been successfully initialized!

You may now begin working with Terraform. Try running "terraform plan" to see
any changes that are required for your infrastructure. All Terraform commands
should now work.

If you ever set or change modules or backend configuration for Terraform,
rerun this command to reinitialize your working directory. If you forget, other
commands will detect it and remind you to do so if necessary.
Define the infrastructure - EC2s
You can create the configuration files for your first EC2 instance. The below is from the file aws.tf in the terraform/basic-vms directory: -
data "aws_ami" "ubuntu" {
  most_recent = true

  filter {
    name   = "name"
    values = ["ubuntu/images/hvm-ssd/ubuntu-bionic-18.04-amd64-server-*"]
  }

  filter {
    name   = "virtualization-type"
    values = ["hvm"]
  }

  owners = ["099720109477"] # Canonical
}

data "aws_vpc" "default" {
  default = true
}

resource "aws_key_pair" "yetiops-aws-prom" {
  key_name = "yetiops-aws-prom"
  public_key = file("~/.ssh/id_rsa.pub")
}

resource "aws_instance" "yetiops-aws-prom" {
  ami           = data.aws_ami.ubuntu.id
  instance_type = "t2.micro"
  user_data     = data.template_file.ubuntu.template

  key_name = aws_key_pair.yetiops-aws-prom.key_name

  vpc_security_group_ids = [
    aws_security_group.yetiops-aws-prom.id
  ]

  tags = {
    Name = "yetiops-aws-prom"
    prometheus = "true"
    node_exporter = "true"
  }
}

resource "aws_security_group" "yetiops-aws-prom" {
  name        = "yetiops-aws-prom"
  description = "AWS Security Group for yetiops-aws-prom"
  vpc_id      = data.aws_vpc.default.id

  tags = {
    Name = "yetiops-aws-prom"
  }
}

resource "aws_security_group_rule" "ingress_ssh_in" {
  type              = "ingress"
  to_port           = 22
  protocol          = "tcp"
  from_port         = 22
  cidr_blocks       = [
    "$MY_PUBLIC_IP/32"
  ]
  security_group_id = aws_security_group.yetiops-aws-prom.id
}

resource "aws_security_group_rule" "ingress_node_exporter_in" {
  type              = "ingress"
  to_port           = 9100
  protocol          = "tcp"
  from_port         = 9100
  cidr_blocks       = [
    "$MY_PUBLIC_IP/32"
  ]
  security_group_id = aws_security_group.yetiops-aws-prom.id
}

resource "aws_security_group_rule" "egress_allow_all" {
  type              = "egress"
  to_port           = 0
  protocol          = "-1"
  from_port         = 0
  cidr_blocks       = [
    "0.0.0.0/0"
  ]
  security_group_id = aws_security_group.yetiops-aws-prom.id
}
To summarize what we are doing here, we are: -
- Using a Terraform data source (i.e. a read only view) to retrieve the latest Amazon Machine Image (i.e. a pre-defined virtual machine image) for Ubuntu 20.04
- The owner ID of
099720109477is the AWS account of Canonical (i.e. the makers of Ubuntu)
- The owner ID of
- Using another data source, we discover the default Virtual Public Cloud (i.e. the private Amazon network for our account)
- Create an SSH keypair in AWS, based upon one we have generated on our machine (you could generate one in AWS instead if you wish)
- Creating an Amazon EC2 of type
t2.micro, with a Security Group attached, specifying user-data (i.e. first boot configuration) and applying some tags (key-value pairs) to the instance - Creating a Security Group (a network firewall), residing in our VPC
- Adding rules to the security group to allow SSH and TCP port 9100 (the Prometheus Node Exporter) port from my public IP address
- Allowing all outbound traffic from the virtual machine
The user_data is specified in a different file, called user_data.tf: -
data "template_file" "ubuntu" {
  template = "${file("${path.module}/files/ubuntu.tpl")}"
}

data "template_cloudinit_config" "ubuntu" {
  gzip          = false
  base64_encode = false

  part {
    filename     = "init.cfg"
    content_type = "text/cloud-config"
    content      = data.template_file.ubuntu.rendered
  }
}
The above file serves two purposes. First, it sources the template from a file. In this case, the file is terraform/basic-vms/files/ubuntu.tpl (${path.module} refers to the path relative to where you define your resources). Secondly, it produces a template_cloudinit_config resource as well from the same template. For AWS this is not strictly required, whereas we will need to use this for Azure and Google Cloud Platform.
The contents of the file are: -
#cloud-config
packages:
 - prometheus-node-exporter
The user-data can be shell scripts (Bash, Powershell or otherwise), or you can make use of cloud-config. cloud-config is intended to be system agnostic, meaning we do not need to tell it which package manager to use (useful if you are installing across different operating systems).
Build the infrastructure - EC2s
We can now apply our configuration, and see if it builds an Amazon EC2 machine. First, run terraform plan (in the same directory as your .tf files) to see what infrastructure will be provisioned: -
$ terraform plan
Refreshing Terraform state in-memory prior to plan...
The refreshed state will be used to calculate this plan, but will not be
persisted to local or remote state storage.

data.template_file.ubuntu: Refreshing state...
data.template_cloudinit_config.ubuntu: Refreshing state...
data.aws_vpc.default: Refreshing state...
data.aws_ami.ubuntu: Refreshing state...

------------------------------------------------------------------------

An execution plan has been generated and is shown below.
Resource actions are indicated with the following symbols:
  + create

Terraform will perform the following actions:

  # aws_instance.yetiops-aws-prom will be created
  + resource "aws_instance" "yetiops-aws-prom" {
      + ami                          = "ami-00f6a0c18edb19300"
      + arn                          = (known after apply)
      + associate_public_ip_address  = (known after apply)
      + availability_zone            = (known after apply)
      + cpu_core_count               = (known after apply)
      + cpu_threads_per_core         = (known after apply)
      + get_password_data            = false
      + host_id                      = (known after apply)
      + id                           = (known after apply)
      + instance_state               = (known after apply)
      + instance_type                = "t2.micro"
      + ipv6_address_count           = (known after apply)
      + ipv6_addresses               = (known after apply)
      + key_name                     = "yetiops-aws-prom"
      + network_interface_id         = (known after apply)
      + outpost_arn                  = (known after apply)
      + password_data                = (known after apply)
      + placement_group              = (known after apply)
      + primary_network_interface_id = (known after apply)
      + private_dns                  = (known after apply)
      + private_ip                   = (known after apply)
      + public_dns                   = (known after apply)
      + public_ip                    = (known after apply)
      + security_groups              = (known after apply)
      + source_dest_check            = true
      + subnet_id                    = (known after apply)
      + tags                         = {
          + "Name"          = "yetiops-aws-prom"
          + "node_exporter" = "true"
          + "prometheus"    = "true"
        }
      + tenancy                      = (known after apply)
      + user_data                    = "2169d8a3e100623d34bf1a7b2f6bd924a8997bfb"
      + volume_tags                  = (known after apply)
      + vpc_security_group_ids       = (known after apply)

      + ebs_block_device {
          + delete_on_termination = (known after apply)
          + device_name           = (known after apply)
          + encrypted             = (known after apply)
          + iops                  = (known after apply)
          + kms_key_id            = (known after apply)
          + snapshot_id           = (known after apply)
          + volume_id             = (known after apply)
          + volume_size           = (known after apply)
          + volume_type           = (known after apply)
        }

      + ephemeral_block_device {
          + device_name  = (known after apply)
          + no_device    = (known after apply)
          + virtual_name = (known after apply)
        }

      + metadata_options {
          + http_endpoint               = (known after apply)
          + http_put_response_hop_limit = (known after apply)
          + http_tokens                 = (known after apply)
        }

      + network_interface {
          + delete_on_termination = (known after apply)
          + device_index          = (known after apply)
          + network_interface_id  = (known after apply)
        }

      + root_block_device {
          + delete_on_termination = (known after apply)
          + device_name           = (known after apply)
          + encrypted             = (known after apply)
          + iops                  = (known after apply)
          + kms_key_id            = (known after apply)
          + volume_id             = (known after apply)
          + volume_size           = (known after apply)
          + volume_type           = (known after apply)
        }
    }

  # aws_key_pair.yetiops-aws-prom will be created
  + resource "aws_key_pair" "yetiops-aws-prom" {
      + arn         = (known after apply)
      + fingerprint = (known after apply)
      + id          = (known after apply)
      + key_name    = "yetiops-aws-prom"
      + key_pair_id = (known after apply)
      + public_key  = "$MY_PUBLIC_KEY"
    }

  # aws_security_group.yetiops-aws-prom will be created
  + resource "aws_security_group" "yetiops-aws-prom" {
      + arn                    = (known after apply)
      + description            = "AWS Security Group for yetiops-aws-prom"
      + egress                 = (known after apply)
      + id                     = (known after apply)
      + ingress                = (known after apply)
      + name                   = "yetiops-aws-prom"
      + owner_id               = (known after apply)
      + revoke_rules_on_delete = false
      + tags                   = {
          + "Name" = "yetiops-aws-prom"
        }
      + vpc_id                 = "vpc-a62062ce"
    }

  # aws_security_group_rule.egress_allow_all will be created
  + resource "aws_security_group_rule" "egress_allow_all" {
      + cidr_blocks              = [
          + "0.0.0.0/0",
        ]
      + from_port                = 0
      + id                       = (known after apply)
      + protocol                 = "-1"
      + security_group_id        = (known after apply)
      + self                     = false
      + source_security_group_id = (known after apply)
      + to_port                  = 0
      + type                     = "egress"
    }

  # aws_security_group_rule.ingress_node_exporter_in will be created
  + resource "aws_security_group_rule" "ingress_node_exporter_in" {
      + cidr_blocks              = [
          + "$MY_PUBLIC_IP/32",
        ]
      + from_port                = 9100
      + id                       = (known after apply)
      + protocol                 = "tcp"
      + security_group_id        = (known after apply)
      + self                     = false
      + source_security_group_id = (known after apply)
      + to_port                  = 9100
      + type                     = "ingress"
    }

  # aws_security_group_rule.ingress_ssh_in will be created
  + resource "aws_security_group_rule" "ingress_ssh_in" {
      + cidr_blocks              = [
          + "$MY_PUBLIC_IP/32",
        ]
      + from_port                = 22
      + id                       = (known after apply)
      + protocol                 = "tcp"
      + security_group_id        = (known after apply)
      + self                     = false
      + source_security_group_id = (known after apply)
      + to_port                  = 22
      + type                     = "ingress"
    }

Plan: 6 to add, 0 to change, 0 to destroy.

------------------------------------------------------------------------

Note: You didn't specify an "-out" parameter to save this plan, so Terraform
can't guarantee that exactly these actions will be performed if
"terraform apply" is subsequently run.
This all looks correct, so now it’s time to apply the configuration: -
$ terraform apply
Refreshing Terraform state in-memory prior to plan...
The refreshed state will be used to calculate this plan, but will not be
persisted to local or remote state storage.

data.template_file.ubuntu: Refreshing state...
data.template_cloudinit_config.ubuntu: Refreshing state...
data.aws_vpc.default: Refreshing state...
data.aws_ami.ubuntu: Refreshing state...

------------------------------------------------------------------------

An execution plan has been generated and is shown below.
Resource actions are indicated with the following symbols:
  + create

Terraform will perform the following actions:

  # aws_instance.yetiops-aws-prom will be created
  + resource "aws_instance" "yetiops-aws-prom" {
      + ami                          = "ami-00f6a0c18edb19300"
      + arn                          = (known after apply)
      + associate_public_ip_address  = (known after apply)
      + availability_zone            = (known after apply)
      + cpu_core_count               = (known after apply)
      + cpu_threads_per_core         = (known after apply)
      + get_password_data            = false
      + host_id                      = (known after apply)
      + id                           = (known after apply)
      + instance_state               = (known after apply)
      + instance_type                = "t2.micro"
      + ipv6_address_count           = (known after apply)
      + ipv6_addresses               = (known after apply)
      + key_name                     = "yetiops-aws-prom"
      + network_interface_id         = (known after apply)
      + outpost_arn                  = (known after apply)
      + password_data                = (known after apply)
      + placement_group              = (known after apply)
      + primary_network_interface_id = (known after apply)
      + private_dns                  = (known after apply)
      + private_ip                   = (known after apply)
      + public_dns                   = (known after apply)
      + public_ip                    = (known after apply)
      + security_groups              = (known after apply)
      + source_dest_check            = true
      + subnet_id                    = (known after apply)
      + tags                         = {
          + "Name"          = "yetiops-aws-prom"
          + "node_exporter" = "true"
          + "prometheus"    = "true"
        }
      + tenancy                      = (known after apply)
      + user_data                    = "2169d8a3e100623d34bf1a7b2f6bd924a8997bfb"
      + volume_tags                  = (known after apply)
      + vpc_security_group_ids       = (known after apply)

      + ebs_block_device {
          + delete_on_termination = (known after apply)
          + device_name           = (known after apply)
          + encrypted             = (known after apply)
          + iops                  = (known after apply)
          + kms_key_id            = (known after apply)
          + snapshot_id           = (known after apply)
          + volume_id             = (known after apply)
          + volume_size           = (known after apply)
          + volume_type           = (known after apply)
        }

      + ephemeral_block_device {
          + device_name  = (known after apply)
          + no_device    = (known after apply)
          + virtual_name = (known after apply)
        }

      + metadata_options {
          + http_endpoint               = (known after apply)
          + http_put_response_hop_limit = (known after apply)
          + http_tokens                 = (known after apply)
        }

      + network_interface {
          + delete_on_termination = (known after apply)
          + device_index          = (known after apply)
          + network_interface_id  = (known after apply)
        }

      + root_block_device {
          + delete_on_termination = (known after apply)
          + device_name           = (known after apply)
          + encrypted             = (known after apply)
          + iops                  = (known after apply)
          + kms_key_id            = (known after apply)
          + volume_id             = (known after apply)
          + volume_size           = (known after apply)
          + volume_type           = (known after apply)
        }
    }

  # aws_key_pair.yetiops-aws-prom will be created
  + resource "aws_key_pair" "yetiops-aws-prom" {
      + arn         = (known after apply)
      + fingerprint = (known after apply)
      + id          = (known after apply)
      + key_name    = "yetiops-aws-prom"
      + key_pair_id = (known after apply)
      + public_key  = "$MY_PUBLIC_KEY"
    }

  # aws_security_group.yetiops-aws-prom will be created
  + resource "aws_security_group" "yetiops-aws-prom" {
      + arn                    = (known after apply)
      + description            = "AWS Security Group for yetiops-aws-prom"
      + egress                 = (known after apply)
      + id                     = (known after apply)
      + ingress                = (known after apply)
      + name                   = "yetiops-aws-prom"
      + owner_id               = (known after apply)
      + revoke_rules_on_delete = false
      + tags                   = {
          + "Name" = "yetiops-aws-prom"
        }
      + vpc_id                 = "vpc-a62062ce"
    }

  # aws_security_group_rule.egress_allow_all will be created
  + resource "aws_security_group_rule" "egress_allow_all" {
      + cidr_blocks              = [
          + "0.0.0.0/0",
        ]
      + from_port                = 0
      + id                       = (known after apply)
      + protocol                 = "-1"
      + security_group_id        = (known after apply)
      + self                     = false
      + source_security_group_id = (known after apply)
      + to_port                  = 0
      + type                     = "egress"
    }

  # aws_security_group_rule.ingress_node_exporter_in will be created
  + resource "aws_security_group_rule" "ingress_node_exporter_in" {
      + cidr_blocks              = [
          + "$MY_PUBLIC_IP/32",
        ]
      + from_port                = 9100
      + id                       = (known after apply)
      + protocol                 = "tcp"
      + security_group_id        = (known after apply)
      + self                     = false
      + source_security_group_id = (known after apply)
      + to_port                  = 9100
      + type                     = "ingress"
    }

  # aws_security_group_rule.ingress_ssh_in will be created
  + resource "aws_security_group_rule" "ingress_ssh_in" {
      + cidr_blocks              = [
          + "$MY_PUBLIC_IP/32",
        ]
      + from_port                = 22
      + id                       = (known after apply)
      + protocol                 = "tcp"
      + security_group_id        = (known after apply)
      + self                     = false
      + source_security_group_id = (known after apply)
      + to_port                  = 22
      + type                     = "ingress"
    }

Plan: 6 to add, 0 to change, 0 to destroy.

------------------------------------------------------------------------

Do you want to perform these actions?
  Terraform will perform the actions described above.
  Only 'yes' will be accepted to approve.

  Enter a value: yes

aws_key_pair.yetiops-aws-prom: Creating...
aws_security_group.yetiops-aws-prom: Creating...
aws_key_pair.yetiops-aws-prom: Creation complete after 0s [id=yetiops-aws-prom]
aws_security_group.yetiops-aws-prom: Creation complete after 1s [id=sg-04e928f187b556e09]
aws_security_group_rule.ingress_ssh_in: Creating...
aws_security_group_rule.egress_allow_all: Creating...
aws_security_group_rule.ingress_node_exporter_in: Creating...
aws_instance.yetiops-aws-prom: Creating...
aws_security_group_rule.ingress_ssh_in: Creation complete after 1s [id=sgrule-703042014]
aws_security_group_rule.egress_allow_all: Creation complete after 1s [id=sgrule-2079816963]
aws_security_group_rule.ingress_node_exporter_in: Creation complete after 2s [id=sgrule-147676407]
aws_instance.yetiops-aws-prom: Still creating... [10s elapsed]
aws_instance.yetiops-aws-prom: Still creating... [20s elapsed]
aws_instance.yetiops-aws-prom: Creation complete after 22s [id=i-04cb1d016718cef07]

Apply complete! Resources: 6 added, 0 changed, 0 destroyed.
We can double check that Terraform is managing these resources now with terraform state list: -
$ terraform state list
data.aws_ami.ubuntu
data.aws_vpc.default
data.template_cloudinit_config.ubuntu
data.template_file.ubuntu
aws_instance.yetiops-aws-prom
aws_key_pair.yetiops-aws-prom
aws_security_group.yetiops-aws-prom
aws_security_group_rule.egress_allow_all
aws_security_group_rule.ingress_node_exporter_in
aws_security_group_rule.ingress_ssh_in
We can check to see if the instance is in the AWS Console: -
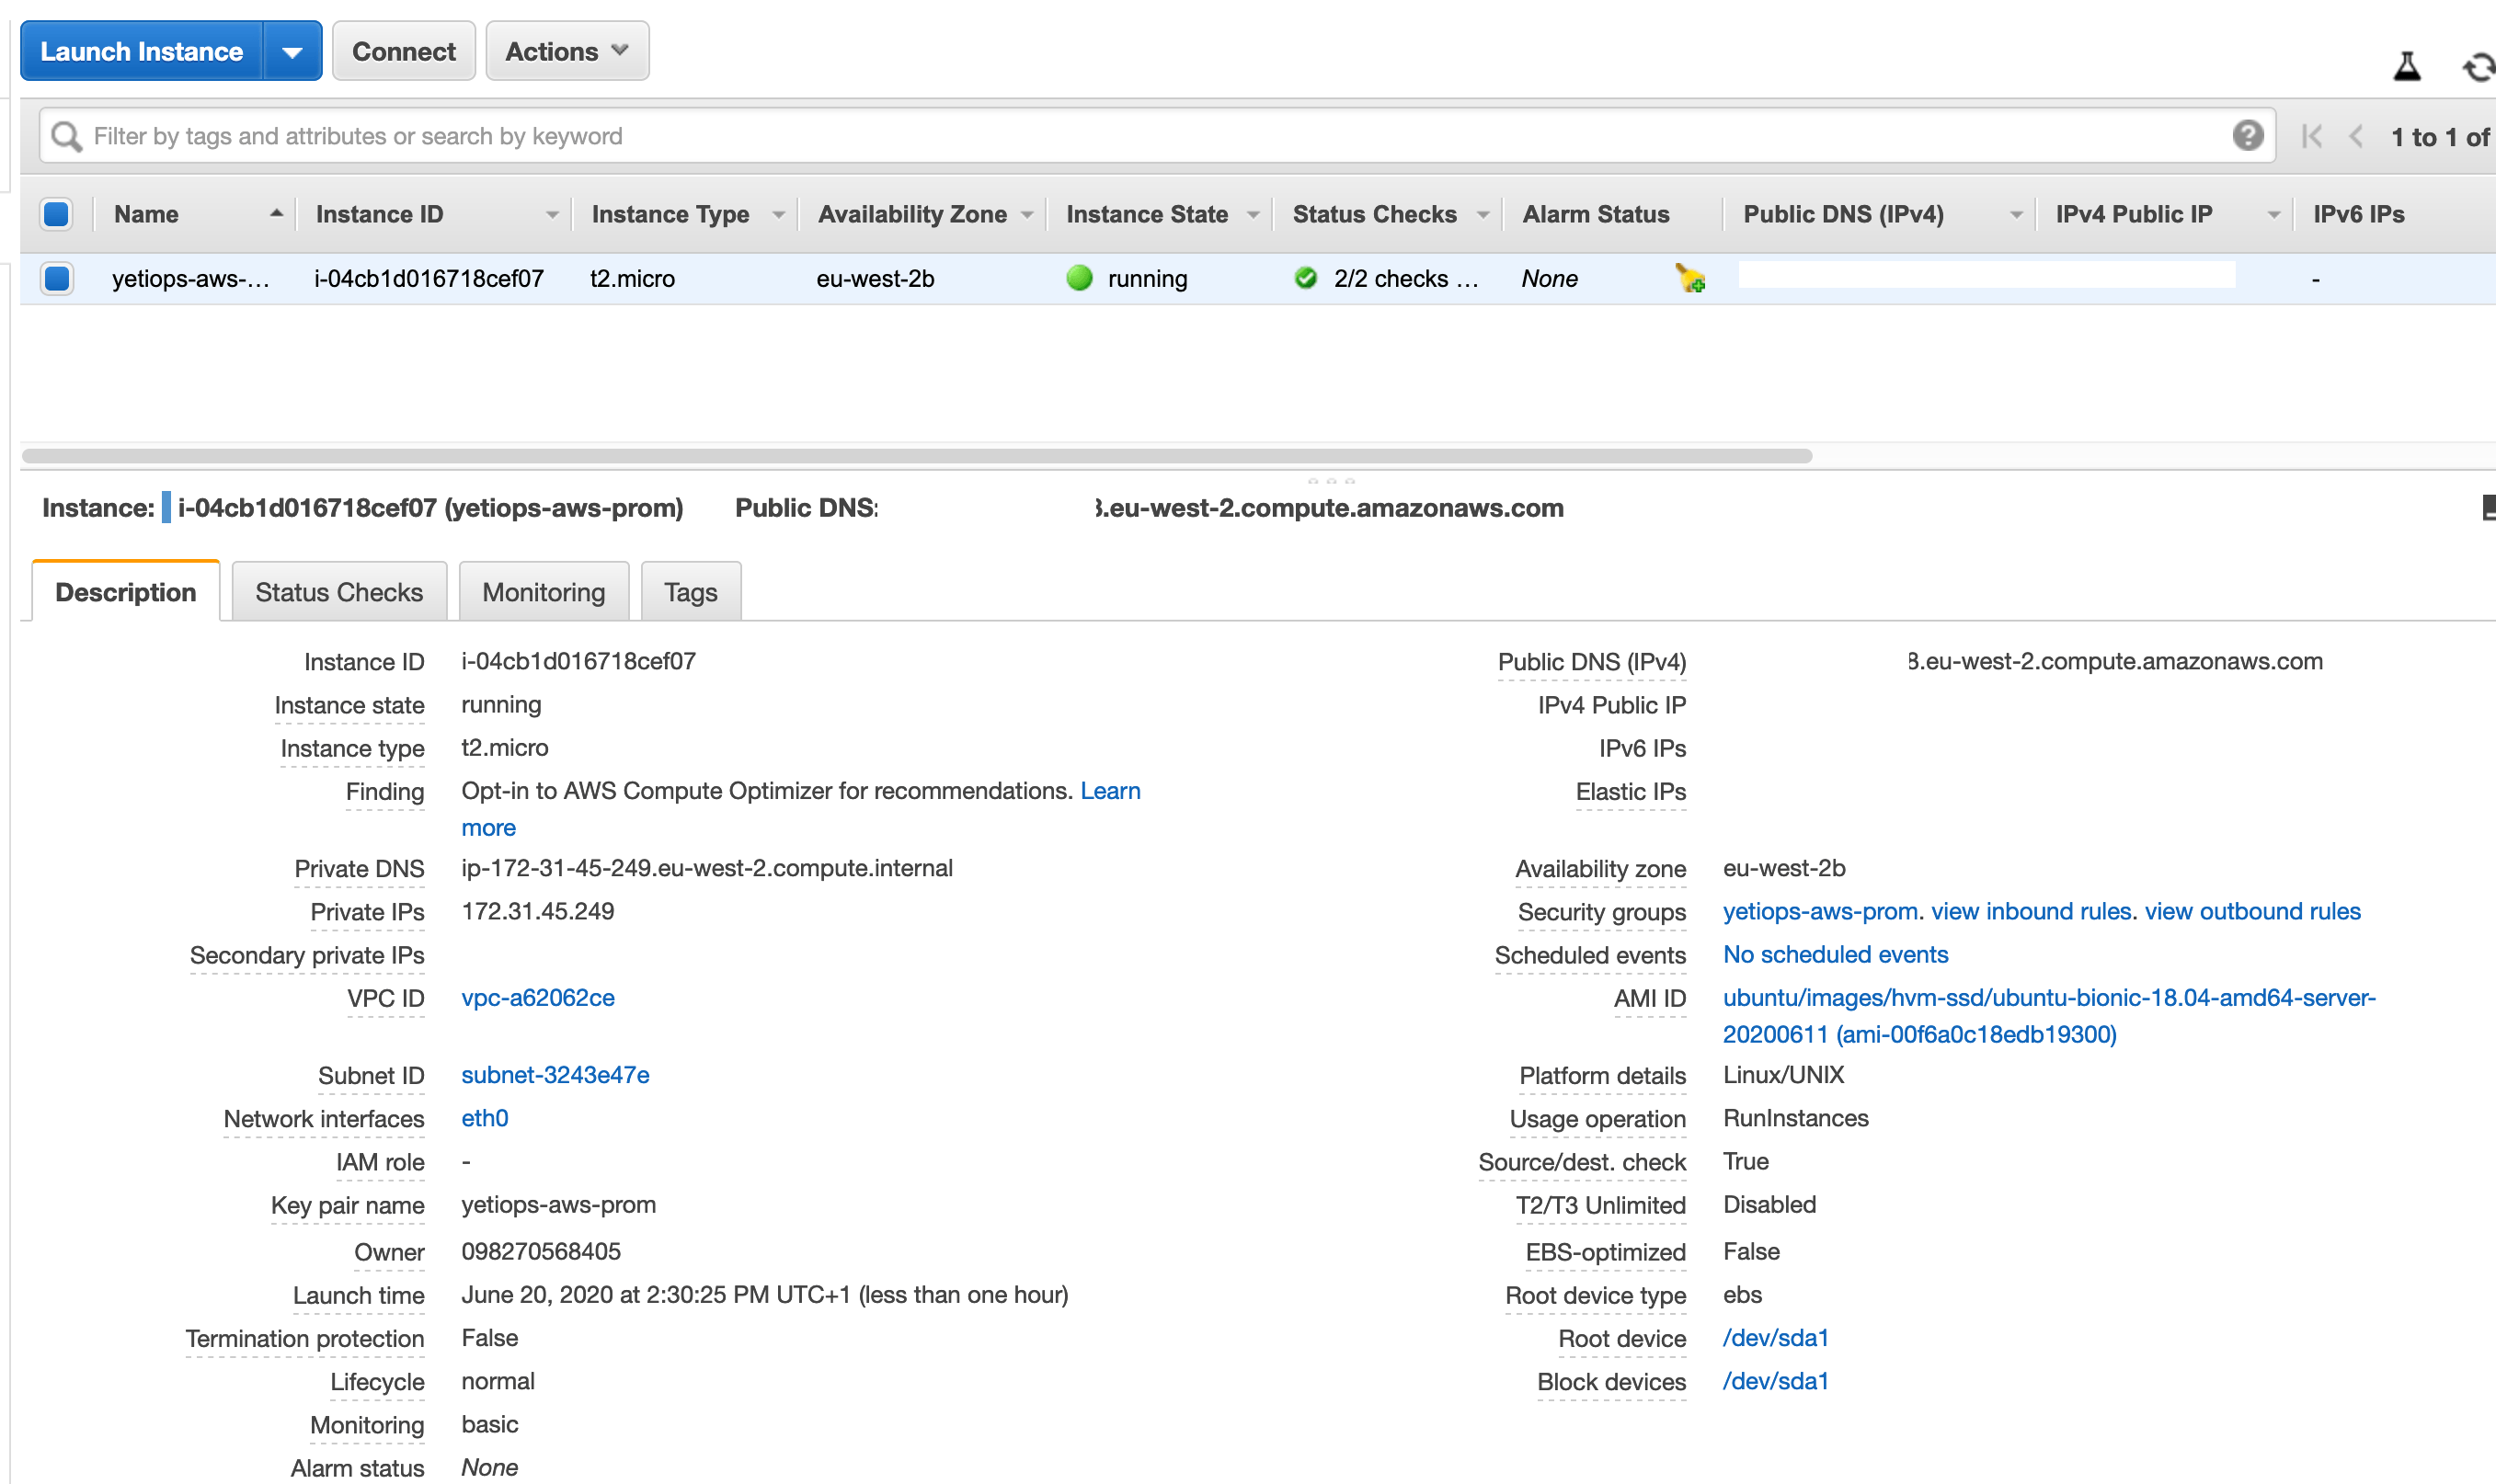
Finally, we can try to SSH to it: -
$ ssh ubuntu@$EC2-PUBLIC-IP
Welcome to Ubuntu 18.04.4 LTS (GNU/Linux 5.3.0-1023-aws x86_64)

 * Documentation:  https://help.ubuntu.com
 * Management:     https://landscape.canonical.com
 * Support:        https://ubuntu.com/advantage

  System information as of Sat Jun 20 13:36:44 UTC 2020

  System load:  0.08              Processes:           91
  Usage of /:   16.1% of 7.69GB   Users logged in:     0
  Memory usage: 17%               IP address for eth0: 172.31.45.249
  Swap usage:   0%

9 packages can be updated.
2 updates are security updates.


The programs included with the Ubuntu system are free software;
the exact distribution terms for each program are described in the
individual files in /usr/share/doc/*/copyright.

Ubuntu comes with ABSOLUTELY NO WARRANTY, to the extent permitted by
applicable law.

To run a command as administrator (user "root"), use "sudo <command>".
See "man sudo_root" for details.

ubuntu@ip-172-31-45-249:~$ ps aux | grep -i node
prometh+  1933  0.0  1.5 245600 15368 ?        Ssl  13:31   0:00 /usr/bin/prometheus-node-exporter --collector.diskstats.ignored-devices=^(ram|loop|fd|(h|s|v|xv)d[a-z]|nvmed+nd+p)d+$ --collector.filesystem.ignored-mount-points=^/(sys|proc|dev|run)($|/) --collector.netdev.ignored-devices=^lo$ --collector.textfile.directory=/var/lib/prometheus/node-exporter
ubuntu    2220  0.0  0.0  14852  1000 pts/0    S+   13:37   0:00 grep --color=auto -i node
As we can see, we have the node_exporter running already, due to the user_data configuration.
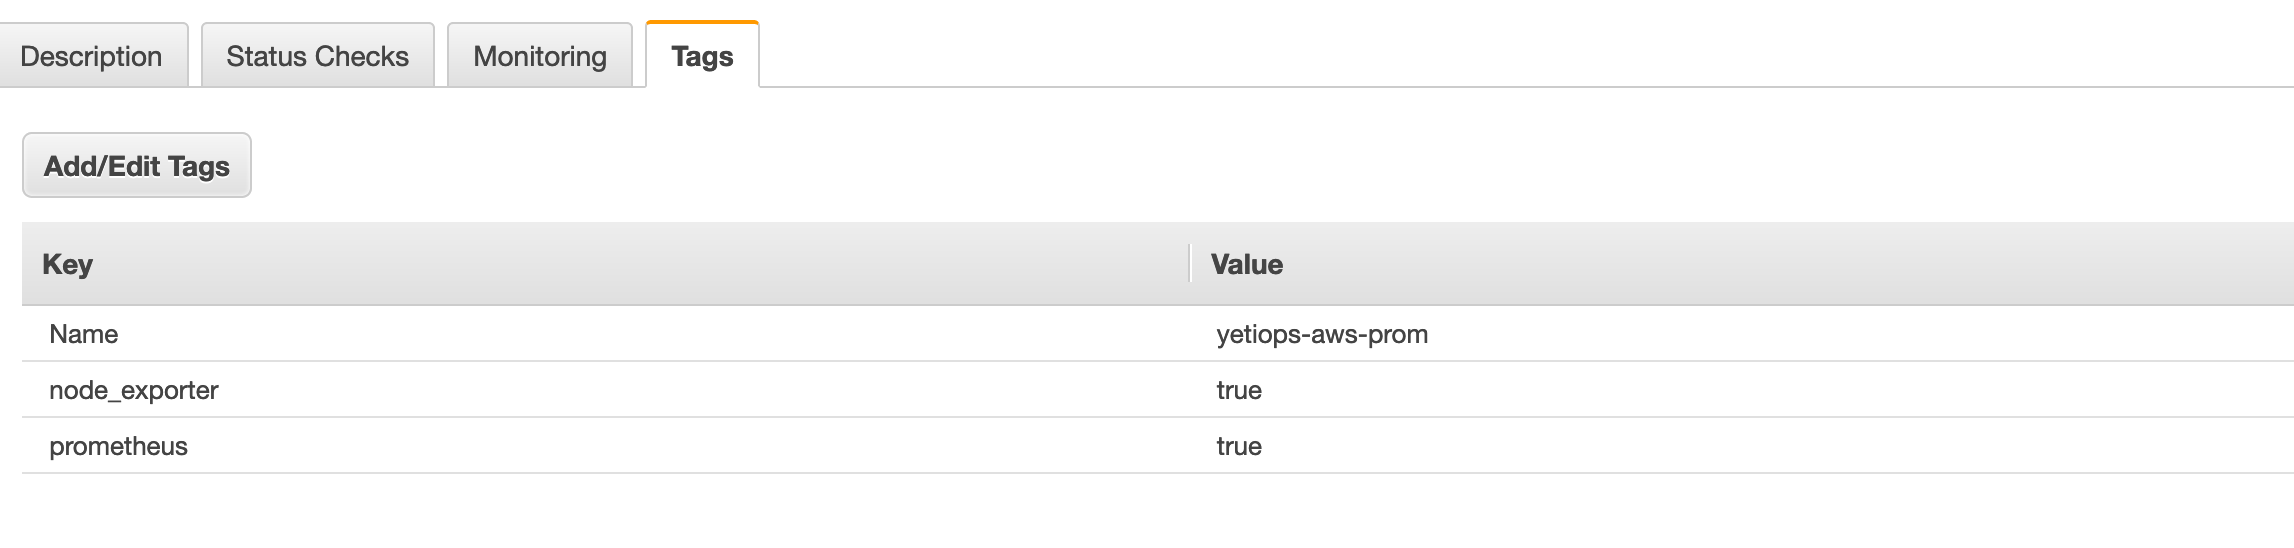
It is worth double checking the tags are configured, as we will need them later when Prometheus wants to discover instances: -
Configure Terraform - Prometheus User
Next, we need to create a user for Prometheus to query the AWS API. To do this, go into the terraform/prometheus-access directory, and create the providers.tf file as we did before: -
# AWS Provider
provider "aws" {
  region  = "eu-west-2"
}
Next, we need to create an IAM user and give it Read-Only access to the EC2 API: -
resource "aws_iam_user" "prometheus-sd-user" {
  name = "prometheus-sd-user"
  path = "/"
}

resource "aws_iam_user_policy_attachment" "prometheus-sd-user-ec2-ro" {
  user = aws_iam_user.prometheus-sd-user.name
  policy_arn = "arn:aws:iam::aws:policy/AmazonEC2ReadOnlyAccess"
}
We could create our own policy if we want to reduce the IAM permissions even further, but the inbuilt AmazonEC2ReadOnlyAccess is sufficient for now. Apply these the same way as before, using terraform apply.
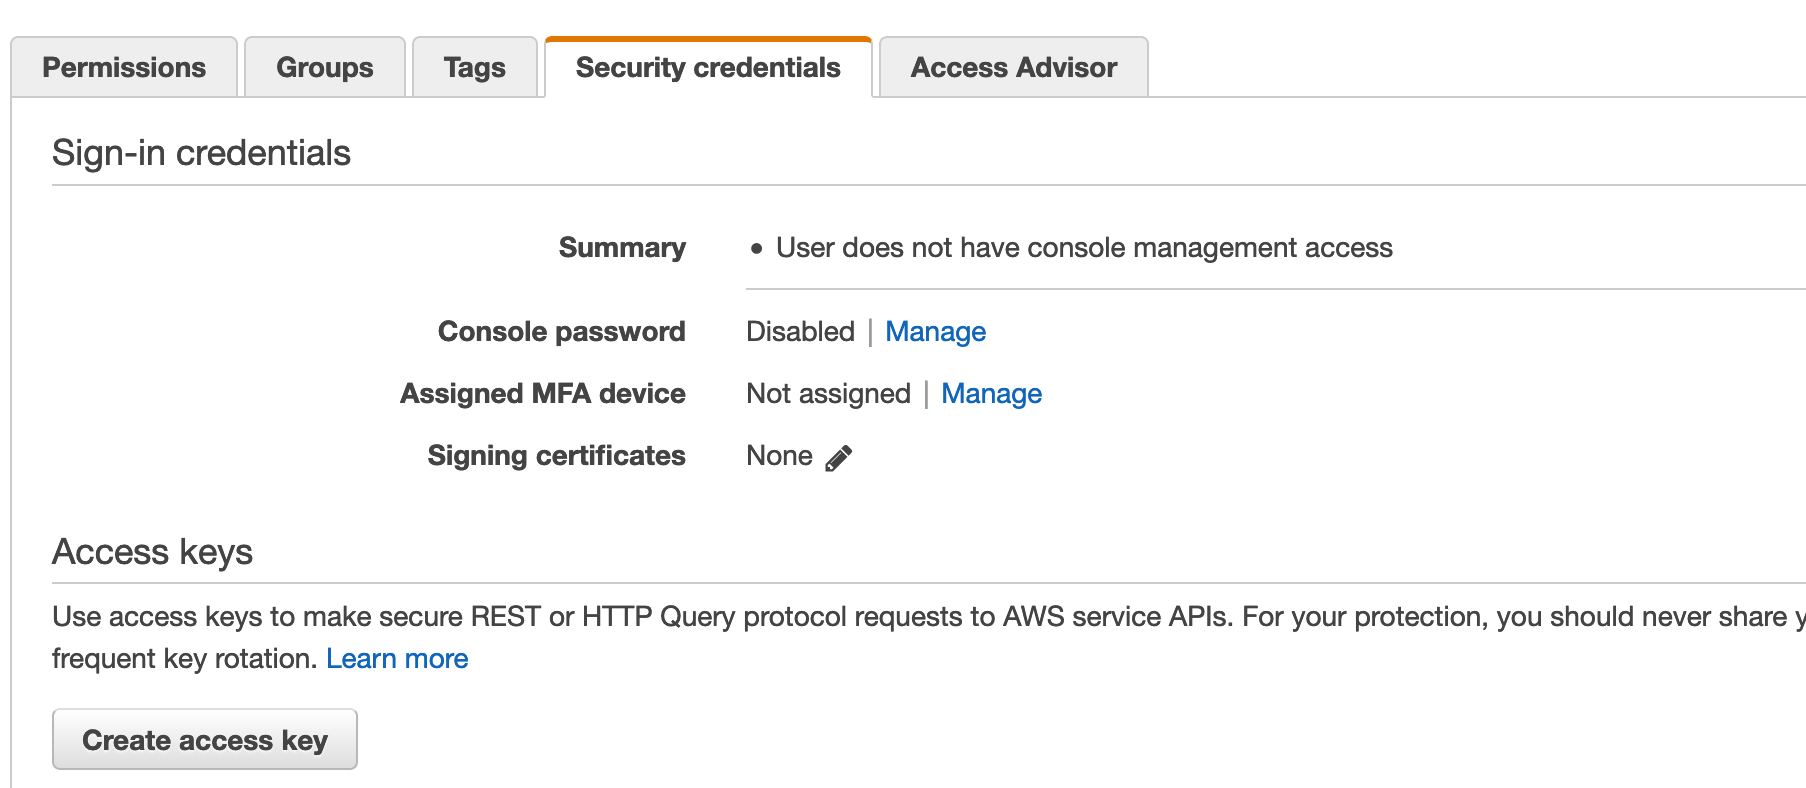
Once this is done, get the AWS Access Key and Secret Key from the AWS Console. Go to the Services menu and then search for IAM: -
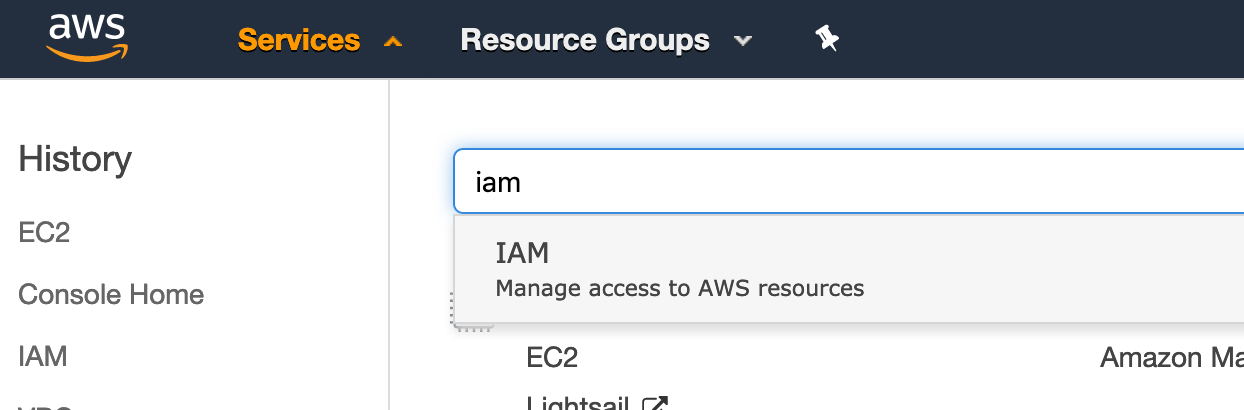 .
.
After this, go to Users, click on the user you created (in our case prometheus-sd-user), and then go to the Security Credentials tab. Click Create Access Key, and save the credentials. We will need them when configuring our Prometheus instance later.
Azure
Cloud Instances within Azure are known as Virtual Machines.
If you do not already have an Azure account, first you’ll need to create a Live account.
Once you have done this, you can then sign in to the Azure Portal. You’ll then need to create an Azure Subscription.
A subscription is your environment within Azure. You can also use it as a billing account, if the billing needs to differ from your primary billing method. It serves as a separation between environments, allowing you to restrict access to production environments, while giving access to pre-production and development environments.
Once you have signed up and created your first subscription, you’ll need to install the Azure CLI tool. Terraform can use the CLI authentication configuration to manage Azure resources.
Installing the Azure CLI
The Azure CLI can be installed via multiple methods. Once you have followed the instructions to install it, you should be able to use the az command: -
$ az

     /\
    /  \    _____   _ _  ___ _
   / /\ \  |_  / | | | \'__/ _\
  / ____ \  / /| |_| | | |  __/
 /_/    \_\/___|\__,_|_|  \___|


Welcome to the cool new Azure CLI!

Use `az --version` to display the current version.
Here are the base commands:

    account             : Manage Azure subscription information.
    acr                 : Manage private registries with Azure Container Registries.
    ad                  : Manage Azure Active Directory Graph entities needed for Role Based Access
                         Control.
[...]
Authenticate the CLI
To authenticate the CLI against Azure, use az login. Depending on whether the machine you run this on is headless or has a GUI, you will be given either of the following: -
Headless
$ az login
To sign in, use a web browser to open the page https://microsoft.com/devicelogin and enter the code $AUTH_CODE to authenticate.
With GUI
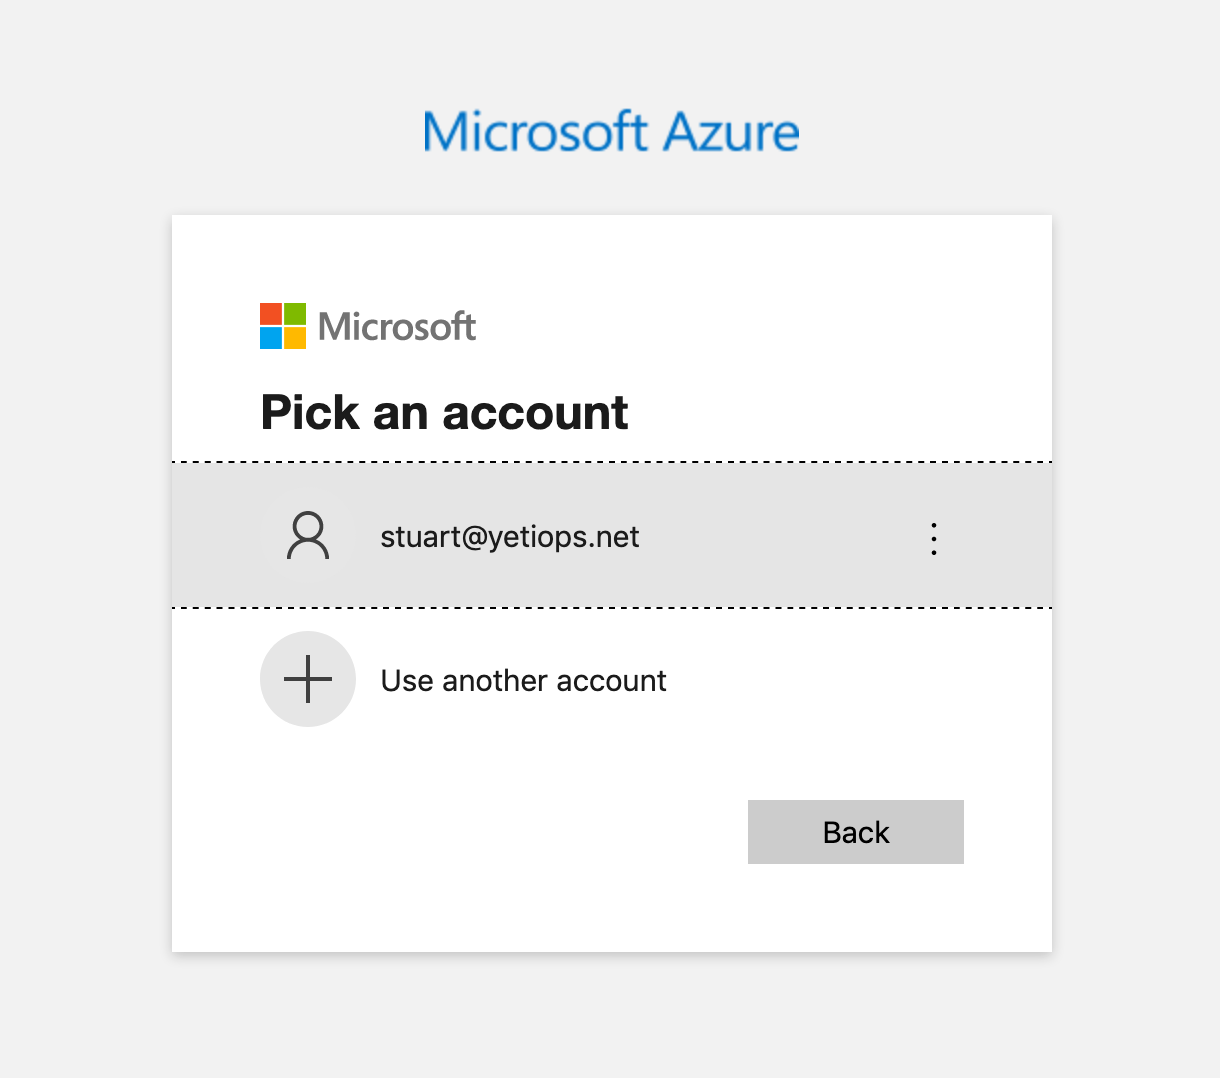
With either of the above, you can login with your Live account. After this, the CLI will be authenticated, producing a list of your subscriptions: -
You have logged in. Now let us find all the subscriptions to which you have access...
[
  {
    "cloudName": "AzureCloud",
    "homeTenantId": "$TENANT_ID",
    "id": "$SUBSCRIPTION_ID",
    "isDefault": true,
    "managedByTenants": [],
    "name": "Free Trial",
    "state": "Enabled",
    "tenantId": "$TENANT_ID",
    "user": {
      "name": "[email protected]",
      "type": "user"
    }
  }
]
You should now be able to use Terraform with Azure.
Configure Terraform - Virtual Machines
Now that we are authenticated with Azure via the az CLI, we can add an Azure section to our terraform/basic-vms/providers.tf file: -
# AWS Provider
provider "aws" {
  region  = "eu-west-2"
}

# Azure Provider
provider "azurerm" {
  subscription_id = "$SUBSCRIPTION_ID"
  features {}
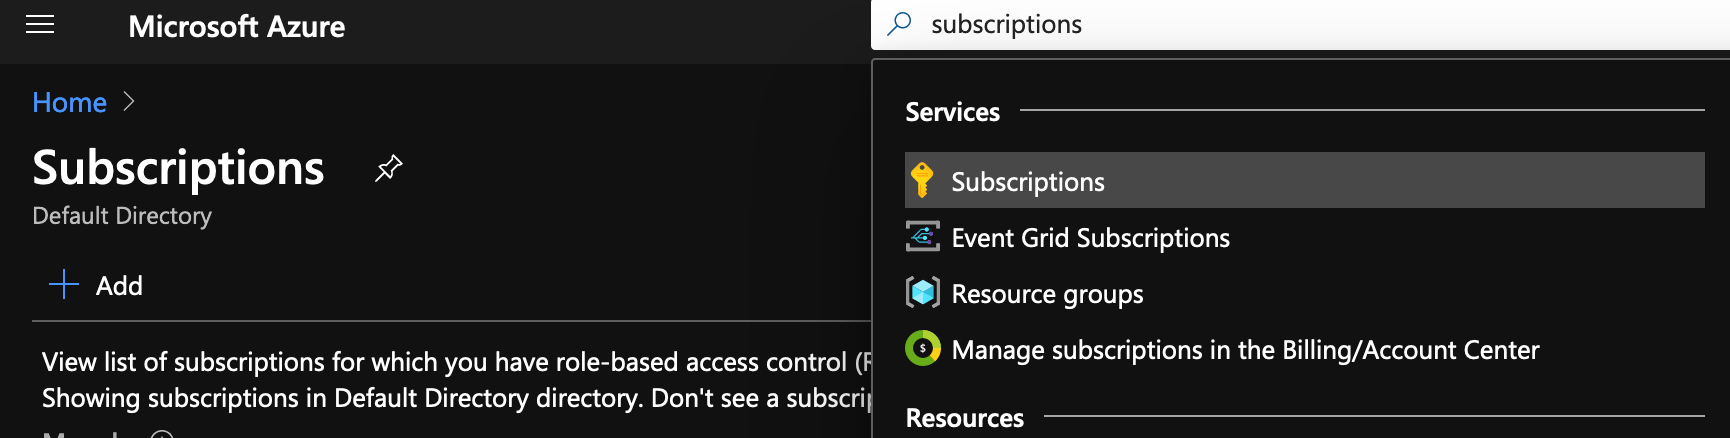
To find the correct subscription ID, use either the output from the az login command, or run az account list: -
$ az account list
[
  {
    "cloudName": "AzureCloud",
    "homeTenantId": "$TENANT_ID",
    "id": "$SUBSCRIPTION_ID",
    "isDefault": true,
    "managedByTenants": [],
    "name": "Free Trial",
    "state": "Enabled",
    "tenantId": "$TENANT_ID",
    "user": {
      "name": "[email protected]",
      "type": "user"
    }
  }
]
Run terraform init to bring in the Azure provider: -
$ terraform init

Initializing the backend...

Initializing provider plugins...
- Checking for available provider plugins...
- Downloading plugin for provider "aws" (hashicorp/aws) 2.67.0...
- Downloading plugin for provider "azurerm" (hashicorp/azurerm) 2.15.0...
- Downloading plugin for provider "template" (hashicorp/template) 2.1.2...

The following providers do not have any version constraints in configuration,
so the latest version was installed.

To prevent automatic upgrades to new major versions that may contain breaking
changes, it is recommended to add version = "..." constraints to the
corresponding provider blocks in configuration, with the constraint strings
suggested below.

* provider.aws: version = "~> 2.67"
* provider.azurerm: version = "~> 2.15"
* provider.template: version = "~> 2.1"

Terraform has been successfully initialized!

You may now begin working with Terraform. Try running "terraform plan" to see
any changes that are required for your infrastructure. All Terraform commands
should now work.

If you ever set or change modules or backend configuration for Terraform,
rerun this command to reinitialize your working directory. If you forget, other
commands will detect it and remind you to do so if necessary.
Define the infrastructure - Virtual Machines
You can now put the infrastructure together to create your first Azure Virtual Machine instance. The below is from the file azure.tf in the terraform/basic-vms directory: -
resource "azurerm_resource_group" "yetiops-azure-prom" {
  name     = "yetiops-azure-prom"
  location = "West Europe"
}


resource "azurerm_virtual_network" "yetiops-azure-prom" {
  name                = "yetiops-azure-prom"
  address_space       = ["10.0.0.0/16"]
  location            = azurerm_resource_group.yetiops-azure-prom.location
  resource_group_name = azurerm_resource_group.yetiops-azure-prom.name
}

resource "azurerm_subnet" "yetiops-azure-prom" {
  name                 = "yetiops-azure-prom-main"
  resource_group_name  = azurerm_resource_group.yetiops-azure-prom.name
  virtual_network_name = azurerm_virtual_network.yetiops-azure-prom.name
  address_prefixes     = [
    "10.0.2.0/24"
  ]
}

resource "azurerm_public_ip" "yetiops-azure-prom-pip" {
  name                = "yetiops-azure-prom-pip"
  resource_group_name = azurerm_resource_group.yetiops-azure-prom.name
  location            = azurerm_resource_group.yetiops-azure-prom.location
  allocation_method   = "Dynamic"
}

resource "azurerm_network_interface" "yetiops-azure-prom" {
  name                = "yetiops-azure-prom-nic"
  location            = azurerm_resource_group.yetiops-azure-prom.location
  resource_group_name = azurerm_resource_group.yetiops-azure-prom.name

  ip_configuration {
    name                          = "yetiops-azure-prom-main"
    subnet_id                     = azurerm_subnet.yetiops-azure-prom.id
    private_ip_address_allocation = "Dynamic"
    public_ip_address_id          = azurerm_public_ip.yetiops-azure-prom-pip.id
  }
}

resource "azurerm_network_security_group" "yetiops-azure-prom" {
  name                = "yetiops-azure-prom"
  location            = azurerm_resource_group.yetiops-azure-prom.location
  resource_group_name = azurerm_resource_group.yetiops-azure-prom.name
  security_rule {
    access                     = "Allow"
    direction                  = "Inbound"
    name                       = "ssh"
    priority                   = 100
    protocol                   = "Tcp"
    source_port_range          = "*"
    source_address_prefixes    = [
      "$MY_PUBLIC_IP"
    ]
    destination_port_range     = "22"
    destination_address_prefix = azurerm_network_interface.yetiops-azure-prom.private_ip_address
  }
  security_rule {
    access                     = "Allow"
    direction                  = "Inbound"
    name                       = "NodeExporter"
    priority                   = 101
    protocol                   = "Tcp"
    source_port_range          = "*"
    source_address_prefixes    = [
      "$MY_PUBLIC_IP"
    ]
    destination_port_range     = "9100"
    destination_address_prefix = azurerm_network_interface.yetiops-azure-prom.private_ip_address
  }
}

resource "azurerm_linux_virtual_machine" "yetiops-azure-prom" {
  name                = "yetiops-azure-prom-machine"
  resource_group_name = azurerm_resource_group.yetiops-azure-prom.name
  location            = azurerm_resource_group.yetiops-azure-prom.location
  size                = "Standard_F2"
  admin_username      = "adminuser"
  custom_data         = base64encode(data.template_cloudinit_config.ubuntu.rendered)

  network_interface_ids = [
    azurerm_network_interface.yetiops-azure-prom.id,
  ]

  admin_ssh_key {
    username   = "adminuser"
    public_key = file("~/.ssh/id_rsa.pub")
  }

  os_disk {
    caching              = "ReadWrite"
    storage_account_type = "Standard_LRS"
  }

  tags = {
    prometheus = "true"
    node_exporter = "true"
    public_ip = "${azurerm_public_ip.yetiops-azure-prom-pip.ip_address}"
  }

  source_image_reference {
    publisher = "Canonical"
    offer     = "UbuntuServer"
    sku       = "18.04-LTS"
    version   = "latest"
  }
}
To summarize what this does: -
- Creates a resource group
- Resource groups are a logical grouping of resources in Azure (e.g. Virtual Machines, firewalls and databases for a single application or project)
- Creates a virtual network and subnet for the Virtual Machine
- Creates a public IP so we can reach the machine externally
- Creates a network interfaces to attach to the Virtual Machine
- Creates a network security group (a firewall) to allow traffic to the virtual machine from my public IP to TCP port 22 (SSH) and TCP port 9100 (Node Exporter)
- Creates a Linux virtual machine of size
Standard_F2(2 CPU cores, 4G of Memory), with some caveats- We can only use RSA keys for SSH
- Ubuntu 20.04 LTS (at the time of writing) is not available on Azure
In this, we also need to Base64-encode the cloud-config, otherwise the machine will not be built correctly. Because we use common configuration though, we can use the same cloud-config file as we did for the AWS EC2.
You may also notice that we place the public IP of the instance in a tag on the machine. I will explain why in the Prometheus configuration section.
Build the infrastructure - Virtual Machines
We can now apply our configuration, and see if it builds an Azure Virtual Machine. This time, rather than running a plan first, we’ll use terraform apply, as this shows a plan before you apply: -
$ terraform apply
data.template_file.ubuntu: Refreshing state...
data.template_cloudinit_config.ubuntu: Refreshing state...
data.aws_vpc.default: Refreshing state...
data.aws_ami.ubuntu: Refreshing state...
aws_key_pair.yetiops-aws-prom: Refreshing state... [id=yetiops-aws-prom]
aws_security_group.yetiops-aws-prom: Refreshing state... [id=sg-04e928f187b556e09]
aws_security_group_rule.ingress_ssh_in: Refreshing state... [id=sgrule-703042014]
aws_security_group_rule.egress_allow_all: Refreshing state... [id=sgrule-2079816963]
aws_security_group_rule.ingress_node_exporter_in: Refreshing state... [id=sgrule-147676407]
aws_instance.yetiops-aws-prom: Refreshing state... [id=i-04cb1d016718cef07]

An execution plan has been generated and is shown below.
Resource actions are indicated with the following symbols:
  + create

Terraform will perform the following actions:

  # azurerm_linux_virtual_machine.yetiops-azure-prom will be created
  + resource "azurerm_linux_virtual_machine" "yetiops-azure-prom" {
      + admin_username                  = "adminuser"
      + allow_extension_operations      = true
      + computer_name                   = (known after apply)
      + custom_data                     = (sensitive value)
      + disable_password_authentication = true
      + id                              = (known after apply)
      + location                        = "westeurope"
      + max_bid_price                   = -1
      + name                            = "yetiops-azure-prom-machine"
      + network_interface_ids           = (known after apply)
      + priority                        = "Regular"
      + private_ip_address              = (known after apply)
      + private_ip_addresses            = (known after apply)
      + provision_vm_agent              = true
      + public_ip_address               = (known after apply)
      + public_ip_addresses             = (known after apply)
      + resource_group_name             = "yetiops-azure-prom"
      + size                            = "Standard_F2"
      + tags                            = (known after apply)
      + virtual_machine_id              = (known after apply)
      + zone                            = (known after apply)

      + admin_ssh_key {
          + public_key = "$SSH_RSA_KEY"
          + username   = "adminuser"
        }

      + os_disk {
          + caching                   = "ReadWrite"
          + disk_size_gb              = (known after apply)
          + name                      = (known after apply)
          + storage_account_type      = "Standard_LRS"
          + write_accelerator_enabled = false
        }

      + source_image_reference {
          + offer     = "UbuntuServer"
          + publisher = "Canonical"
          + sku       = "18.04-LTS"
          + version   = "latest"
        }
    }

  # azurerm_network_interface.yetiops-azure-prom will be created
  + resource "azurerm_network_interface" "yetiops-azure-prom" {
      + applied_dns_servers           = (known after apply)
      + dns_servers                   = (known after apply)
      + enable_accelerated_networking = false
      + enable_ip_forwarding          = false
      + id                            = (known after apply)
      + internal_dns_name_label       = (known after apply)
      + internal_domain_name_suffix   = (known after apply)
      + location                      = "westeurope"
      + mac_address                   = (known after apply)
      + name                          = "yetiops-azure-prom-nic"
      + private_ip_address            = (known after apply)
      + private_ip_addresses          = (known after apply)
      + resource_group_name           = "yetiops-azure-prom"
      + virtual_machine_id            = (known after apply)

      + ip_configuration {
          + name                          = "yetiops-azure-prom-main"
          + primary                       = (known after apply)
          + private_ip_address            = (known after apply)
          + private_ip_address_allocation = "dynamic"
          + private_ip_address_version    = "IPv4"
          + public_ip_address_id          = (known after apply)
          + subnet_id                     = (known after apply)
        }
    }

  # azurerm_network_security_group.yetiops-azure-prom will be created
  + resource "azurerm_network_security_group" "yetiops-azure-prom" {
      + id                  = (known after apply)
      + location            = "westeurope"
      + name                = "yetiops-azure-prom"
      + resource_group_name = "yetiops-azure-prom"
      + security_rule       = [
          + {
              + access                                     = "Allow"
              + description                                = ""
              + destination_address_prefix                 = (known after apply)
              + destination_address_prefixes               = []
              + destination_application_security_group_ids = []
              + destination_port_range                     = "22"
              + destination_port_ranges                    = []
              + direction                                  = "Inbound"
              + name                                       = "ssh"
              + priority                                   = 100
              + protocol                                   = "Tcp"
              + source_address_prefix                      = ""
              + source_address_prefixes                    = [
                  + "$MY_PUBLIC_IP",
                ]
              + source_application_security_group_ids      = []
              + source_port_range                          = "*"
              + source_port_ranges                         = []
            },
          + {
              + access                                     = "Allow"
              + description                                = ""
              + destination_address_prefix                 = (known after apply)
              + destination_address_prefixes               = []
              + destination_application_security_group_ids = []
              + destination_port_range                     = "9100"
              + destination_port_ranges                    = []
              + direction                                  = "Inbound"
              + name                                       = "NodeExporter"
              + priority                                   = 101
              + protocol                                   = "Tcp"
              + source_address_prefix                      = ""
              + source_address_prefixes                    = [
                  + "$MY_PUBLIC_IP",
                ]
              + source_application_security_group_ids      = []
              + source_port_range                          = "*"
              + source_port_ranges                         = []
            },
        ]
    }

  # azurerm_public_ip.yetiops-azure-prom-pip will be created
  + resource "azurerm_public_ip" "yetiops-azure-prom-pip" {
      + allocation_method       = "Dynamic"
      + fqdn                    = (known after apply)
      + id                      = (known after apply)
      + idle_timeout_in_minutes = 4
      + ip_address              = (known after apply)
      + ip_version              = "IPv4"
      + location                = "westeurope"
      + name                    = "yetiops-azure-prom-pip"
      + resource_group_name     = "yetiops-azure-prom"
      + sku                     = "Basic"
    }

  # azurerm_resource_group.yetiops-azure-prom will be created
  + resource "azurerm_resource_group" "yetiops-azure-prom" {
      + id       = (known after apply)
      + location = "westeurope"
      + name     = "yetiops-azure-prom"
    }

  # azurerm_subnet.yetiops-azure-prom will be created
  + resource "azurerm_subnet" "yetiops-azure-prom" {
      + address_prefix                                 = (known after apply)
      + address_prefixes                               = [
          + "10.0.2.0/24",
        ]
      + enforce_private_link_endpoint_network_policies = false
      + enforce_private_link_service_network_policies  = false
      + id                                             = (known after apply)
      + name                                           = "yetiops-azure-prom-main"
      + resource_group_name                            = "yetiops-azure-prom"
      + virtual_network_name                           = "yetiops-azure-prom"
    }

  # azurerm_virtual_network.yetiops-azure-prom will be created
  + resource "azurerm_virtual_network" "yetiops-azure-prom" {
      + address_space       = [
          + "10.0.0.0/16",
        ]
      + guid                = (known after apply)
      + id                  = (known after apply)
      + location            = "westeurope"
      + name                = "yetiops-azure-prom"
      + resource_group_name = "yetiops-azure-prom"
      + subnet              = (known after apply)
    }

Plan: 7 to add, 0 to change, 0 to destroy.

Do you want to perform these actions?
  Terraform will perform the actions described above.
  Only 'yes' will be accepted to approve.

  Enter a value: yes

azurerm_resource_group.yetiops-azure-prom: Creating...
azurerm_resource_group.yetiops-azure-prom: Creation complete after 1s [id=/subscriptions/$SUBSCRIPTION_ID/resourceGroups/yetiops-azure-prom]
azurerm_virtual_network.yetiops-azure-prom: Creating...
azurerm_public_ip.yetiops-azure-prom-pip: Creating...
azurerm_public_ip.yetiops-azure-prom-pip: Creation complete after 1s [id=/subscriptions/$SUBSCRIPTION_ID/resourceGroups/yetiops-azure-prom/providers/Microsoft.Network/publicIPAddresses/yetiops-azure-prom-pip]
azurerm_virtual_network.yetiops-azure-prom: Still creating... [10s elapsed]
azurerm_virtual_network.yetiops-azure-prom: Creation complete after 12s [id=/subscriptions/$SUBSCRIPTION_ID/resourceGroups/yetiops-azure-prom/providers/Microsoft.Network/virtualNetworks/yetiops-azure-prom]
azurerm_subnet.yetiops-azure-prom: Creating...
azurerm_subnet.yetiops-azure-prom: Creation complete after 0s [id=/subscriptions/$SUBSCRIPTION_ID/resourceGroups/yetiops-azure-prom/providers/Microsoft.Network/virtualNetworks/yetiops-azure-prom/subnets/yetiops-azure-prom-main]
azurerm_network_interface.yetiops-azure-prom: Creating...
azurerm_network_interface.yetiops-azure-prom: Creation complete after 2s [id=/subscriptions/$SUBSCRIPTION_ID/resourceGroups/yetiops-azure-prom/providers/Microsoft.Network/networkInterfaces/yetiops-azure-prom-nic]
azurerm_network_security_group.yetiops-azure-prom: Creating...
azurerm_linux_virtual_machine.yetiops-azure-prom: Creating...
azurerm_network_security_group.yetiops-azure-prom: Creation complete after 1s [id=/subscriptions/$SUBSCRIPTION_ID/resourceGroups/yetiops-azure-prom/providers/Microsoft.Network/networkSecurityGroups/yetiops-azure-prom]
azurerm_linux_virtual_machine.yetiops-azure-prom: Still creating... [10s elapsed]
azurerm_linux_virtual_machine.yetiops-azure-prom: Still creating... [20s elapsed]
azurerm_linux_virtual_machine.yetiops-azure-prom: Still creating... [30s elapsed]
azurerm_linux_virtual_machine.yetiops-azure-prom: Still creating... [40s elapsed]
azurerm_linux_virtual_machine.yetiops-azure-prom: Still creating... [50s elapsed]
azurerm_linux_virtual_machine.yetiops-azure-prom: Still creating... [1m0s elapsed]
azurerm_linux_virtual_machine.yetiops-azure-prom: Still creating... [1m10s elapsed]
azurerm_linux_virtual_machine.yetiops-azure-prom: Still creating... [1m20s elapsed]
azurerm_linux_virtual_machine.yetiops-azure-prom: Still creating... [1m30s elapsed]
azurerm_linux_virtual_machine.yetiops-azure-prom: Creation complete after 1m37s [id=/subscriptions/$SUBSCRIPTION_ID/resourceGroups/yetiops-azure-prom/providers/Microsoft.Compute/virtualMachines/yetiops-azure-prom-machine]

Apply complete! Resources: 7 added, 0 changed, 0 destroyed.
We can double check that Terraform is managing these resources now with terraform state list: -
$ terraform state list
data.aws_ami.ubuntu
data.aws_vpc.default
data.template_cloudinit_config.ubuntu
data.template_file.ubuntu
aws_instance.yetiops-aws-prom
aws_key_pair.yetiops-aws-prom
aws_security_group.yetiops-aws-prom
aws_security_group_rule.egress_allow_all
aws_security_group_rule.ingress_node_exporter_in
aws_security_group_rule.ingress_ssh_in
azurerm_linux_virtual_machine.yetiops-azure-prom
azurerm_network_interface.yetiops-azure-prom
azurerm_network_security_group.yetiops-azure-prom
azurerm_public_ip.yetiops-azure-prom-pip
azurerm_resource_group.yetiops-azure-prom
azurerm_subnet.yetiops-azure-prom
azurerm_virtual_network.yetiops-azure-prom
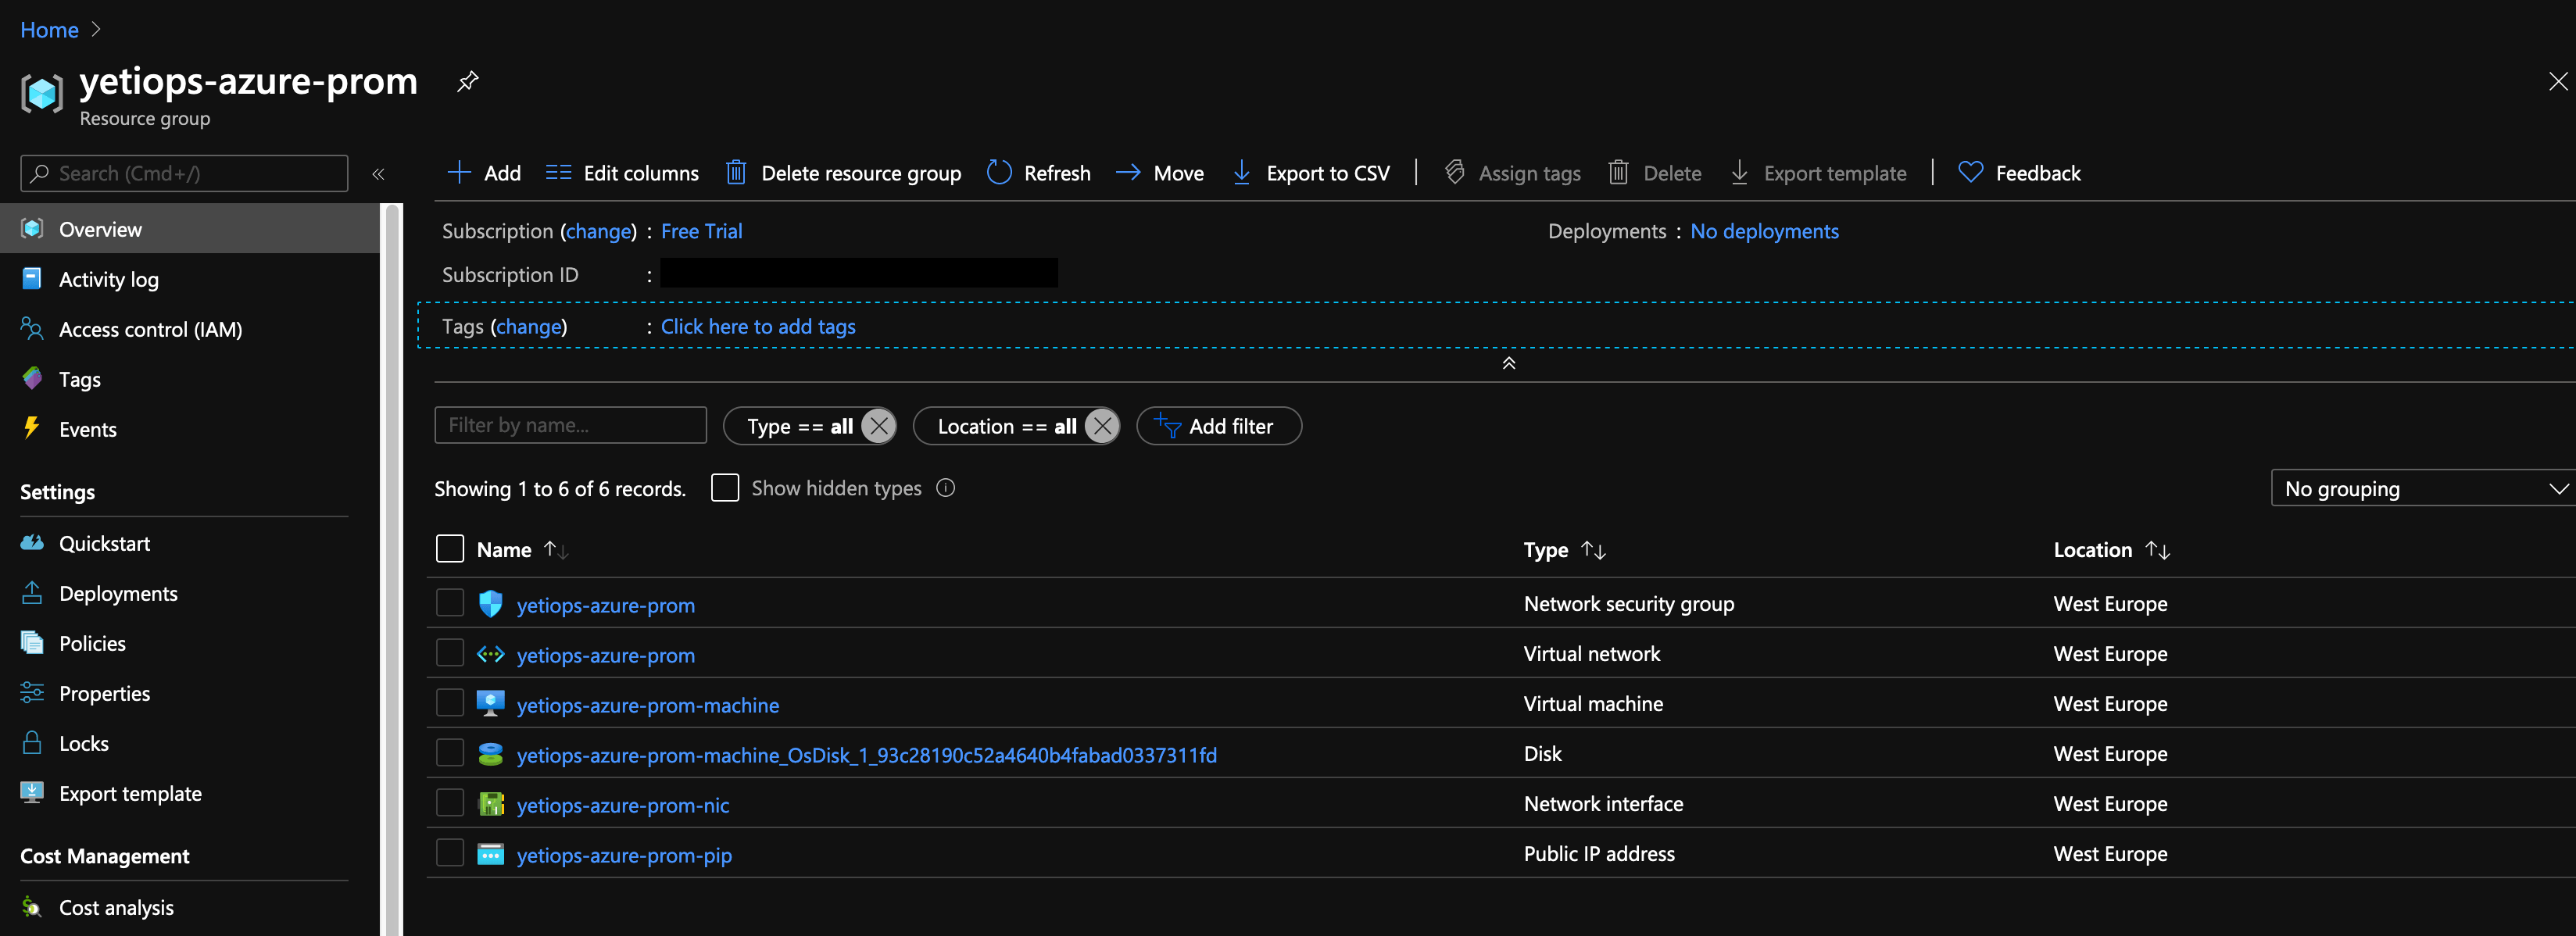
We can check to see if the instance and other resources are in the Azure Portal: -
Now lets try SSH: -
$ ssh adminuser@$AZURE_VM_IP
Welcome to Ubuntu 18.04.4 LTS (GNU/Linux 5.3.0-1028-azure x86_64)

 * Documentation:  https://help.ubuntu.com
 * Management:     https://landscape.canonical.com
 * Support:        https://ubuntu.com/advantage

  System information as of Sat Jun 20 17:37:46 UTC 2020

  System load:  0.04              Processes:           119
  Usage of /:   4.9% of 28.90GB   Users logged in:     0
  Memory usage: 7%                IP address for eth0: 10.0.2.4
  Swap usage:   0%


9 packages can be updated.
2 updates are security updates.


The programs included with the Ubuntu system are free software;
the exact distribution terms for each program are described in the
individual files in /usr/share/doc/*/copyright.

Ubuntu comes with ABSOLUTELY NO WARRANTY, to the extent permitted by
applicable law.

To run a command as administrator (user "root"), use "sudo <command>".
See "man sudo_root" for details.

adminuser@yetiops-azure-prom-machine:~$  ps aux | grep -i node
prometh+   2285  0.0  0.2 242556 10928 ?        Ssl  17:30   0:00 /usr/bin/prometheus-node-exporter --collector.diskstats.ignored-devices=^(ram|loop|fd|(h|s|v|xv)d[a-z]|nvmed+nd+p)d+$ --collector.filesystem.ignored-mount-points=^/(sys|proc|dev|run)($|/) --collector.netdev.ignored-devices=^lo$ --collector.textfile.directory=/var/lib/prometheus/node-exporter
adminus+   3071  0.0  0.0  14852  1060 pts/0    S+   17:38   0:00 grep --color=auto -i node
Configure Terraform - Prometheus User
Next, we need to create a user that Prometheus will use to query the Azure API. To do this, go into the terraform/prometheus-access directory, and create the providers.tf file as we did before: -
# AWS Provider
provider "aws" {
  region  = "eu-west-2"
}

# Azure Provider
provider "azurerm" {
  subscription_id = "$SUBSCRIPTION_ID"
  features {}
}

provider "azuread" {
}
One point to note with Azure is that all resources are created using the azurerm provider. However for user access, you need to use the azuread provider instead. This is because Azure Active Directory can be used separately from Azure resources (for example, running Azure AD with Office 365), using a different API altogether.
The below file configures the user for Prometheus access: -
data "azurerm_subscription" "current" {
}

resource "azuread_application" "prometheus-sd-user" {
  name                              = "prometheus-sd-user"
  oauth2_allow_implicit_flow        = true
  available_to_other_tenants        = false
  type                              = "webapp/api"
}

resource "azuread_service_principal" "prometheus-sd-user" {
  application_id                    = azuread_application.prometheus-sd-user.application_id
  app_role_assignment_required      = false
}

resource "azurerm_role_assignment" "prometheus-sd-user-reader" {
  scope                = data.azurerm_subscription.current.id
  principal_id         = azuread_service_principal.prometheus-sd-user.id
  role_definition_name =  "Reader"
}
In the above, we first get our current Azure subscription ID. We then create an Azure Application. The Azure Application is equivalent to a service account.
We create a service principal to attach to the service account, so that we can assign roles to this service account.
Finally, we assign the Azure Reader role, scoped to the current subscription. Do not use this role in production, instead try and use one has less access (or create your own).
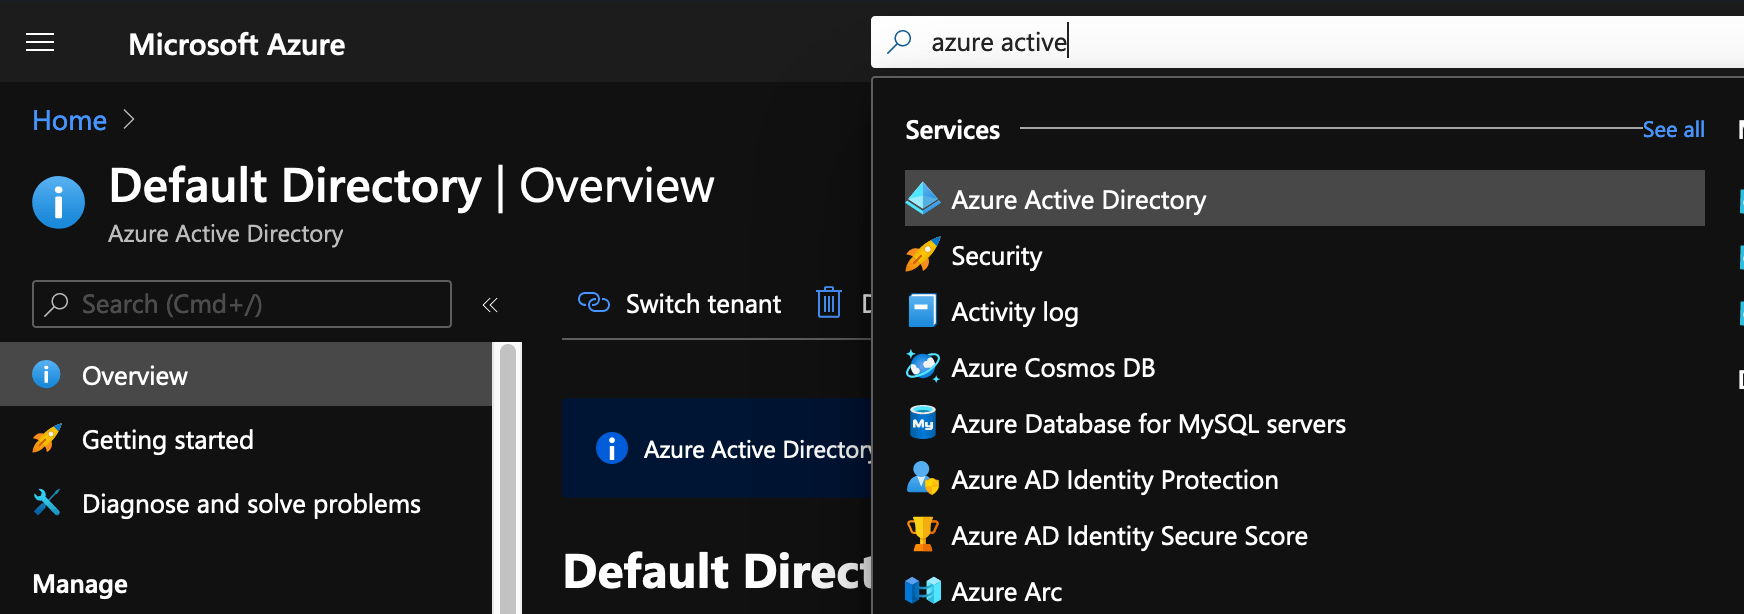
Once this is done, you will need to generate a Client Secret for use with Prometheus. Go to the Azure Portal, and find Azure Active Directory: -
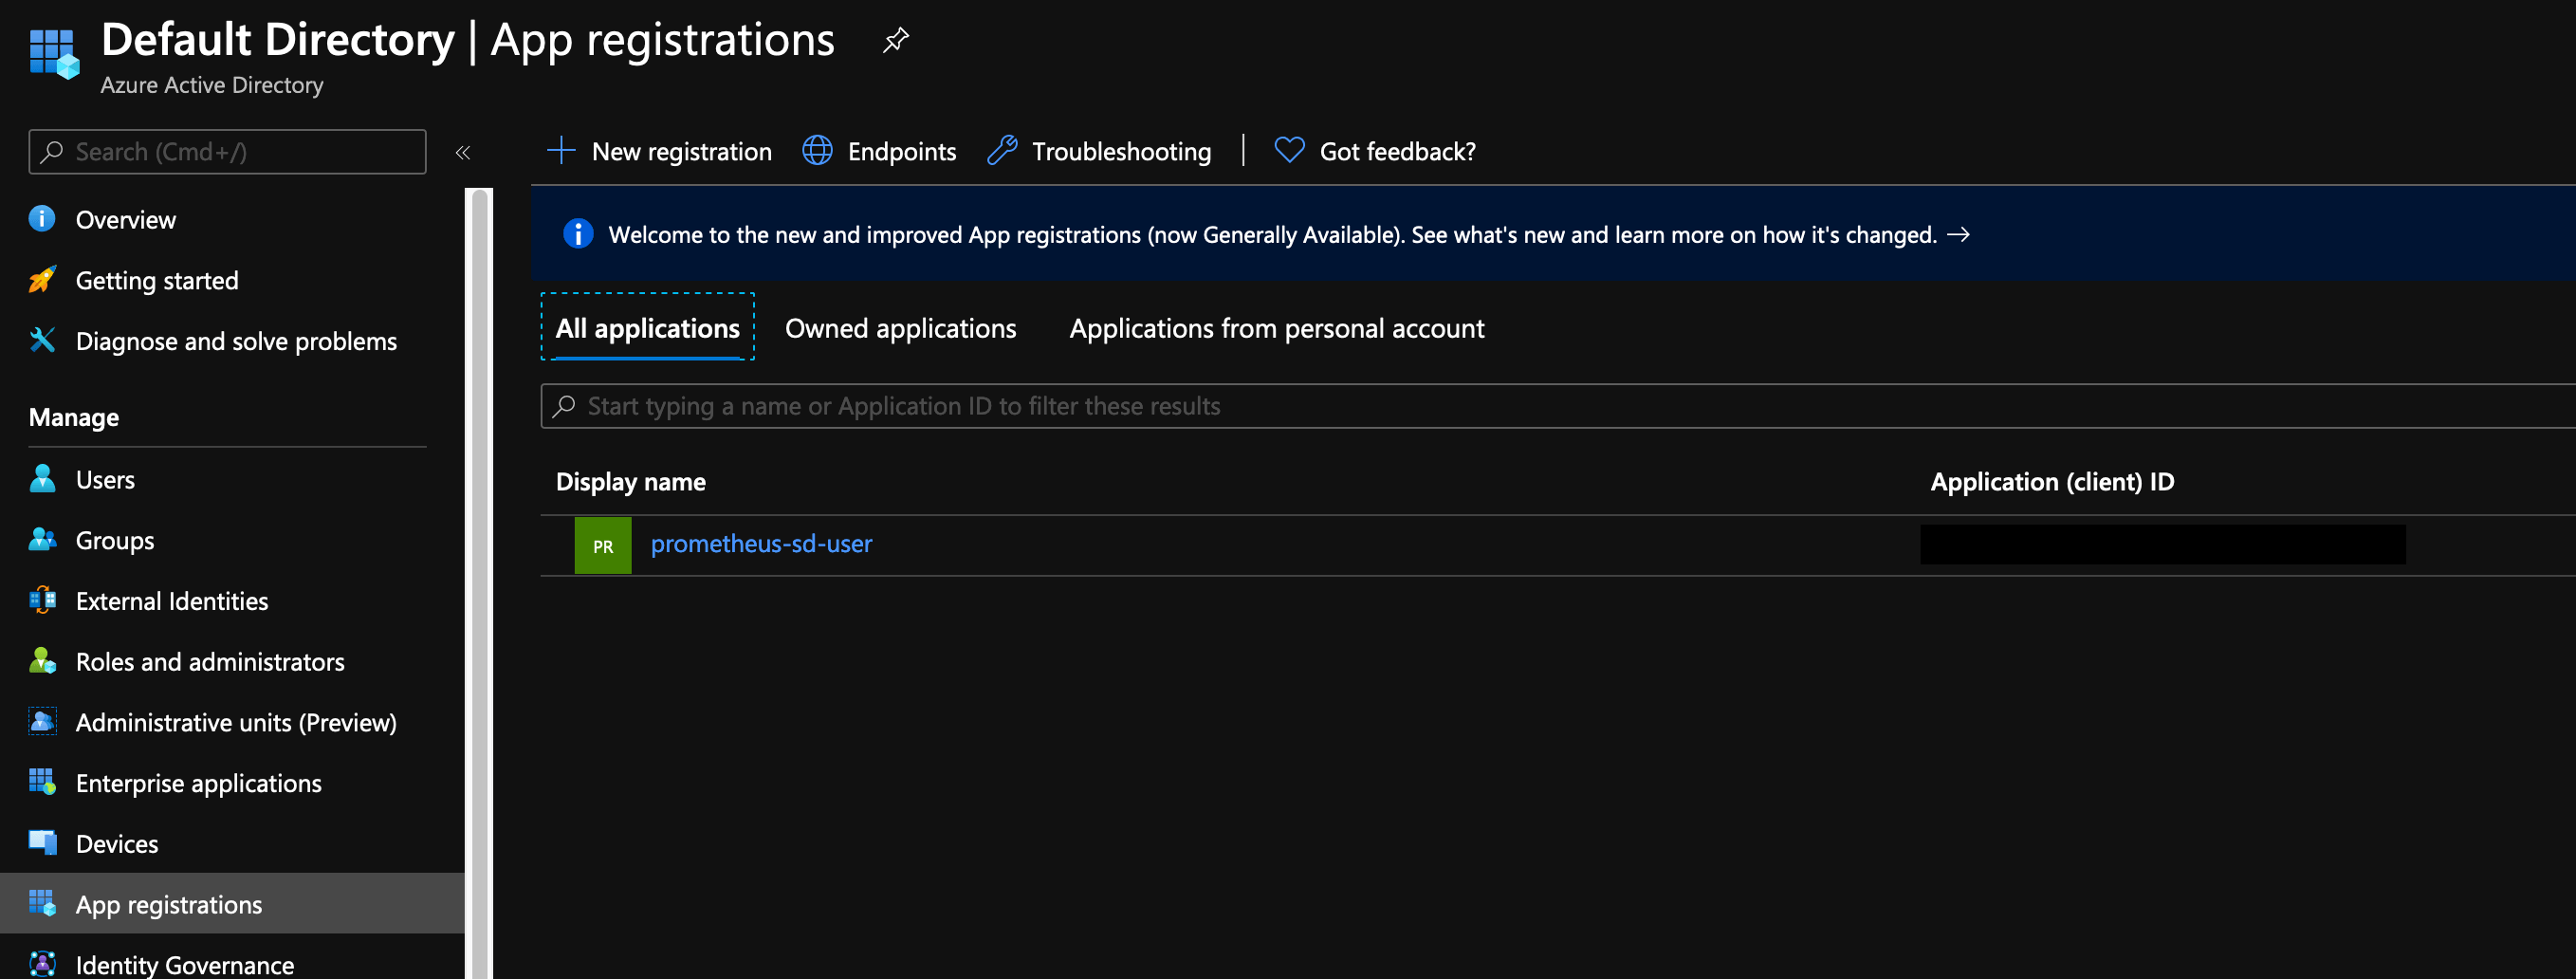
Go to App Registrations, at which point you should see your Prometheus user: -
Get the Client ID from here, and then click on the user. From here, you need to go to Certificates and Secrets, and then New Client Secret: -
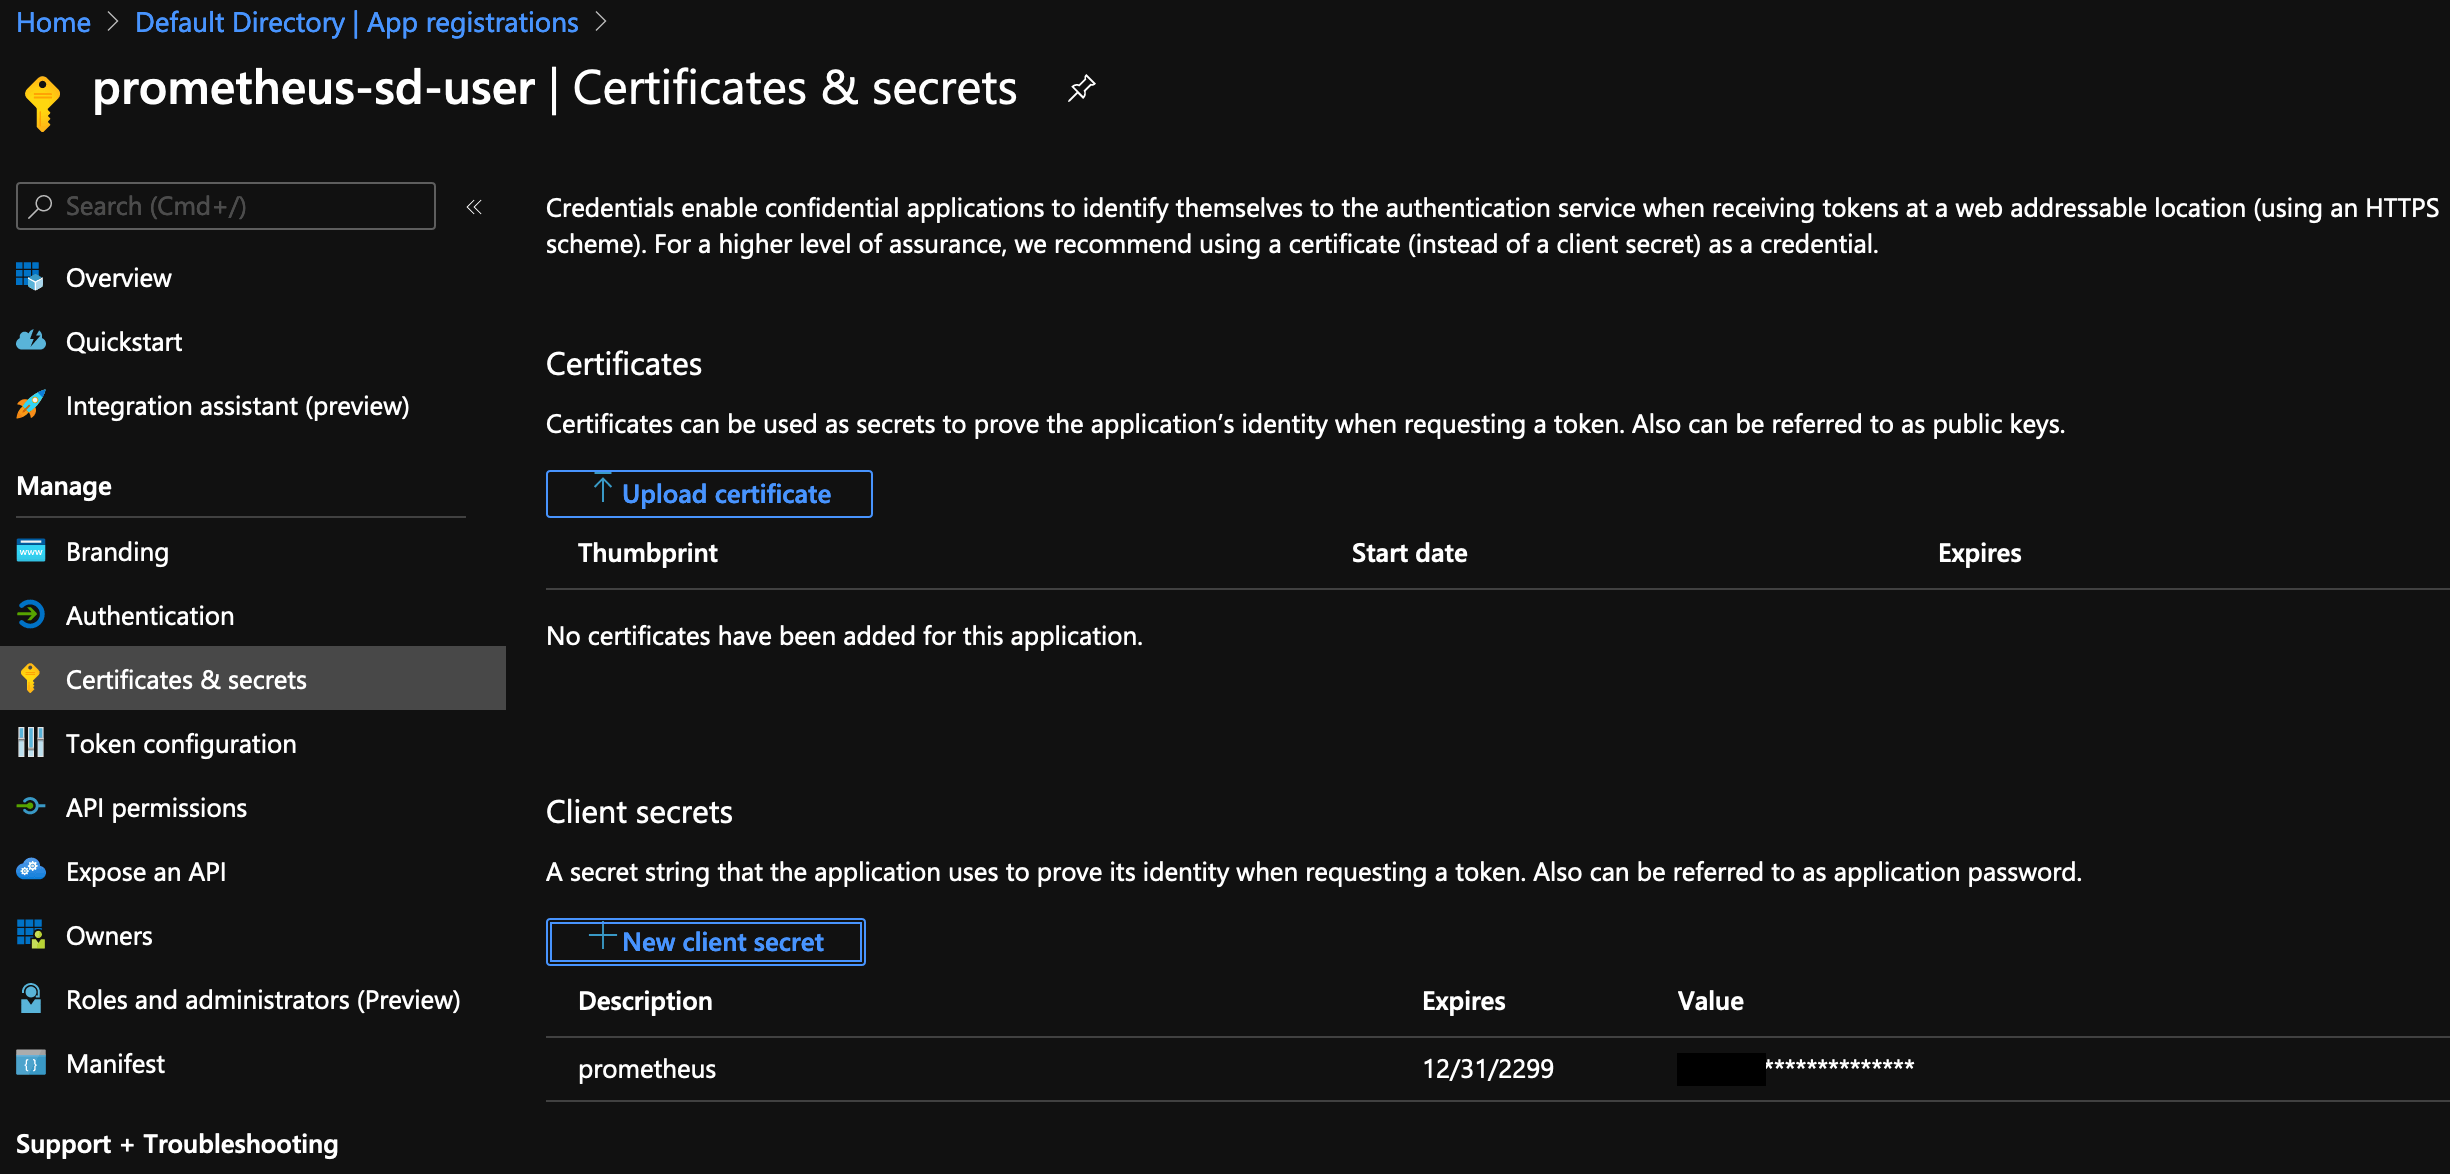
When you create a secret, you can choose between expiring in a year, two years or never. Choose what works for your environment, bearing in mind that if you choose a year or two years, you will need to renew this at a later date. If you forget to renew it, your monitoring for Azure resources will fail.
Save these details, ready for configuring Prometheus later.
Google Cloud Platform
Cloud instances within the Google Cloud Platform are known as Compute Instances.
To start using Google Cloud Platform, first you need a Google account. If you have a Google account already (i.e. for Gmail, Youtube or otherwise) you can use this account, or you can create one solely for demo purposes.
Once you have a Google account, you can then sign in to the Google Cloud Console. When you first access the Console, you’ll need to go through the steps of activating the Google Cloud Platform for your account, and then you’ll need to create a project: -
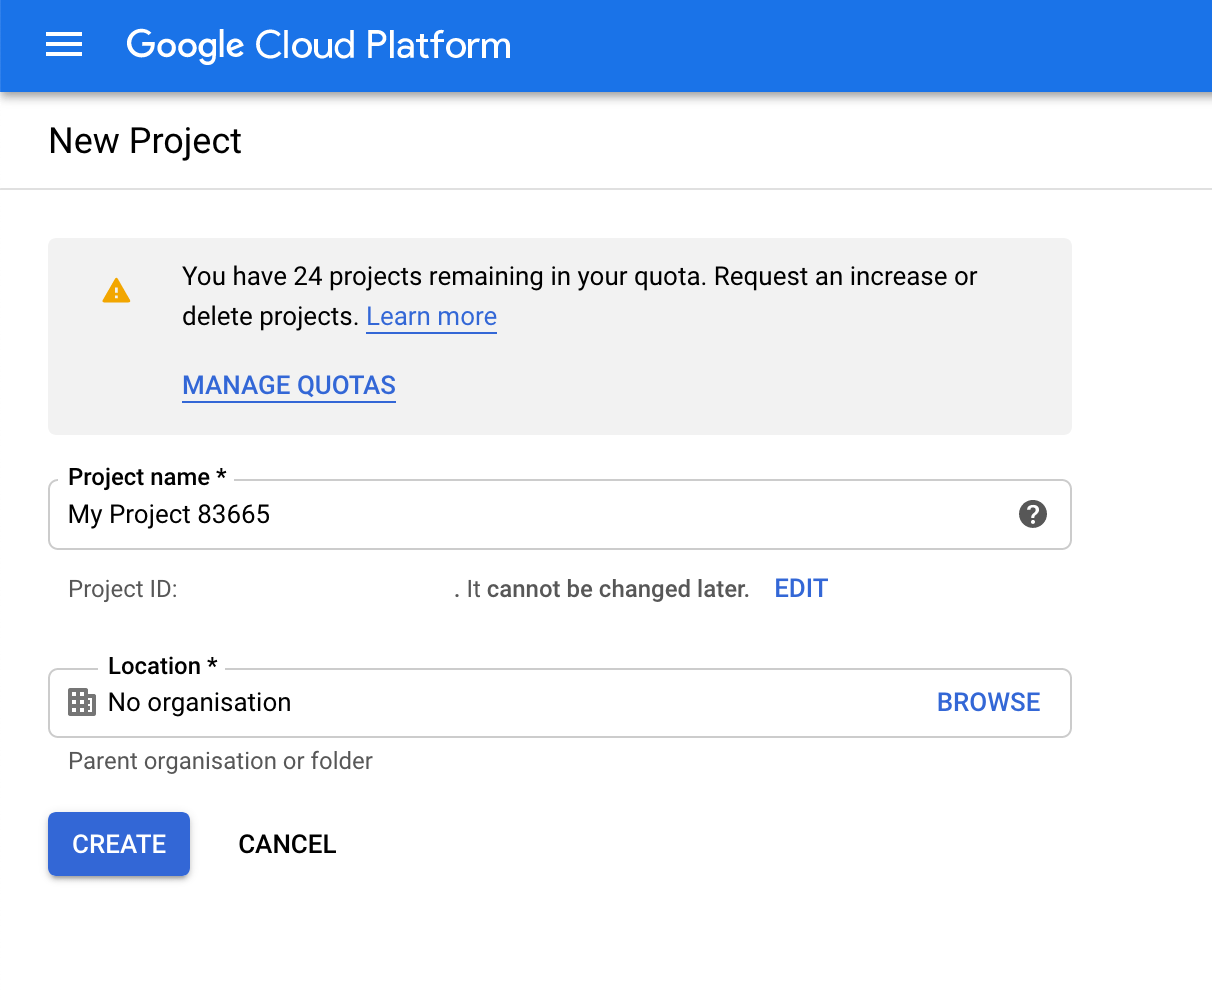
Similar to Azure Subscriptions, projects are used for billing purposes and to separate your environments. You can use this to provide fine-grained access controls to users who should be able to access pre-production, but not production.
After this, you will need to install the Google Cloud SDK
Install the SDK
To install the SDK on your chosen platform, you can follow the instructions here. Once installed, you can run gcloud version to make sure it works: -
$ gcloud version
Google Cloud SDK 294.0.0
bq 2.0.57
core 2020.05.21
gsutil 4.51
You then need to authenticate the CLI with your account. This is done using gcloud init: -
$ gcloud init
To continue, you must log in. Would you like to log in (Y/n)? Y
This command will open your web browser to the Google Account login page. Alternatively if you run it with --console-only, you can authenticate a headless machine by using a web browser on another machine.
It will then ask you which project and default region you would like to use: -
Pick cloud project to use:
 [1] [my-project-1]
 [2] [my-project-2]
 ...
 Please enter your numeric choice: 1

Which compute zone would you like to use as project default?
 [1] [asia-east1-a]
 [2] [asia-east1-b]
 ...
 [14] Do not use default zone
 Please enter your numeric choice: 2
After this, you should now be able to use the gcloud CLI with your account. We can now use Terraform with Google Cloud.
Configure Terraform - Compute Instances
Now that we are authenticated with Google Cloud Platform via the gcloud CLI, we can add a Google Cloud Platform section to our terraform/basic-vms/providers.tf file: -
# AWS Provider
provider "aws" {
  region  = "eu-west-2"
}

# Azure Provider
provider "azurerm" {
  subscription_id = "$SUBSCRIPTION_ID"
  features {}

# Google Cloud Platform Provider
provider "google" {
  credentials = file("~/.gcloud/account.json")
  project = "yetiops-blog"
  region  = "europe-west3"
  zone    = "europe-west3-c"
}
The ~/.gcloud/account.json file should have been created by the gcloud CLI. If it has not, check your .gcloud directory to see where this resides.
Run terraform init to bring in the Google Cloud Platform provider: -
$ terraform init
Initializing the backend...

Initializing provider plugins...
- Checking for available provider plugins...
- Downloading plugin for provider "azurerm" (hashicorp/azurerm) 2.15.0...
- Downloading plugin for provider "google" (hashicorp/google) 3.26.0...
- Downloading plugin for provider "template" (hashicorp/template) 2.1.2...
- Downloading plugin for provider "aws" (hashicorp/aws) 2.67.0...

The following providers do not have any version constraints in configuration,
so the latest version was installed.

To prevent automatic upgrades to new major versions that may contain breaking
changes, it is recommended to add version = "..." constraints to the
corresponding provider blocks in configuration, with the constraint strings
suggested below.

* provider.aws: version = "~> 2.67"
* provider.azurerm: version = "~> 2.15"
* provider.google: version = "~> 3.26"
* provider.template: version = "~> 2.1"

Terraform has been successfully initialized!

You may now begin working with Terraform. Try running "terraform plan" to see
any changes that are required for your infrastructure. All Terraform commands
should now work.

If you ever set or change modules or backend configuration for Terraform,
rerun this command to reinitialize your working directory. If you forget, other
commands will detect it and remind you to do so if necessary.
Define the infrastructure - Compute Instances
You can now configure your first Google Cloud Platform Compute Instance. The below is in the file gcp.tf in the terraform/basic-vms directory: -
# GCP VM

resource "google_compute_instance" "yetiops-gcp-prom" {
  name         = "yetiops-gcp-prom"
  machine_type = "f1-micro"

  boot_disk {
    initialize_params {
      image = "ubuntu-2004-lts"
    }
  }

  network_interface {
    network       = google_compute_network.yetiops-gcp-prom-net.name
    access_config {
    }
  }

  labels = {
    "prometheus" = "true"
    "node_exporter" = "true"
  }

  metadata = {
    enable-oslogin = "TRUE"
    user-data = data.template_cloudinit_config.ubuntu.rendered
  }
}

# GCP Firewall

resource "google_compute_firewall" "yetiops-gcp-prom-fw-icmp" {
  name    = "yetiops-gcp-prom-fw-icmp"
  network = google_compute_network.yetiops-gcp-prom-net.name

  allow {
    protocol = "icmp"
  }

}

resource "google_compute_firewall" "yetiops-gcp-prom-fw-ssh" {
  name    = "yetiops-gcp-prom-ssh"
  network = google_compute_network.yetiops-gcp-prom-net.name
  direction = "INGRESS"
  source_ranges = ["$MY_PUBLIC_IP/32"]

  allow {
    protocol = "tcp"
    ports = ["22"]
  }
}

resource "google_compute_firewall" "yetiops-gcp-prom-fw-node-exporter" {
  name    = "yetiops-gcp-prom-node-exporter"
  network = google_compute_network.yetiops-gcp-prom-net.name
  direction = "INGRESS"
  source_ranges = ["$MY_PUBLIC_IP/32"]

  allow {
    protocol = "tcp"
    ports = ["9100"]
  }
}

# GCP VPC Network

resource "google_compute_network" "yetiops-gcp-prom-net" {
  name = "yetiops-gcp-prom-net"
}


# OS Login SSH Key

data "google_client_openid_userinfo" "me" {
}

resource "google_os_login_ssh_public_key" "cache" {
  user =  data.google_client_openid_userinfo.me.email
  key = file("~/.ssh/id_ed25519.pub")
}

resource "google_project_iam_member" "role-binding" {
  project = "yetiops-blog"
  role    = "roles/compute.osAdminLogin"
  member  = "user:[email protected]"
}
To summarize what Terraform is going to do: -
- Create an Ubuntu 20.04 Compute Instance of size
f1-micro(1 vCPU, 0.6G of memory)- We enable OS Login which ties your Linux login to your Google Account directly
- We supply the same
user-dataas we do for Azure and AWS
- Create a firewall to allow all ICMP, as well as SSH and the Node Exporter port (TCP 9100) through from my public IP
- Create a network for the instance and firewall to run inside of
- Use our SSH key for OS Login
One small difference to note is that Google use the term labels rather then tags (like in AWS and Azure).
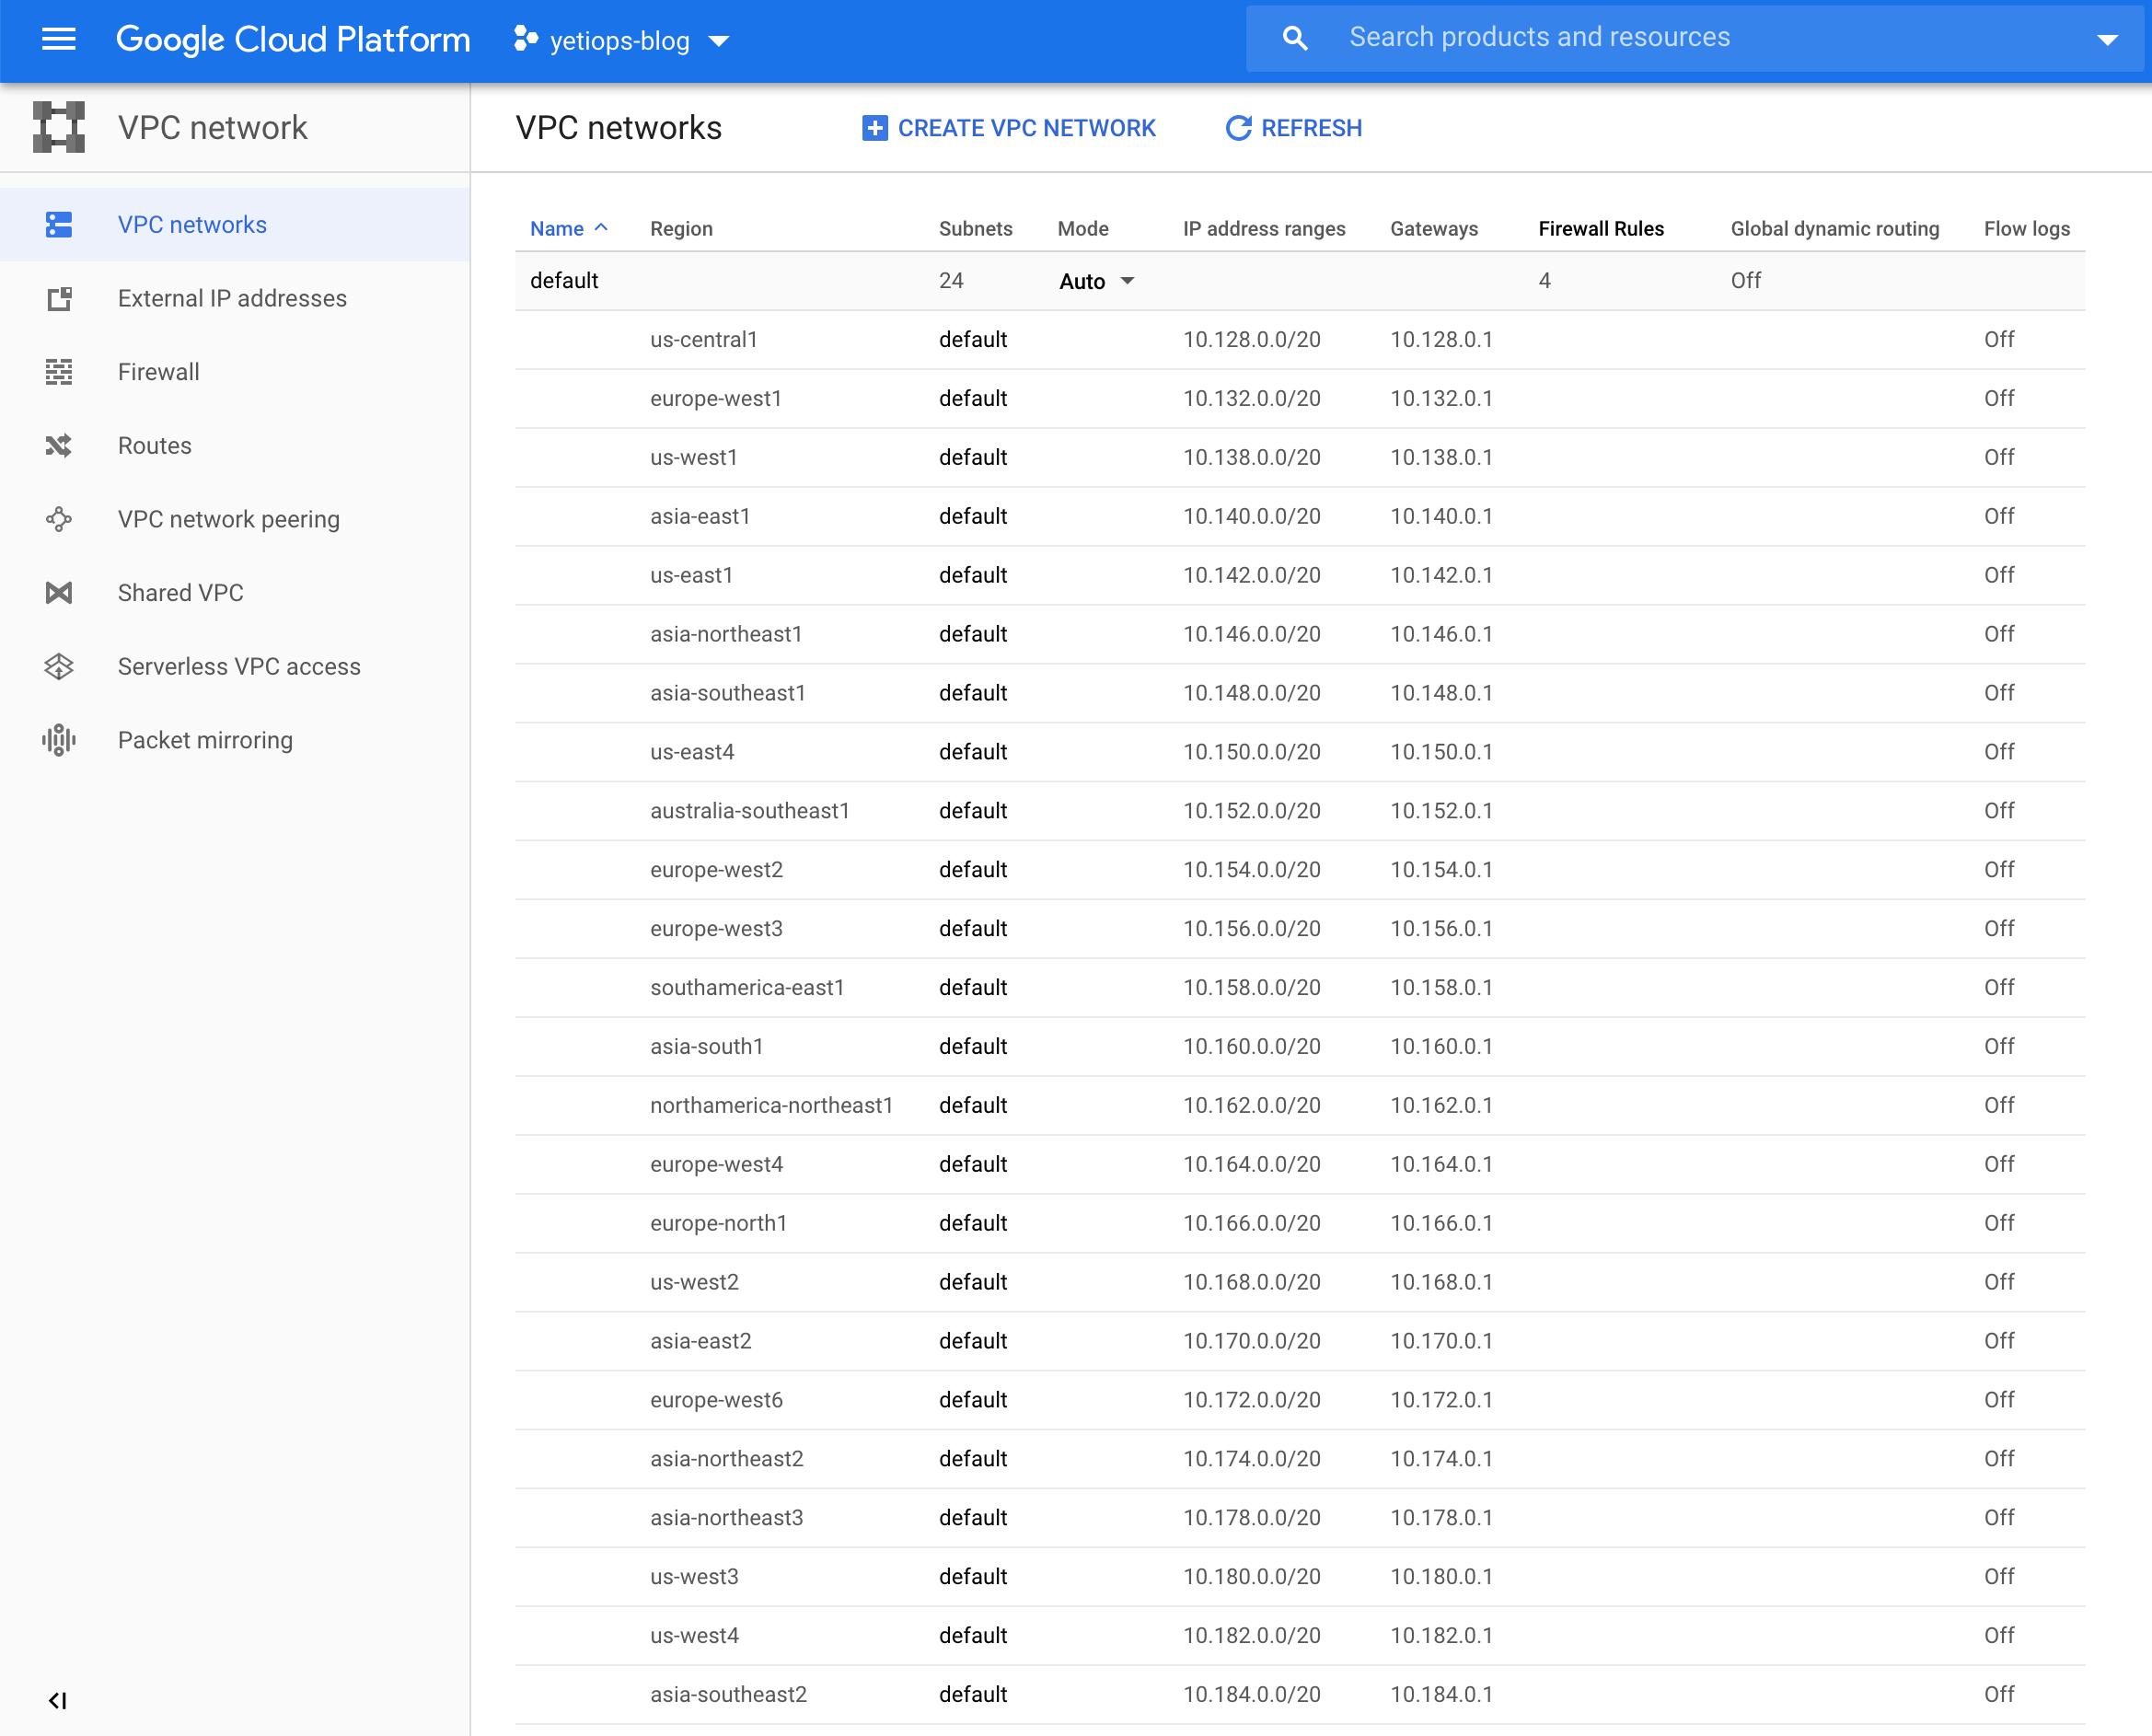
An interesting point to note is that in AWS and Azure, the AWS VPC and the Azure networks are regional. Communication between regions requires routers, VPNs, or in the case of AWS, VPC Peering. In the Google Cloud Platform, the VPC is multi-region by default: -
Build the infrastructure - Compute Instances
We can now apply our configuration, and see if it builds a Compute Instance: -
$ terraform apply
data.template_file.ubuntu: Refreshing state...
data.template_cloudinit_config.ubuntu: Refreshing state...
data.google_client_openid_userinfo.me: Refreshing state...
data.aws_vpc.default: Refreshing state...
data.aws_ami.ubuntu: Refreshing state...
aws_key_pair.yetiops-aws-prom: Refreshing state... [id=yetiops-aws-prom]
aws_security_group.yetiops-aws-prom: Refreshing state... [id=sg-0843cc8542221927d]
aws_security_group_rule.ingress_node_exporter_in: Refreshing state... [id=sgrule-1236498832]
aws_security_group_rule.egress_allow_all: Refreshing state... [id=sgrule-1341973878]
aws_security_group_rule.ingress_ssh_in: Refreshing state... [id=sgrule-977439385]
aws_instance.yetiops-aws-prom: Refreshing state... [id=i-0f409fa1d4b5dd373]
azurerm_resource_group.yetiops-azure-prom: Refreshing state... [id=/subscriptions/$SUBSCRIPTION_ID/resourceGroups/yetiops-azure-prom]
azurerm_virtual_network.yetiops-azure-prom: Refreshing state... [id=/subscriptions/$SUBSCRIPTION_ID/resourceGroups/yetiops-azure-prom/providers/Microsoft.Network/virtualNetworks/yetiops-azure-prom]
azurerm_public_ip.yetiops-azure-prom-pip: Refreshing state... [id=/subscriptions/$SUBSCRIPTION_ID/resourceGroups/yetiops-azure-prom/providers/Microsoft.Network/publicIPAddresses/yetiops-azure-prom-pip]
azurerm_subnet.yetiops-azure-prom: Refreshing state... [id=/subscriptions/$SUBSCRIPTION_ID/resourceGroups/yetiops-azure-prom/providers/Microsoft.Network/virtualNetworks/yetiops-azure-prom/subnets/yetiops-azure-prom-main]
azurerm_network_interface.yetiops-azure-prom: Refreshing state... [id=/subscriptions/$SUBSCRIPTION_ID/resourceGroups/yetiops-azure-prom/providers/Microsoft.Network/networkInterfaces/yetiops-azure-prom-nic]
azurerm_linux_virtual_machine.yetiops-azure-prom: Refreshing state... [id=/subscriptions/$SUBSCRIPTION_ID/resourceGroups/yetiops-azure-prom/providers/Microsoft.Compute/virtualMachines/yetiops-azure-prom-machine]
azurerm_network_security_group.yetiops-azure-prom: Refreshing state... [id=/subscriptions/$SUBSCRIPTION_ID/resourceGroups/yetiops-azure-prom/providers/Microsoft.Network/networkSecurityGroups/yetiops-azure-prom]

An execution plan has been generated and is shown below.
Resource actions are indicated with the following symbols:
  + create
  ~ update in-place

Terraform will perform the following actions:

  # google_compute_firewall.yetiops-gcp-prom-fw-icmp will be created
  + resource "google_compute_firewall" "yetiops-gcp-prom-fw-icmp" {
      + creation_timestamp = (known after apply)
      + destination_ranges = (known after apply)
      + direction          = (known after apply)
      + id                 = (known after apply)
      + name               = "yetiops-gcp-prom-fw-icmp"
      + network            = "yetiops-gcp-prom-net"
      + priority           = 1000
      + project            = (known after apply)
      + self_link          = (known after apply)
      + source_ranges      = (known after apply)

      + allow {
          + ports    = []
          + protocol = "icmp"
        }
    }

  # google_compute_firewall.yetiops-gcp-prom-fw-node-exporter will be created
  + resource "google_compute_firewall" "yetiops-gcp-prom-fw-node-exporter" {
      + creation_timestamp = (known after apply)
      + destination_ranges = (known after apply)
      + direction          = "INGRESS"
      + id                 = (known after apply)
      + name               = "yetiops-gcp-prom-node-exporter"
      + network            = "yetiops-gcp-prom-net"
      + priority           = 1000
      + project            = (known after apply)
      + self_link          = (known after apply)
      + source_ranges      = [
          + "$MY_PUBLIC_IP/32",
        ]

      + allow {
          + ports    = [
              + "9100",
            ]
          + protocol = "tcp"
        }
    }

  # google_compute_firewall.yetiops-gcp-prom-fw-ssh will be created
  + resource "google_compute_firewall" "yetiops-gcp-prom-fw-ssh" {
      + creation_timestamp = (known after apply)
      + destination_ranges = (known after apply)
      + direction          = "INGRESS"
      + id                 = (known after apply)
      + name               = "yetiops-gcp-prom-ssh"
      + network            = "yetiops-gcp-prom-net"
      + priority           = 1000
      + project            = (known after apply)
      + self_link          = (known after apply)
      + source_ranges      = [
          + "$MY_PUBLIC_IP/32",
        ]

      + allow {
          + ports    = [
              + "22",
            ]
          + protocol = "tcp"
        }
    }

  # google_compute_instance.yetiops-gcp-prom will be created
  + resource "google_compute_instance" "yetiops-gcp-prom" {
      + can_ip_forward       = false
      + cpu_platform         = (known after apply)
      + current_status       = (known after apply)
      + deletion_protection  = false
      + guest_accelerator    = (known after apply)
      + id                   = (known after apply)
      + instance_id          = (known after apply)
      + label_fingerprint    = (known after apply)
      + labels               = {
          + "node_exporter" = "true"
          + "prometheus"    = "true"
        }
      + machine_type         = "f1-micro"
      + metadata             = {
          + "enable-oslogin" = "TRUE"
          + "user-data"      = "Content-Type: multipart/mixed; boundary=\"MIMEBOUNDARY\"\nMIME-Version: 1.0\r\n\r\n--MIMEBOUNDARY\r\nContent-Disposition: attachment; filename=\"init.cfg\"\r\nContent-Transfer-Encoding: 7bit\r\nContent-Type: text/cloud-config\r\nMime-Version: 1.0\r\n\r\n#cloud-config\npackages:\n - prometheus-node-exporter\n\r\n--MIMEBOUNDARY--\r\n"
        }
      + metadata_fingerprint = (known after apply)
      + min_cpu_platform     = (known after apply)
      + name                 = "yetiops-gcp-prom"
      + project              = (known after apply)
      + self_link            = (known after apply)
      + tags_fingerprint     = (known after apply)
      + zone                 = (known after apply)

      + boot_disk {
          + auto_delete                = true
          + device_name                = (known after apply)
          + disk_encryption_key_sha256 = (known after apply)
          + kms_key_self_link          = (known after apply)
          + mode                       = "READ_WRITE"
          + source                     = (known after apply)

          + initialize_params {
              + image  = "ubuntu-2004-lts"
              + labels = (known after apply)
              + size   = (known after apply)
              + type   = (known after apply)
            }
        }

      + network_interface {
          + name               = (known after apply)
          + network            = "yetiops-gcp-prom-net"
          + network_ip         = (known after apply)
          + subnetwork         = (known after apply)
          + subnetwork_project = (known after apply)

          + access_config {
              + nat_ip       = (known after apply)
              + network_tier = (known after apply)
            }
        }

      + scheduling {
          + automatic_restart   = (known after apply)
          + on_host_maintenance = (known after apply)
          + preemptible         = (known after apply)

          + node_affinities {
              + key      = (known after apply)
              + operator = (known after apply)
              + values   = (known after apply)
            }
        }
    }

  # google_compute_network.yetiops-gcp-prom-net will be created
  + resource "google_compute_network" "yetiops-gcp-prom-net" {
      + auto_create_subnetworks         = true
      + delete_default_routes_on_create = false
      + gateway_ipv4                    = (known after apply)
      + id                              = (known after apply)
      + ipv4_range                      = (known after apply)
      + name                            = "yetiops-gcp-prom-net"
      + project                         = (known after apply)
      + routing_mode                    = (known after apply)
      + self_link                       = (known after apply)
    }

  # google_os_login_ssh_public_key.cache will be created
  + resource "google_os_login_ssh_public_key" "cache" {
      + fingerprint = (known after apply)
      + id          = (known after apply)
      + key         = "$MY_SSH_KEY"
      + user        = "$GCP_SERVICE_ACCOUNT"
    }

  # google_project_iam_member.role-binding will be created
  + resource "google_project_iam_member" "role-binding" {
      + etag    = (known after apply)
      + id      = (known after apply)
      + member  = "user:[email protected]"
      + project = "yetiops-blog"
      + role    = "roles/compute.osAdminLogin"
    }

Plan: 7 to add, 0 to change, 0 to destroy.

Do you want to perform these actions?
  Terraform will perform the actions described above.
  Only 'yes' will be accepted to approve.

  Enter a value: yes

google_os_login_ssh_public_key.cache: Creating...
google_project_iam_member.role-binding: Creating...
google_compute_network.yetiops-gcp-prom-net: Creating...
google_os_login_ssh_public_key.cache: Creation complete after 1s [id=users/$GCP_SERVICE_ACCOUNT/sshPublicKeys/$PUBLIC_KEY_ID]
google_compute_network.yetiops-gcp-prom-net: Still creating... [10s elapsed]
google_project_iam_member.role-binding: Still creating... [10s elapsed]
google_project_iam_member.role-binding: Creation complete after 10s [id=yetiops-blog/roles/compute.osAdminLogin/user:[email protected]]
google_compute_network.yetiops-gcp-prom-net: Still creating... [20s elapsed]
google_compute_network.yetiops-gcp-prom-net: Still creating... [30s elapsed]
google_compute_network.yetiops-gcp-prom-net: Still creating... [40s elapsed]
google_compute_network.yetiops-gcp-prom-net: Creation complete after 43s [id=projects/yetiops-blog/global/networks/yetiops-gcp-prom-net]
google_compute_firewall.yetiops-gcp-prom-fw-ssh: Creating...
google_compute_firewall.yetiops-gcp-prom-fw-icmp: Creating...
google_compute_firewall.yetiops-gcp-prom-fw-node-exporter: Creating...
google_compute_instance.yetiops-gcp-prom: Creating...
google_compute_firewall.yetiops-gcp-prom-fw-icmp: Still creating... [10s elapsed]
google_compute_firewall.yetiops-gcp-prom-fw-ssh: Still creating... [10s elapsed]
google_compute_firewall.yetiops-gcp-prom-fw-node-exporter: Still creating... [10s elapsed]
google_compute_instance.yetiops-gcp-prom: Still creating... [10s elapsed]
google_compute_firewall.yetiops-gcp-prom-fw-node-exporter: Creation complete after 12s [id=projects/yetiops-blog/global/firewalls/yetiops-gcp-prom-node-exporter]
google_compute_firewall.yetiops-gcp-prom-fw-ssh: Creation complete after 12s [id=projects/yetiops-blog/global/firewalls/yetiops-gcp-prom-ssh]
google_compute_firewall.yetiops-gcp-prom-fw-icmp: Creation complete after 13s [id=projects/yetiops-blog/global/firewalls/yetiops-gcp-prom-fw-icmp]
google_compute_instance.yetiops-gcp-prom: Creation complete after 15s [id=projects/yetiops-blog/zones/europe-west3-c/instances/yetiops-gcp-prom]

Apply complete! Resources: 7 added, 0 changed, 0 destroyed.
We can double check that Terraform is managing these resources now with terraform state list: -
$ terraform state list
data.aws_ami.ubuntu
data.aws_vpc.default
data.google_client_openid_userinfo.me
data.template_cloudinit_config.ubuntu
data.template_file.ubuntu
aws_instance.yetiops-aws-prom
aws_key_pair.yetiops-aws-prom
aws_security_group.yetiops-aws-prom
aws_security_group_rule.egress_allow_all
aws_security_group_rule.ingress_node_exporter_in
aws_security_group_rule.ingress_ssh_in
azurerm_linux_virtual_machine.yetiops-azure-prom
azurerm_network_interface.yetiops-azure-prom
azurerm_network_security_group.yetiops-azure-prom
azurerm_public_ip.yetiops-azure-prom-pip
azurerm_resource_group.yetiops-azure-prom
azurerm_subnet.yetiops-azure-prom
azurerm_virtual_network.yetiops-azure-prom
google_compute_firewall.yetiops-gcp-prom-fw-icmp
google_compute_firewall.yetiops-gcp-prom-fw-node-exporter
google_compute_firewall.yetiops-gcp-prom-fw-ssh
google_compute_instance.yetiops-gcp-prom
google_compute_network.yetiops-gcp-prom-net
google_os_login_ssh_public_key.cache
google_project_iam_member.role-binding
We can check to see if the instance and other resources are in the Google Cloud Console: -

Now we should be able to use the gcloud CLI to login to the machine: -
$ gcloud compute ssh yetiops-gcp-prom
Welcome to Ubuntu 20.04 LTS (GNU/Linux 5.4.0-1015-gcp x86_64)

 * Documentation:  https://help.ubuntu.com
 * Management:     https://landscape.canonical.com
 * Support:        https://ubuntu.com/advantage

  System information as of Mon Jun 22 11:53:06 UTC 2020

  System load:  0.02              Processes:             105
  Usage of /:   15.5% of 9.52GB   Users logged in:       0
  Memory usage: 42%               IPv4 address for ens4: 10.156.0.2
  Swap usage:   0%

29 updates can be installed immediately.
11 of these updates are security updates.
To see these additional updates run: apt list --upgradable


The programs included with the Ubuntu system are free software;
the exact distribution terms for each program are described in the
individual files in /usr/share/doc/*/copyright.

Ubuntu comes with ABSOLUTELY NO WARRANTY, to the extent permitted by
applicable law.


The programs included with the Ubuntu system are free software;
the exact distribution terms for each program are described in the
individual files in /usr/share/doc/*/copyright.

Ubuntu comes with ABSOLUTELY NO WARRANTY, to the extent permitted by
applicable law.

Creating directory '/home/yetiops_gcp_gmail_com'.
yetiops_gcp_gmail_com@yetiops-gcp-prom:~$

yetiops_gcp_gmail_com@yetiops-gcp-prom:~$ ps aux | grep -i node
prometh+    2497  0.0  1.7 336924 10516 ?        Ssl  11:48   0:00 /usr/bin/prometheus-node-exporter
yetiops+    3751  0.0  0.1   8156   672 pts/0    S+   11:53   0:00 grep --color=auto -i node
Configure Terraform - Prometheus User
Next, we need to create a user that Prometheus will use to query the Google Cloud API. To do this, go into the terraform/prometheus-access directory, and update the providers.tf file as we did before: -
# AWS Provider
provider "aws" {
  region  = "eu-west-2"
}

# Azure Provider
provider "azurerm" {
  subscription_id = "$SUBSCRIPTION_ID"
  features {}
}

provider "azuread" {
}

# GCP Provider
provider "google" {
  credentials = file("~/.gcloud/account.json")
  project = "yetiops-blog"
  region  = "europe-west3"
  zone    = "europe-west3-c"
}
The below file configures the user for Prometheus access: -
resource "google_service_account" "prometheus-sd-user" {
  account_id   = "prometheus-sd-user"
  display_name = "Prometheus Service Discovery"
}

resource "google_project_iam_member" "prometheus-sd-user-compute-viewer" {
  role    = "roles/compute.viewer"
  member  = "serviceAccount:${google_service_account.prometheus-sd-user.email}"
}
We create the service account, and we also assign the role of compute.viewer. This restricts it to viewing only Compute resources. You do not need to generate a Client ID and Secret, as we will use the Google Cloud SDK when configuring the Prometheus instance.
Prometheus
Now that we have our infrastructure in AWS, Azure and Google Compute Platform, we can configure our Prometheus instance. I am using an Ubuntu 20.04 virtual machine in my lab for this.
AWS Service Discovery
To enable Prometheus to discover services on AWS, you need to install the AWS CLI on the virtual machine. This time though, rather than using the credentials from your user or root account, use the credentials generated for the prometheus-sd-user earlier.
Also, you need to configure the AWS CLI with the user that Prometheus executes as on your instance. In my case, this is the prometheus user: -
# Change to the prometheus user
$ sudo su - prometheus

# Configure the AWS CLI
$ aws configure
AWS Access Key ID [None]: ###PROMETHEUS-SD-USER-ACCESS_KEY###
AWS Secret Access Key [None]: ###PROMETHEUS-SD-USER-SECRET_KEY###
Default region name [None]: eu-west-2 ### Replace this with whatever region you prefer (eg us-east-1, ap-southeast-1)
Default output format [None]:

# Check that you can list EC2 instances
$  aws ec2 describe-instances | jq .Reservations[].Instances[].Tags
[
  {
    "Key": "node_exporter",
    "Value": "true"
  },
  {
    "Key": "prometheus",
    "Value": "true"
  },
  {
    "Key": "Name",
    "Value": "yetiops-aws-prom"
  }
]
If you run your Prometheus instance within AWS, you could use AWS Instance Profiles and IAM Roles rather than using Client Keys and Secret Keys. When Prometheus runs within AWS, it can assume the role of the instance it is running on. This role can then be assign the appropriate permissions. This is a cleaner than using keys and secrets. To make use of this, you would use the following in your Terraform: -
resource "aws_iam_role" "prometheus-ec2-role" {
  name = "prometheus"
  path = "/"

  assume_role_policy = <<EOF
{
    "Version": "2012-10-17",
    "Statement": [
        {
            "Action": "sts:AssumeRole",
            "Principal": {
               "Service": "ec2.amazonaws.com"
            },
            "Effect": "Allow",
            "Sid": ""
        }
    ]
}
EOF

resource "aws_iam_role_policy_attachment" "prometheus-sd-policy-attach" {
  role       = aws_iam_role.prometheus-ec2-role.name
  policy_arn = "arn:aws:iam::aws:policy/AmazonEC2ReadOnlyAccess"
}

resource "aws_iam_instance_profile" "prometheus-instance-profile" {
  name = "promtheus"
  role = aws_iam_role.prometheus-ec2-role.name
}

resource "aws_instance" "prometheus" {
  [...]
  iam_instance_profile = aws_iam_instance_profile.prometheus-instance-profile.name
}
Once the above is configured, you can now update your Prometheus configuration (prometheus.yaml) for EC2 service discovery: -
global:
  scrape_interval:     15s
  evaluation_interval: 15s

scrape_configs:
  - job_name: 'ec2-nodes'
    ec2_sd_configs:
      - region: eu-west-2
        port: 9100
    relabel_configs:
      - source_labels: [__meta_ec2_tag_prometheus]
        regex: true.*
        action: keep
      - source_labels: [__meta_ec2_tag_node_exporter]
        regex: true.*
        action: keep
      - source_labels: [__meta_ec2_instance_id]
        target_label: instance
      - source_labels: [__meta_ec2_public_ip]
        regex: (.+)
        replacement: ${1}:9100
        target_label: __address__
Prometheus EC2 discovery inherits the configuration from the AWS credentials file generated by the AWS CLI.
First, Prometheus looks through all of our EC2 instances. If any have the tag prometheus, and the value matches the regex true.* (e.g. the word true), then we keep the service. In the context of our Prometheus configuration, keep means that any instance discovered in AWS, in our account and in the eu-west-2 region is only registered as a target if it has a tag of prometheus: true. If it is any other value, or lacks the prometheus tag, then we ignore the instance. This is useful for hosts without any exporters.
Next, we do the same for EC2 instances with the tag named node_exporter. Again, if the value is true, we register the target. This is useful where you are running mixed workloads (e.g. Linux and Windows), as this job only works for the Node Exporter (which does not run on Windows).
Next, we take the instance_id and put it into the instance label.
Finally, we take the public_ip, append :9100 to it, and replace the contents of the __address__ label (i.e. the address that Prometheus will scrape the metrics from). By default, the __address__ label uses the private IP of the instance. This is fine if you have VPNs between your network and the AWS environment, have a Direct Connect (i.e. a physical link(s) into Amazon’s network) or the Prometheus instance runs inside AWS. If the Prometheus instance cannot route to the private IP, then this relabelling action is required.
The above labels are sourced from the Prometheus EC2 Service Discovery metadata. You can see what metadata is discovered from an instance by going to the Service Discovery page in Prometheus’s Status Menu: -

As you can see, we have our tags, the public IP, private IP, the __address__ label (which we replace) and more. You could use all of these labels, or only the relevant labels.
Lets see if the instance is up, and if we can reach the Node Exporter: -

There we go!
Google Cloud Platform Service Discovery
To enable Prometheus to discover services on Google Cloud Platform, install the Google Cloud SDK on the Prometheus instance.
Once install, we retrieve a JSON file containing the credentials for your prometheus-sd-user service account using the gcloud CLI: -
# Login to the Google Cloud Platform using your Google Account credentials
$ gcloud auth login

# Retrieve the JSON file
$ gcloud iam service-accounts keys create ~/key.json   --iam-account [email protected]
The IAM Account string is the Prometheus service account user i.e. prometheus-sd-user), followed by @$YOUR_GCP_PROJECT.iam.gserviceaccount.com. Once you have retrieved the file, it needs to be moved to the following location: -
$ mv ~/key.json $PROMETHEUS_USER_HOME_DIRECTORY/.config/gcloud/application_default_credentials.json
On my Prometheus instance, the home directory for the Prometheus user is /home/prometheus.
As with AWS, if you run Prometheus on a Google Compute Instance, you can make use of Cloud IAM Service Accounts. These would be attached directly to the Compute Instance that runs Prometheus. This negates the need to retrieve the JSON file with the service account credentials. You can apply this with: -
resource "google_compute_instance" "prometheus" {

  service_account {
    scopes = ["compute-ro"]
  }
}
Once this is done, you should now be able to discover your Compute Instances with Prometheus. The Prometheus configuration required for Google Cloud Platform is below: -
  - job_name: 'gce-nodes'
    gce_sd_configs:
      - project: yetiops-blog
        zone: europe-west3-c
        port: 9100
    relabel_configs:
      - source_labels: [__meta_gce_label_prometheus]
        regex: true.*
        action: keep
      - source_labels: [__meta_gce_label_node_exporter]
        regex: true.*
        action: keep
      - source_labels: [__meta_gce_public_ip]
        regex: (.+)
        replacement: ${1}:9100
        target_label: __address__
      - source_labels: [__meta_gce_instance_id]
        target_label: instance
This is very similar to the AWS EC2 configuration, with a couple of exceptions: -
- We supply the Project name
- We use labels rather than tags
Otherwise, we perform the same operations (keeping services/instances that have the prometheus: true and node_exporter: true labels, and rewriting the __address__ to use the public IP).
Again, all of the above is obtained from the Prometheus Google Cloud Platform Service Discovery metadata.
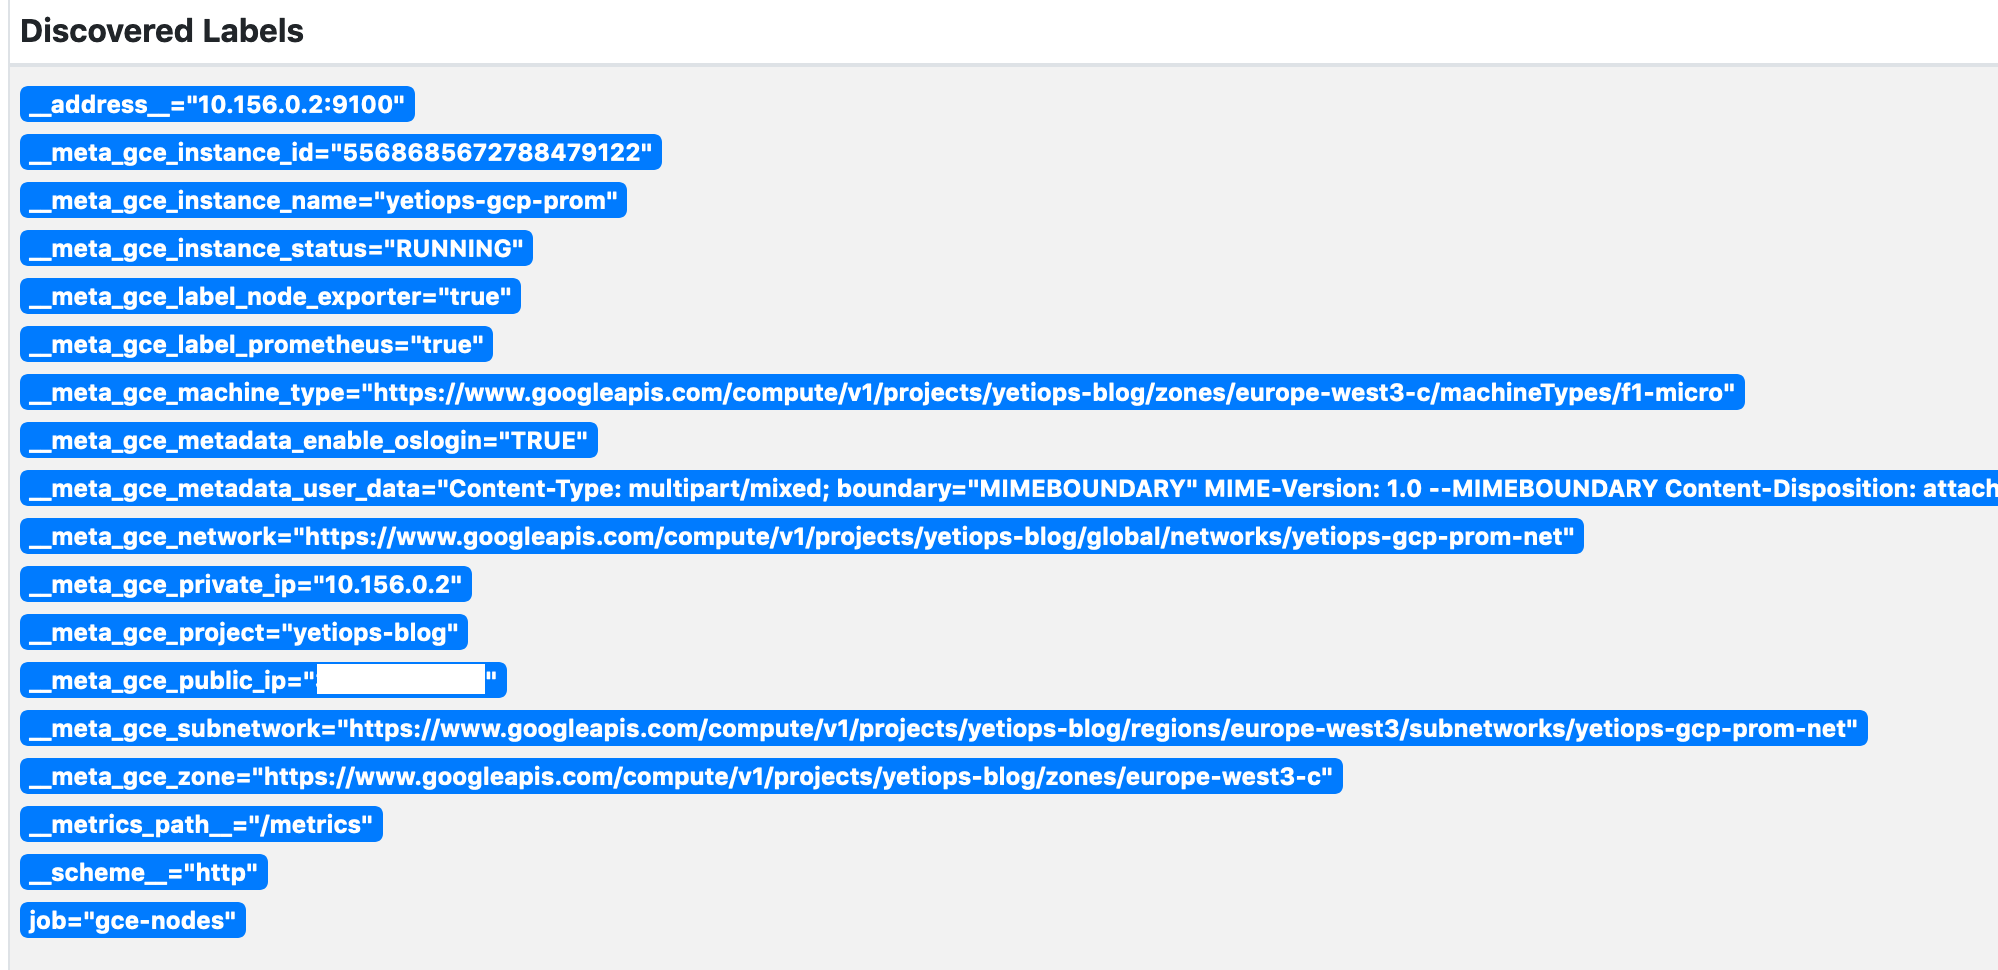
A point to note is that Google Cloud Platform uses the term metadata to include things like the user-data, enabling OS Login, and other custom fields you may add to the instance. This is not the same as the Prometheus metadata that is generated during Service Discovery.
Can we reach the instance and the Node Exporter?

We can!
Azure Service Discovery
To enable Prometheus to discover services in Azure, you need to use the following details: -
- Subscription ID - You can check this with
az account list(in the fieldid) - Tenant ID - You can check this with
az account list(in the fieldtenantId) - Client ID - This is the ID from the steps here
- Client Secret - This is the secret generated in the steps here
These details will be placed directly into the Prometheus configuration. Unlike AWS or Google Cloud Platform, the Azure service discovery provider does not use any locally saved credentials from the az CLI.
If you run the Prometheus instance inside Azure, you can use Managed Identities. These are similar to AWS Instance Profiles/IAM Roles and Google Cloud Platform’s Cloud IAM Service Accounts attached to Cloud Instances. This identity is attached to the Azure Virtual Machine. You can then assign the appropriate permissions, negating the need to use IDs and secrets. To use a Managed Identity instead, you can use: -
resource "azurerm_virtual_machine" "prometheus" {
  # ...

  identity {
    type = "SystemAssigned"
  }
}

data "azurerm_role_definition" "reader" {
  name = "Reader"
}

resource "azurerm_role_assignment" "prometheus" {
  name               = azurerm_virtual_machine.prometheus.name
  scope              = data.azurerm_subscription.primary.id
  role_definition_id = "${data.azurerm_subscription.subscription.id}${data.azurerm_role_definition.reader.id}"
  principal_id       = azurerm_virtual_machine.prometheus.identity[0]["principal_id"]
}
Now you can configure the Azure service discovery in Prometheus. The required configuration is below: -
  - job_name: 'azure-nodes'
    azure_sd_configs:
      - subscription_id: '$SUBSCRIPTION_ID'
        tenant_id: '$TENANT_ID'
        client_id: '$CLIENT_ID'
        client_secret: '$CLIENT_SECRET'
        port: 9100
    relabel_configs:
      - source_labels: [__meta_azure_machine_tag_prometheus]
        regex: true.*
        action: keep
      - source_labels: [__meta_azure_machine_tag_node_exporter]
        regex: true.*
        action: keep
      - source_labels: [__meta_azure_machine_tag_public_ip]
        regex: (.+)
        action: keep
      - source_labels: [__meta_azure_machine_name]
        target_label: instance
      - source_labels: [__meta_azure_machine_tag_public_ip]
        regex: (.+)
        replacement: ${1}:9100
        target_label: __address__
This is similar to the AWS and Google Cloud Platform configuration. The credentials are configured in the azure_sd_config section.
One point to note here is that we are discovering the Public IP of the instance through a tag. Why is this?
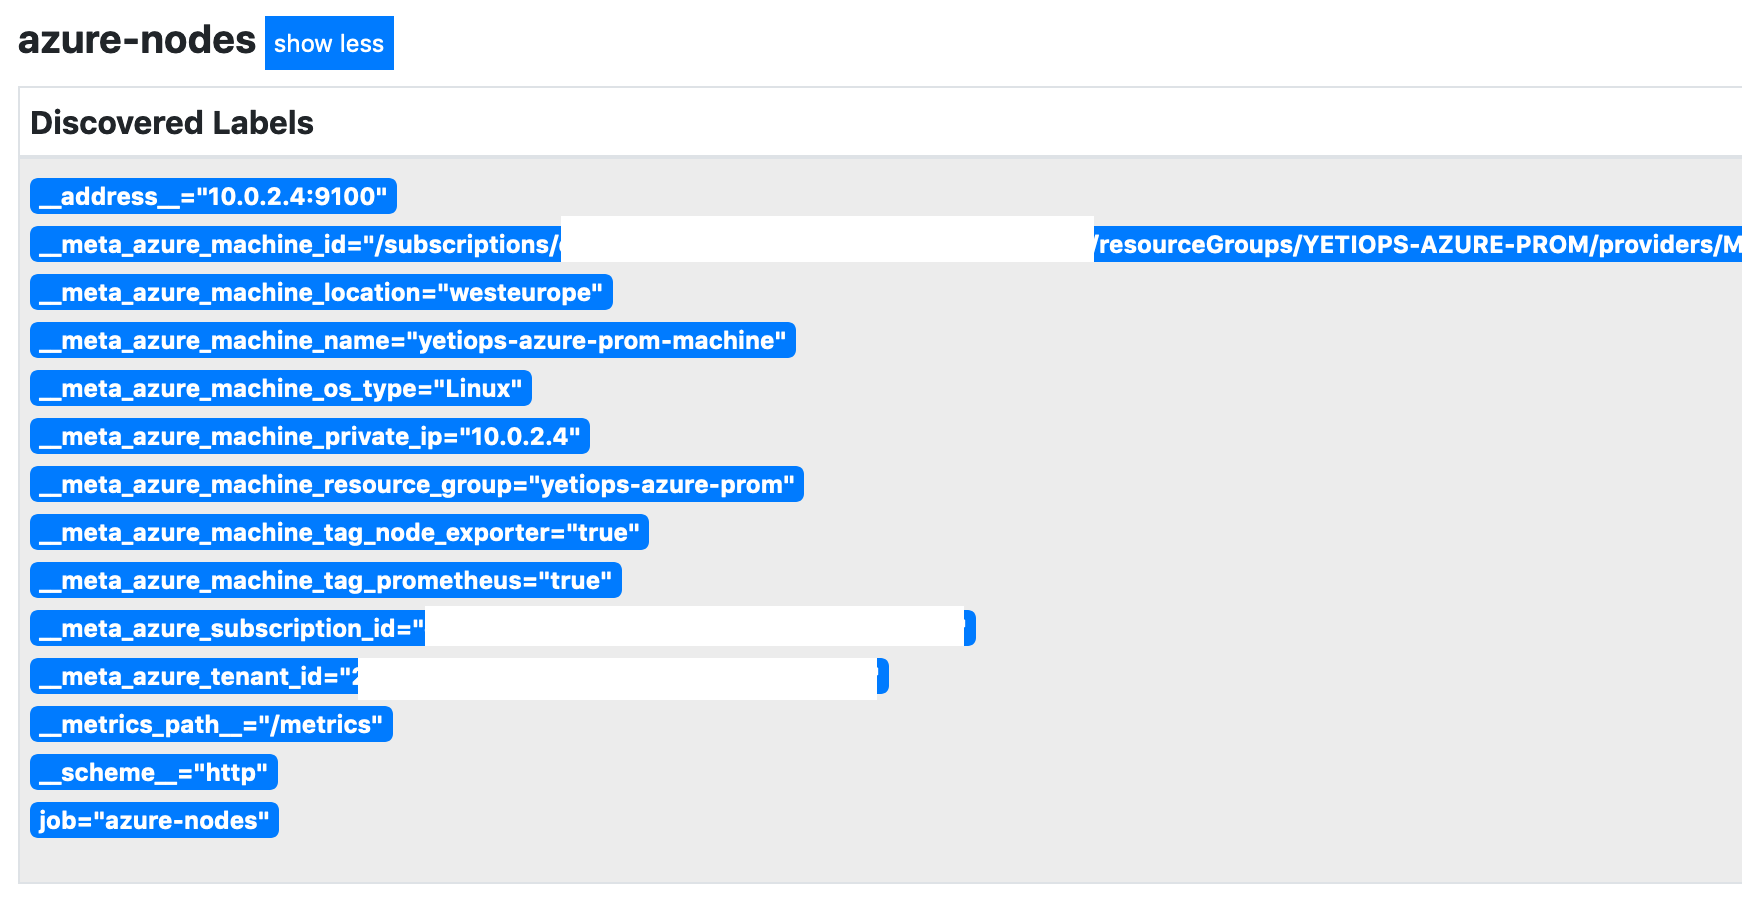
In the above, the public IP is not actually exposed by the metadata. If look at the Terraform configuration again, we can see why: -
resource "azurerm_public_ip" "yetiops-azure-prom-pip" {
  name                = "yetiops-azure-prom-pip"
  resource_group_name = azurerm_resource_group.yetiops-azure-prom.name
  location            = azurerm_resource_group.yetiops-azure-prom.location
  allocation_method   = "Dynamic"
}

resource "azurerm_network_interface" "yetiops-azure-prom" {
  name                = "yetiops-azure-prom-nic"
  location            = azurerm_resource_group.yetiops-azure-prom.location
  resource_group_name = azurerm_resource_group.yetiops-azure-prom.name

  ip_configuration {
    name                          = "yetiops-azure-prom-main"
    subnet_id                     = azurerm_subnet.yetiops-azure-prom.id
    private_ip_address_allocation = "Dynamic"
    public_ip_address_id          = azurerm_public_ip.yetiops-azure-prom-pip.id
  }
}
A public IP is not assigned automatically when provisioning a machine. Instead you need to create a public IP resource, and attach it to a network interface. This is then attached to the virtual machine. While it may be possible to infer what public IPs a virtual machine has attached, because Azure sees them as a separate resource, the Azure service discovery in Prometheus does not expose them.
To get around this issue, we added the following into our Virtual Machine tags: -
  tags = {
    prometheus = "true"
    node_exporter = "true"
    public_ip = "${azurerm_public_ip.yetiops-azure-prom-pip.ip_address}"
  }
We configure a tag that contains its public IP, and assign it to the Virtual Machine. The Azure Prometheus service discovery metadata includes all of the tags, which will now include one containing the public IP. We can see this in the below: -
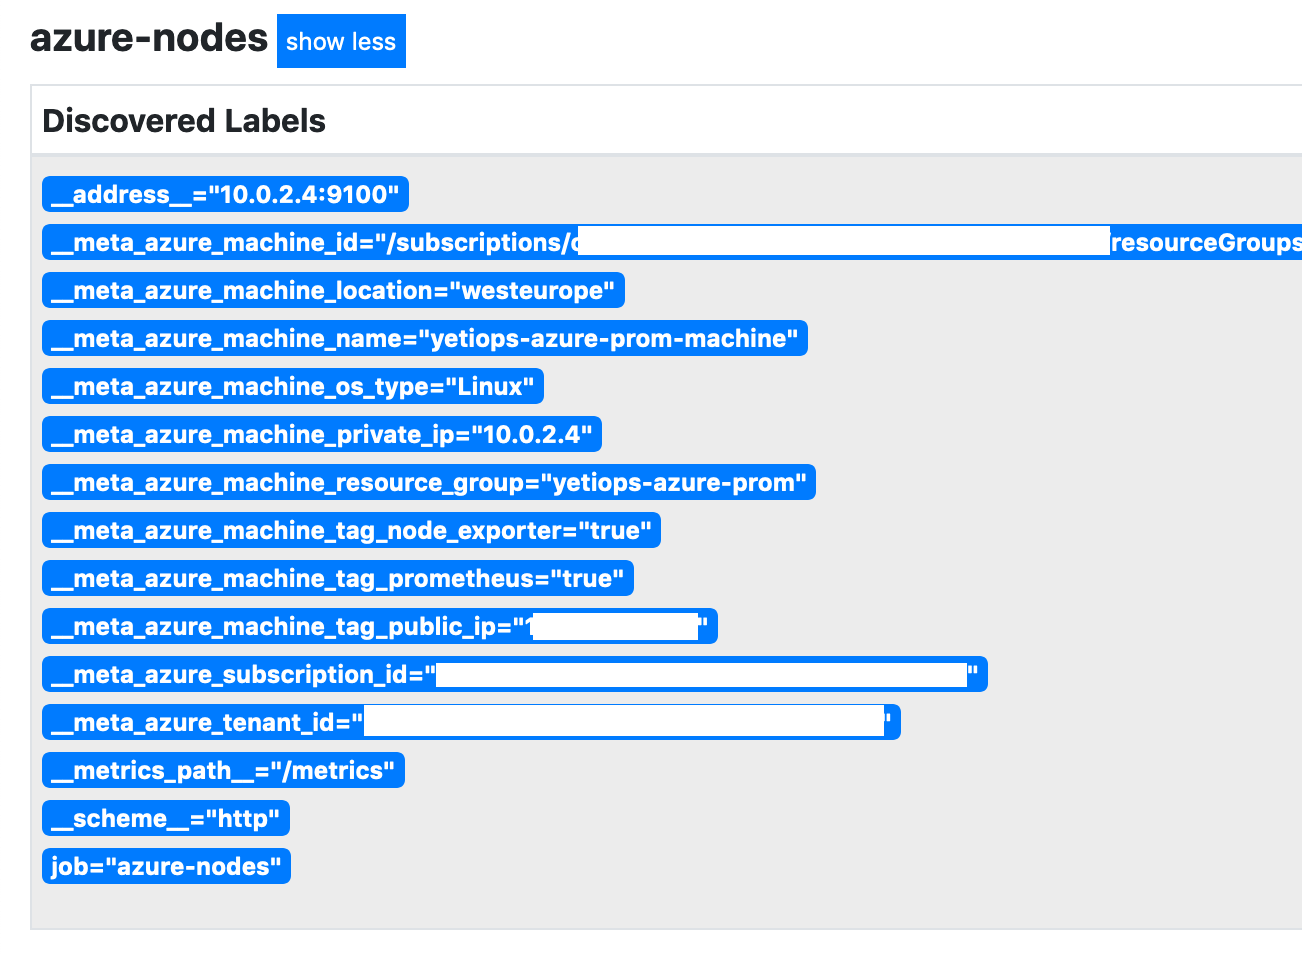
We perform the same operations (keeping services/instances that have the prometheus: true and node_exporter: true labels, and rewriting the __address__ to use the public IP). The additional public_ip tag is now also a requirement, otherwise we wouldn’t be able to monitor Azure machines.
Can we reach the instance and the Node Exporter?

There we go!
Grafana
With the above, we can use any Node Exporter dashboard in Grafana to view all of the discovered instances. The Node Exporter Full is always a good start when using the Node Exporter: -
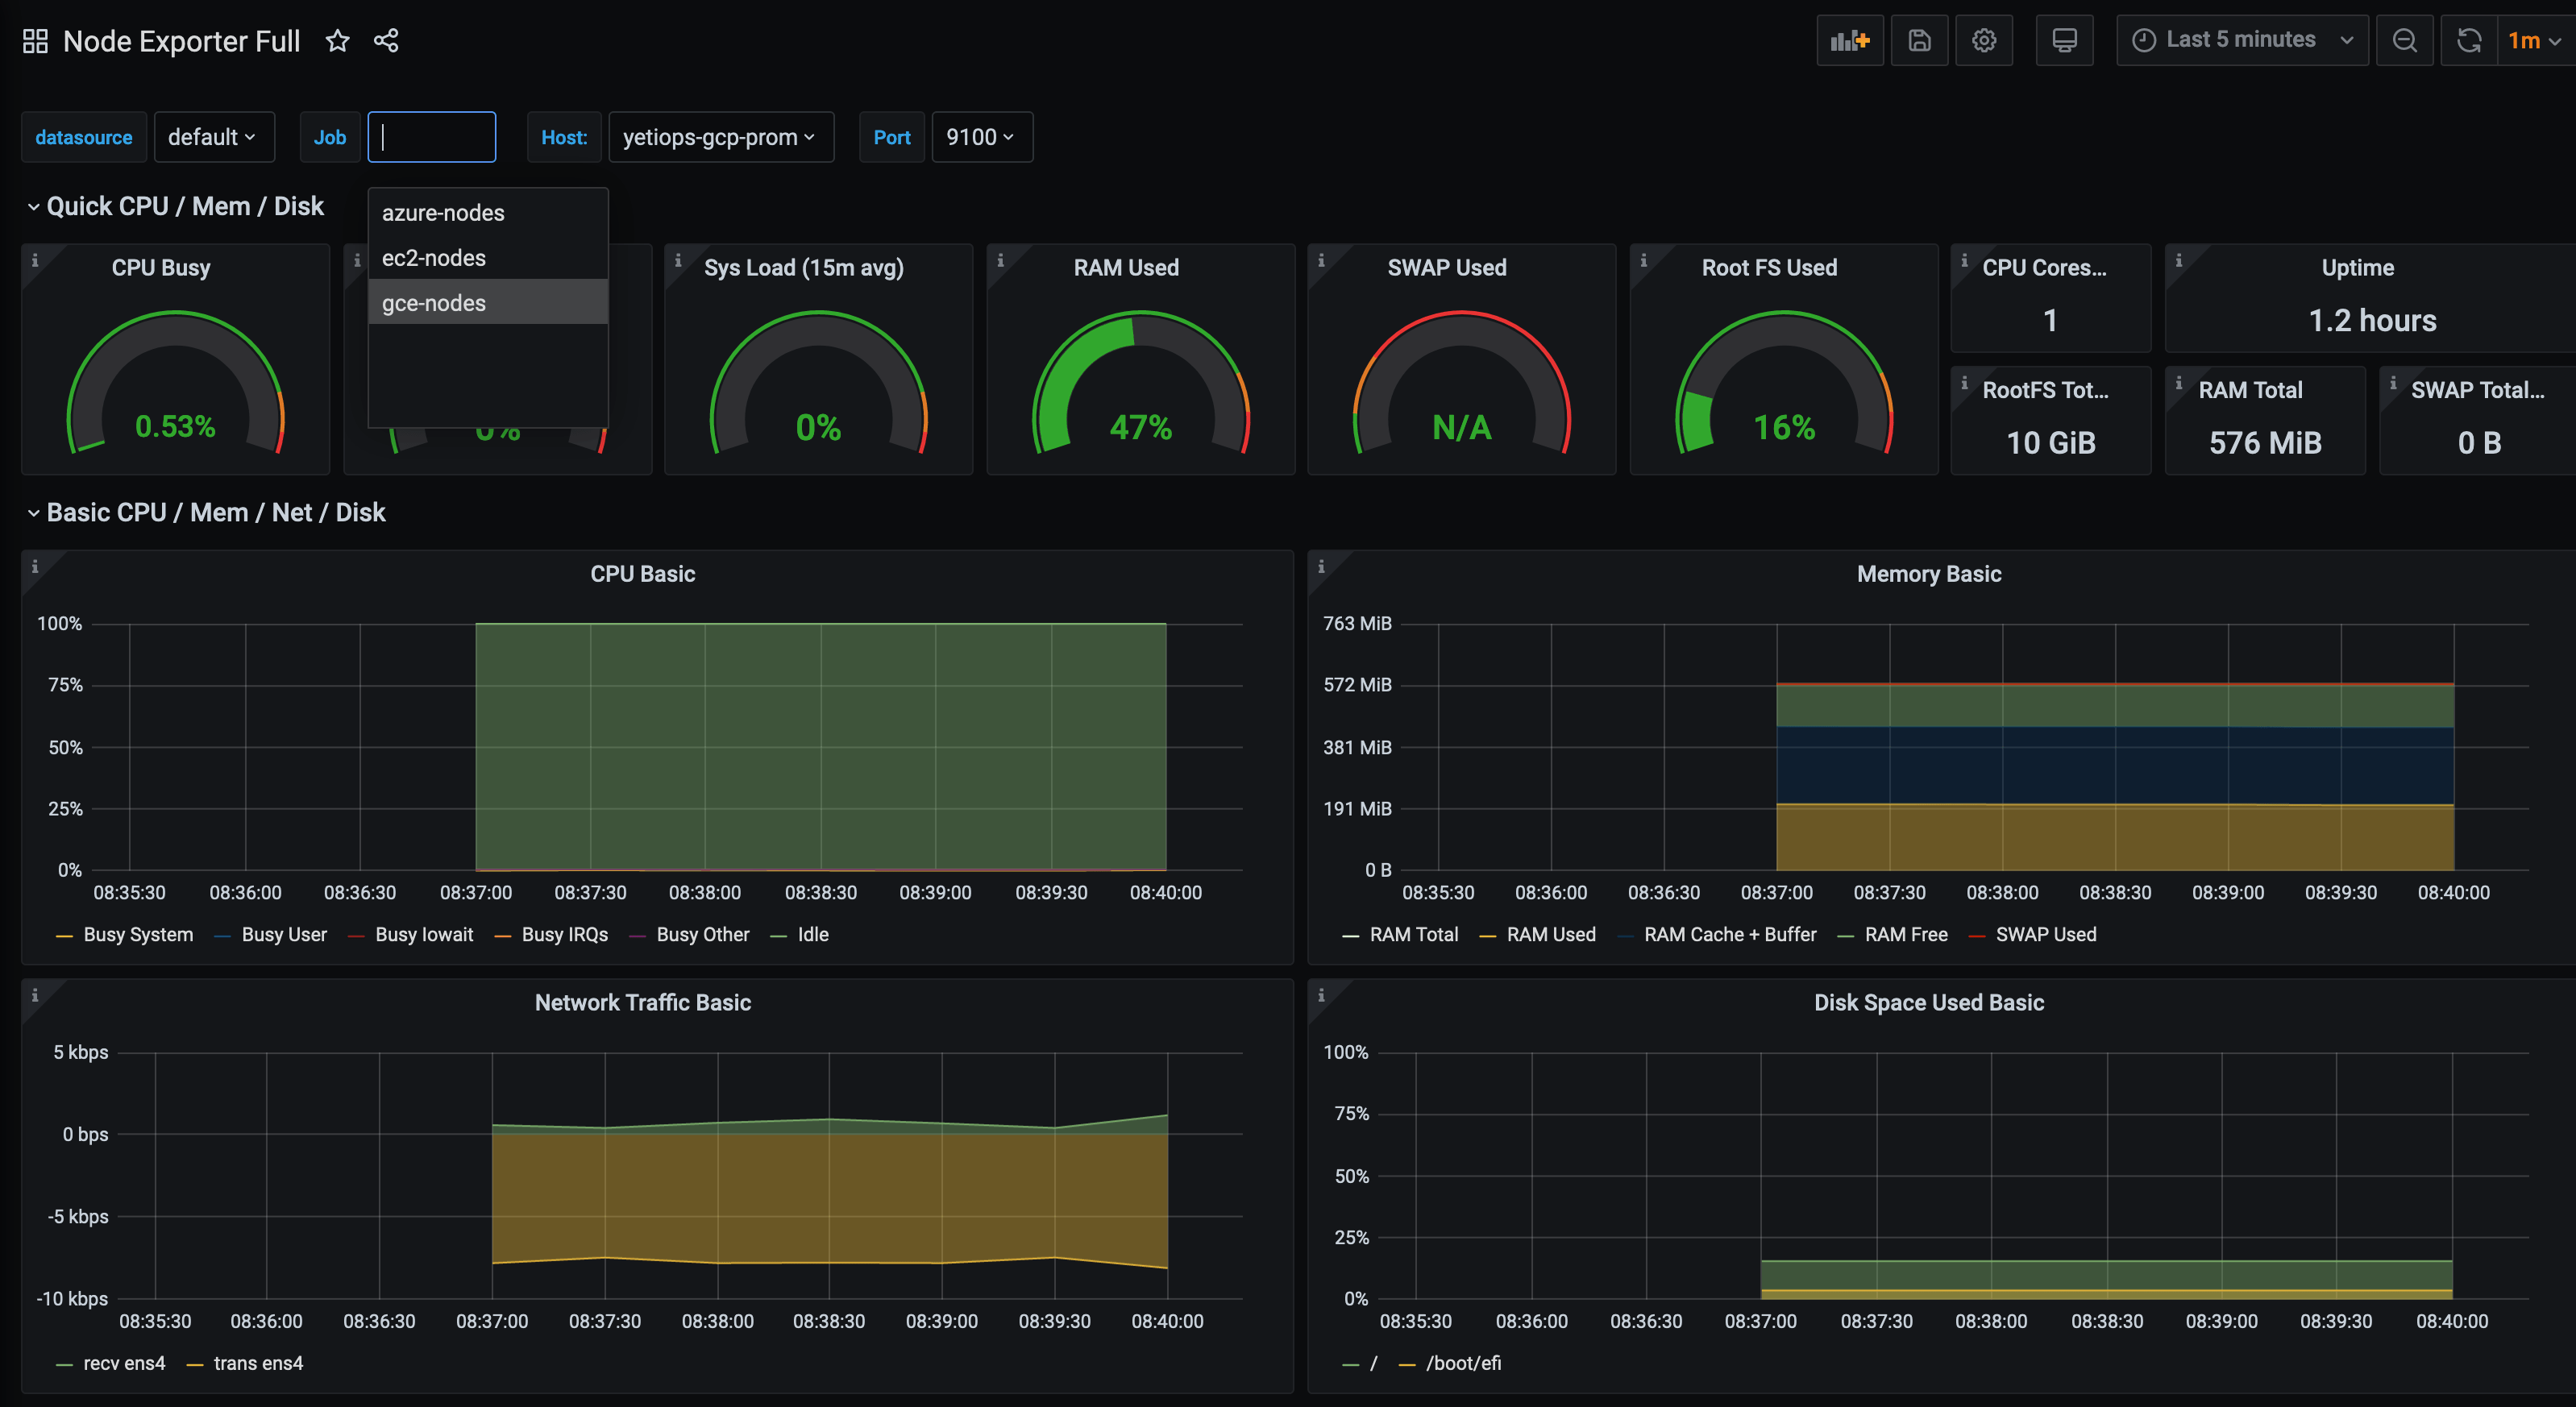
As you can see, we have the Azure and EC2 jobs, as well as the GCE (Google Compute Engine) job that is being viewed.
Whenever an extra node is provisioned it will appear in this dashboard.
Other exporters
If you are running multiple exporters, you will need to create different jobs for each exporter. While many applications try to avoid repeating configuration, the Prometheus project recommend this approach. Additional jobs add little to overhead to Prometheus over using one job for multiple uses. They also recommend using configuration management to generate the Prometheus jobs, meaning more jobs is just an artifact of your environment, rather than an issue.
You could create something like: -
  - job_name: 'gce-win-nodes'
    gce_sd_configs:
      - project: yetiops-blog
        zone: europe-west3-c
        port: 9182
    relabel_configs:
      - source_labels: [__meta_gce_label_prometheus]
        regex: true.*
        action: keep
      - source_labels: [__meta_gce_label_windows_exporter]
        regex: true.*
        action: keep
      - source_labels: [__meta_gce_public_ip]
        regex: (.+)
        replacement: ${1}:9182
        target_label: __address__
      - source_labels: [__meta_gce_instance_id]
        target_label: instance
This would then discover your Windows nodes running the Windows Exporter.
Summary
The EC2, Azure and Google Cloud Platform service discovery options within Prometheus are incredibly useful. You can cut down on the amount of infrastructure/configuration required for monitoring your instances, without losing flexibility.
The use of tags to discover instances makes it a quick process to enable. Install the Node Exporter, allow it through your cloud firewall/security group, add the prometheus and node_exporter tags, and Prometheus will discover it.
There are uses cases for something like Consul (multiple service discovery, service meshing, common configuration for hybrid environments), but if all you need is a couple of exporters, then the Cloud service discovery options are a very useful option.
devops monitoring prometheus aws azure gcp terraform
technical prometheus monitoring cloud
10625 Words
2020-06-23 12:56 +0000