27 minutes
Kubernetes - Building a Mixed Linux and Windows Cluster using Packer, Terraform, Ansible and KVM - Part 2: Creating the Cluster
This post is the second in a series on creating a Kubernetes cluster containing both Linux and Windows workers. The first post covered building the virtual machine images ready to be configured as Control Plane or Worker nodes. This post will cover initializing the cluster using Terraform and Cloud-Init. The final post in the series will cover how to deploy applications to the cluster and make them available.
Packer changes
Our virtual machine images are created using Packer, which was covered in the previous post. Since creating that post, we have also added the Hashicorp Vault CLI to both the Linux and Windows images, necessitating some changes in the Ansible roles applied to the Packer images. Reasons for this will become apparent in the next section
Linux
To install on Linux, we add an additional Ansible role (called Vault) and place the following into the tasks/main.yml file: -
---
# tasks file for vault
- name: Add Hashicorp Repository key
  apt_key:
    url: https://apt.releases.hashicorp.com/gpg
    state: present

- name: Add Hashicorp Repository
  apt_repository:
    repo: deb [arch=amd64] https://apt.releases.hashicorp.com buster main
    state: present

- name: Install Vault
  package:
    name:
      - vault
    state: present
    update_cache: yes
Now that there is an official Debian repository for most of Hashicorp’s projects, we can just add it to our Debian machines and install Vault using Apt. If your chosen flavour of Linux is RPM-based (e.g. Red Hat, CentOS, Fedora), repositories are available too.
After this, the base Packer image will have the Vault CLI installed.
Windows
To install on Windows, we do the same as for Linux (add an Ansible rolled called Vault). The contents of the tasks/main.yml file are: -
---
# tasks file for vault
- name: Install vault
  win_chocolatey:
    name:
    - vault
    state: present
When installing packages with Chocolatey, Ansible will automatically install the Chocolatey package manager if it hasn’t been already. This means we only need to a task that installs the Vault package.
Vault?
To create a Kubernetes cluster, we use kubeadm. First, we run the step to create a cluster (kubeadm init) on the first Control Plane node. After this, we join the other nodes to the first Control Plane node using kubeadm join.
The issue here is that kubeadm join requires the use of a token, a hash of the discovery token CA certificate and a certificate key. Even if we are comfortable with exposing these in plain text, we still need to find a way for the other Control Plane nodes and all of the Workers to access them.
One option would be to manually join each node, but this isn’t very scalable. If you create multiple clusters, and with many more workers, it could take hours to go through all of the nodes and manually join them together.
Instead we configure the first Control Plane node to place the token, discovery token CA certificate and certificate key into Hashicorp’s Vault once the kubeadm init phase is complete. Vault is a secret management store, which makes it perfect for this task.
The other Control Plane nodes and Workers will then be able to retrieve he secret and join the first Control Plane node (and therefore the cluster).
As an added bonus, Vault can be configured using Terraform. Other than the initial Vault node(s) setup, all of our Vault configuration can be created and managed as Infrastructure-as-Code.
Creating a Vault node
To create a Vault node, follow the instructions from Hashicorp’s Getting Started page. If you intend to run Vault in production, or at least simulate Vault in a production scenario (with sealing, unsealing, access policies and more), follow the Install Vault section and the Deploy Vault section.
If you have never used Vault before, I would advise following the entire tutorial to gain familiarity. If you are already comfortable with the concepts of Vault though, the two sections mentioned will get Vault up and running.
Unsealing Vault
When you go through the process of installing Vault, you will be presented with something like the below: -
Unseal Key 1: $UNSEAL_KEY_1
Unseal Key 2: $UNSEAL_KEY_2
Unseal Key 3: $UNSEAL_KEY_3
Unseal Key 4: $UNSEAL_KEY_4
Unseal Key 5: $UNSEAL_KEY_5

Initial Root Token: $ROOT_TOKEN

Vault initialized with 5 key shares and a key threshold of 3. Please securely
distribute the key shares printed above. When the Vault is re-sealed,
restarted, or stopped, you must supply at least 3 of these keys to unseal it
before it can start servicing requests.

Vault does not store the generated master key. Without at least 3 key to
reconstruct the master key, Vault will remain permanently sealed!

It is possible to generate new unseal keys, provided you have a quorum of
existing unseal keys shares. See "vault operator rekey" for more information.
Vault starts in a sealed state by default. If Vault is sealed, the secrets are not accessible until is is unsealed. How you manage the unseal keys (a password store, in a physical safe, etc) is down to your processes.
Vault will stay sealed until it is presented with at least 3 unseal keys. To provide these keys, run vault operator unseal and enter one of the keys. Do this two more times (providing a different unseal key each time), and you will be presented with the below: -
Key                     Value
---                     -----
Seal Type               shamir
Initialized             true
Sealed                  false <-----------
Total Shares            5
Threshold               3
Version                 1.5.4
Cluster Name            vault-cluster-5fd7d77e
Cluster ID              71aa20ba-1fd4-e2ec-79bc-3748c8548d0e
HA Enabled              true
HA Cluster              https://127.0.0.1:8201
HA Mode                 standby
Active Node Address     https://0.0.0.0:8200
Raft Committed Index    8061
Raft Applied Index      8061
In the above, you can see that the Sealed value is false, meaning we can now access the secrets inside Vault.
Interacting with Vault
To interact with Vault, you can use the CLI or the web interface. The web interface looks like this: -

Initially, you will need to use the root token (as shown in the previous section) to login. After this, you will be presented with something like the following: -
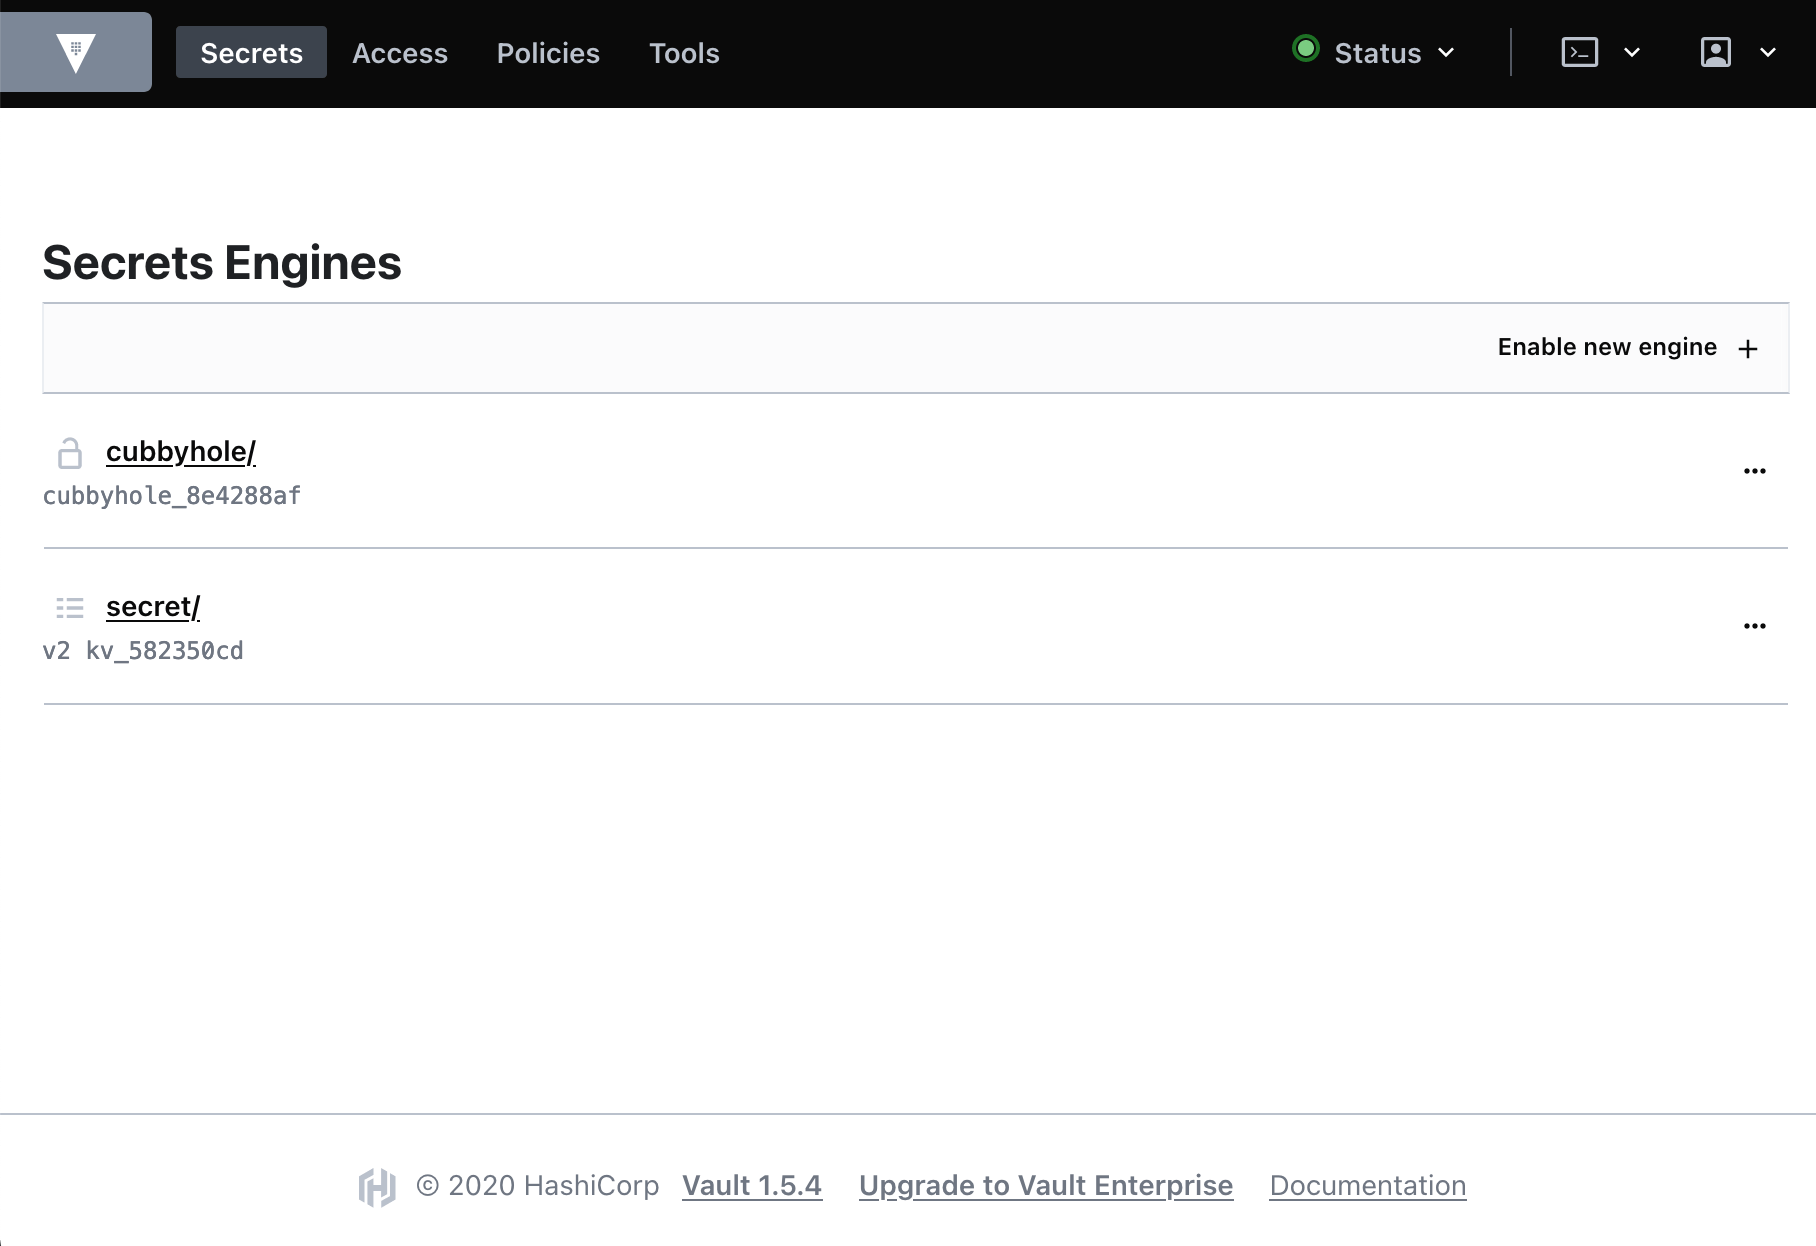
From here you can create Secrets Engines, define Access (users, groups, auth methods etc), create Policies and also use some of the tools available (e.g. password generation, hashing etc). It is strongly advised to create users and/or enable alternative authentication methods rather than using the root key for access by users. Authentication methods include OIDC, LDAP, AWS IAM and more (see here for the full list).
The below shows the options available from the Vault CLI: -
$ vault
Usage: vault <command> [args]

Common commands:
    read        Read data and retrieves secrets
    write       Write data, configuration, and secrets
    delete      Delete secrets and configuration
    list        List data or secrets
    login       Authenticate locally
    agent       Start a Vault agent
    server      Start a Vault server
    status      Print seal and HA status
    unwrap      Unwrap a wrapped secret

Other commands:
    audit          Interact with audit devices
    auth           Interact with auth methods
    debug          Runs the debug command
    kv             Interact with Vault's Key-Value storage
    lease          Interact with leases
    monitor        Stream log messages from a Vault server
    namespace      Interact with namespaces
    operator       Perform operator-specific tasks
    path-help      Retrieve API help for paths
    plugin         Interact with Vault plugins and catalog
    policy         Interact with policies
    print          Prints runtime configurations
    secrets        Interact with secrets engines
    ssh            Initiate an SSH session
    token          Interact with tokens
Using Terraform with Vault
Terraform has a Vault provider that is well supported (as both projects were created by Hashicorp). This means that not only can we create our Kubernetes cluster using Terraform, but we can also setup our roles, secrets and policies in Vault at the same time.
Being able to use Terraform for this means that everything we need to create a cluster can be committed to a code repository (e.g. Git). You can also create reusable modules. This means that defining a cluster can be as simple as defining a few variables, with the modules taking care of everything else.
To use the Vault provider, define something like the following: -
providers.tf
terraform {
 required_version = ">= 0.13"
  required_providers {
    vault = {
      source = "hashicorp/vault"
      version = "2.15.0"
    }
  }
}
This will bring in the Vault provider, allowing you to create Vault resources.
The following Terraform configuration create the necessary Vault components for the clusters to use: -
# Create the generic auth backend - User and password
resource "vault_auth_backend" "approle" {
  type = "approle"
}

# KV Path Mount
resource "vault_mount" "secret-kv" {
  path        = "secret"
  type        = "kv"
  options = {
    "version" = "2"
  }
}

# Create a policy that can only write the kubeadm token
resource "vault_policy" "kubeadm_token_write" {
    name = "kubeadm_token_write"

    policy = <<EOT
path "secret/kubeadm_token" {
  capabilities = ["update", "create"]
}
path "secret/data/kubeadm_token" {
  capabilities = ["update", "create"]
}
EOT
}

# Create a policy that can only read the kubeadm token
resource "vault_policy" "kubeadm_token_read" {
    name = "kubeadm_token_read"

    policy = <<EOT
path "secret/kubeadm_token" {
  capabilities = ["read"]
}
path "secret/data/kubeadm_token" {
  capabilities = ["read"]
}
EOT
}

# KubeADM Read User
resource "vault_approle_auth_backend_role" "kubeadm_read" {
  backend   = vault_auth_backend.approle.path
  role_name = "kubeadm-read"
  token_policies  = ["kubeadm_token_read"]
}

resource "vault_approle_auth_backend_role_secret_id" "kubeadm_read" {
  backend   = vault_auth_backend.approle.path
  role_name = vault_approle_auth_backend_role.kubeadm_read.role_name
}

# KubeADM Write User
resource "vault_approle_auth_backend_role" "kubeadm_write" {
  backend   = vault_auth_backend.approle.path
  role_name = "kubeadm-write"
  token_policies  = ["kubeadm_token_write"]
}

resource "vault_approle_auth_backend_role_secret_id" "kubeadm_write" {
  backend   = vault_auth_backend.approle.path
  role_name = vault_approle_auth_backend_role.kubeadm_write.role_name
}
There are a few terms we need to cover here: -
- Auth Backend - This is how a user and/or application will login to Vault (to be able to retrieve a secret)
- Mount - This is the kind of secret backend used for a particular path
- Many other backends (known as Secrets Engines) are available
- Path - Where in Vault the secret is stored (e.g.
/secret/my-tokenor/another-path/another-token)- It is worth noting that a secret (e.g.
kubeadm_token) can have multiple keys and values
- It is worth noting that a secret (e.g.
- App Role - This is effectively a service account that has access to Vault
- App roles come with a Role ID and Secret ID that is used to authenticate against Vault with (similar to AWS Access Keys and Secret Keys)
- An app role can be used to retrieve a token, which can be used in future Vault requests (via the CLI or API)
- Policy - A policy defines what a user and/or applications is allowed to do
- This can be restricted to certain paths
- It can also restrict operations (e.g.
readonly, orupdateandcreateonly)
To summarize what we are doing in the above, we are: -
- Creating the
approleauth backend (i.e. allowing anapproleto login to Vault) - Creating the
secretpath, as a generic Key-Value store - Create two
approles(kubeadm-read and kubeadm-write) - Create the associated policies for the
approles - Ensure a secret ID is created for each
approle
The kubeadm-write app role cannot read the secret (and doesn’t need to). Similarly the kubeadm-read app role only needs to read the secret, so it is not given “update” or “create” permissions.
In our scenario, the only Kubernetes node that needs the kubeadm-write role is the first Control Plane node. It knows the kubeadm secret values when it creates them, which are then added to Vault.
All other nodes can use the kubeadm-read. They read the values of the secret and use them as part of the join process (i.e. joining to the first Control Plane node).
Libvirt Terraform Provider
In previous versions of Terraform (0.12 and below), adding third-party providers involved installing from source and moving providers into certain directories. From version 0.13 and above, the process is far simpler. All you need to do now is add something like the below to your Providers definition: -
terraform {
 required_version = ">= 0.13"
  required_providers {
    libvirt = {
      source  = "dmacvicar/libvirt"
      version = "0.6.2"
    }
    vault = {
      source = "hashicorp/vault"
      version = "2.15.0"
    }
  }
}
If you then run terraform init, it will bring in the libvirt provider.
The provider itself covers the creation of virtual machines in KVM/libvirt and related resources, including: -
- Creating “domains” (i.e. virtual machines)
- Creating networks
- Creating pools for storage
- Creating volumes (i.e. disks to install machines on)
- Support for CloudInit or CoreOS Ignition for first-time boot configuration
As with the Proxmox Provider I covered in a previous post, it as expansive as something like the AWS or Azure providers. This is because KVM/libvirt is just a hypervisor. It does not provide firewalling, managed databases, functions as a service (e.g. AWS Lambdas) or anything else. This means it only needs to cover enough to build and run a virtual machine.
Creating the initial storage pool
I am running this cluster on a machine that already runs KVM, so a lot of the basic networking and storage exists already. I did create a storage pool just for the Kubernetes nodes using Terraform though: -
resource "libvirt_pool" "libvirt-default-pool" {
  name = "kubernetes"
  type = "dir"
  path = var.libvirt_disk_path
}

variable "libvirt_disk_path" {
  description = "path for libvirt pool"
  default     = "/var/lib/libvirt/images/kubernetes"
}
There are multiple options for the type of pool you can create (everything from directories to iSCSI to ZFS). As I’m not using any shared storage (like iSCSI) or advanced disk management (like ZFS), I have opted for using a directory.
Creating the first Control Plane node
To create the first Control Plane node, we need to create a volume, a domain and our Cloud-Init configuration. The following Terraform configuration covers all of this: -
resource "libvirt_volume" "k8s-cp-01" {
  name = "k8s-cp-01"
  pool = libvirt_pool.libvirt-default-pool.name
  source = "/var/lib/libvirt/images/debian10-kube.qcow2"
  format = "qcow2"
}

data "template_file" "k8s-cp-01" {
  template = file("${path.module}/cloud-init/debian-primary.cfg")
  vars = {
    SSH_KEY = file("~/.ssh/id_rsa.pub")
    VAULT_KW_ROLE_ID = vault_approle_auth_backend_role.kubeadm_write.role_id
    VAULT_KW_SECRET_ID = vault_approle_auth_backend_role_secret_id.kubeadm_write.secret_id
    HOSTNAME = "k8s-cp-01"
  }
}

resource "libvirt_cloudinit_disk" "k8s-cp-01" {
  name           = "k8s-cp-01.iso"
  user_data      = data.template_file.k8s-cp-01.rendered
  pool           = libvirt_pool.libvirt-default-pool.name
}

resource "libvirt_domain" "k8s-cp-01" {
  name   = "k8s-cp-01"
  memory = "4096"
  vcpu   = 2

  cloudinit = libvirt_cloudinit_disk.k8s-cp-01.id

  network_interface {
    network_name = "mgmt-bridge"
    mac          = "52:54:00:FE:80:01"
  }

  # IMPORTANT: this is a known bug on cloud images, since they expect a console
  # we need to pass it
  # https://bugs.launchpad.net/cloud-images/+bug/1573095
  console {
    type        = "pty"
    target_port = "0"
    target_type = "serial"
  }

  console {
    type        = "pty"
    target_type = "virtio"
    target_port = "1"
  }

  disk {
    volume_id = libvirt_volume.k8s-cp-01.id
  }

  graphics {
    type        = "vnc"
    listen_type = "address"
    autoport    = true
  }
}
In this, we create our domain (with 4G of memory and 2 vCPUs), create a volume (that is cloned from the debian10-kube.qcow2 image we created with Packer) and create our Cloud-Init configuration. We pass in our SSH public key, the hostname, and also the Vault app role Role ID and Secret ID for the kubeadm-write role into the Cloud-Init configuration template. This allows us to use a fairly generic Cloud-Init template for the Control Plane node.
Cloud-Init Template
Our template to take our Packer-created image and turn it into our first Control Plane node looks like the below: -
#cloud-config
ssh_pwauth: true
fqdn: ${HOSTNAME}.behemoth.yetiops.lab

packages:
 - prometheus-node-exporter
 - sudo

users:
  - name: yetiops
    groups: sudo
    shell: /bin/bash
    sudo: ['ALL=(ALL) NOPASSWD:ALL']
    ssh-authorized-keys:
      - ${SSH_KEY}

kubeadm_init:
  - &kube_init |
    kubeadm init --pod-network-cidr=10.244.0.0/16 --control-plane-endpoint "k8s-api.behemoth.yetiops.lab" --upload-certs > /root/kubeadm_output
    grep -Ei "\-\-token|discovery-token-ca-cert-hash|\-\-certificate-key" /root/kubeadm_output | tr '\n' ' ' | sed -e 's/kubeadm/\nkubeadm/g' | grep -i control | sed -e 's/--/\n/g' -e 's/ \\//g' | grep -Eiv "control-plane|kubeadm join" > /root/kubeadm_join


vault_kv:
  - &vaultkv |
    export VAULT_ADDR="https://10.15.32.240:8200"
    export VAULT_SKIP_VERIFY=true
    export VAULT_TOKEN=$(vault write -field=token auth/approle/login role_id=${VAULT_KW_ROLE_ID} secret_id=${VAULT_KW_SECRET_ID})
    vault kv put secret/kubeadm_token token=$(grep -Ei "^token" /root/kubeadm_join | awk '{print $2}') discovery-token-ca-cert-hash=$(grep -Ei "^discovery-token-ca-cert-hash" /root/kubeadm_join | awk '{print $2}') certificate-key=$(grep -Ei "^certificate-key" /root/kubeadm_join | awk '{print $2}')

win_prep:
  - &winprep |
    export KUBECONFIG=/etc/kubernetes/admin.conf
    curl -L https://raw.githubusercontent.com/coreos/flannel/master/Documentation/kube-flannel.yml | sed 's/vxlan"/vxlan",\n        "VNI" : 4096,\n        "Port": 4789/g' | kubectl apply -f -
    curl -L https://github.com/kubernetes-sigs/sig-windows-tools/releases/latest/download/kube-proxy.yml | sed 's/VERSION/v1.19.3/g' | kubectl apply -f -
    kubectl apply -f https://github.com/kubernetes-sigs/sig-windows-tools/releases/latest/download/flannel-overlay.yml


runcmd:
 - [ sh, -c, *kube_init ]
 - [ sh, -c, *vaultkv ]
 - [ sh, -c, *winprep ]
The above template uses the cloud-config format. This allows us to use some in-built functions (e.g. user creation, setting hostnames, installing packages). We can then create our own functions (i.e. the kubeadm_init, vault_kv and win_prep sections) for more those not already covered by cloud-config.
The first function (kubeadm_init) has two parts to it.
First, it runs kubeadm init, supplying our Pod Network (using the common 10.244.0.0/16 subnet), specifies that the endpoint (i.e. the Kubernetes URL) will be k8s-api.behemoth.yetiops.lab (served by relayd on our OpenBSD router appliance in the lab setup), uses the upload-certs functionality to upload the Control Plane certificates to a Kubernetes secret), and then places the output of the command into a file called /root/kubeadm_output.
Once this is complete, it finds the lines containing our tokens, our certificate hashes and the certificate key, parses the output, removes any unneeded text. Finally, it creates a file called /root/kubeadm_join containing the values: -
token $TOKEN_CONTENTS
discovery-token-ca-cert-hash $DISCOVERY_CERT_HASH
certificate-key $CERTIFICATE-KEY
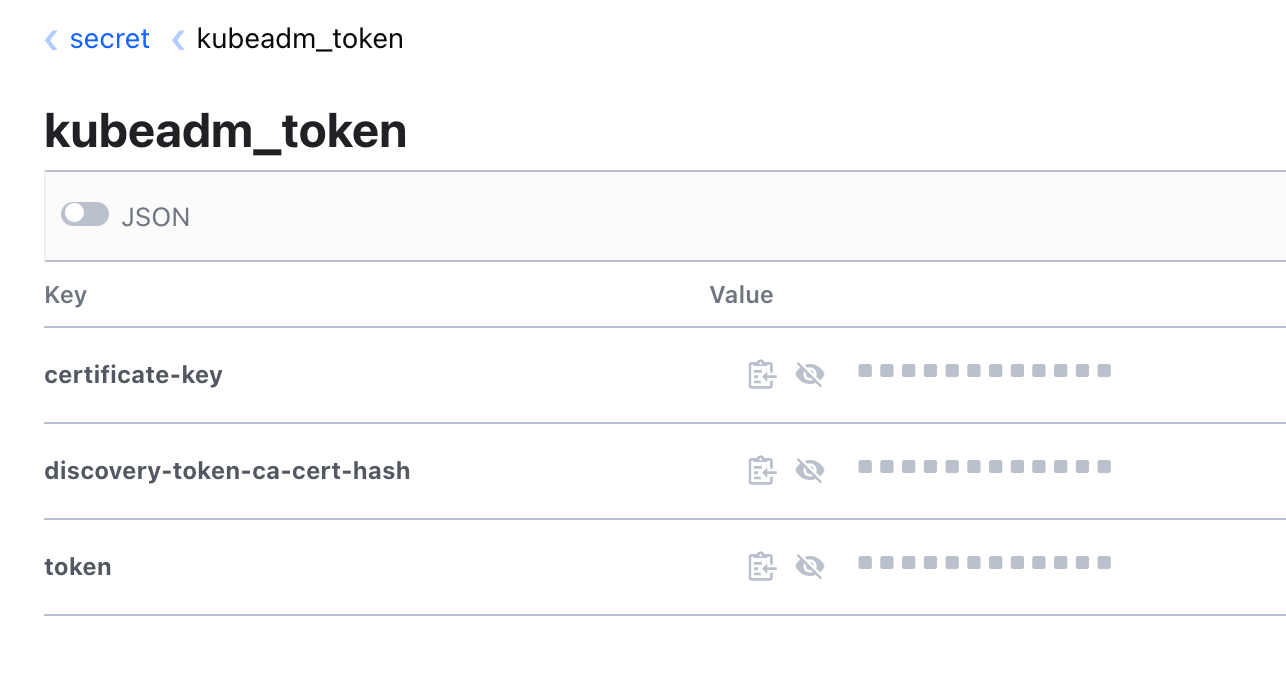
The second function (vaultkv) is where we add our details to Vault. We first specify the address of Vault, and to skip verification of the certificate (by default, Vault’s certificate is self-signed). Next, we use the vault write command to login to Vault and retrieve our Vault API token, exporting it as the VAULT_TOKEN environment variable. The Vault CLI will look for this environment variable by default when performing any further operations.
Once we have the Vault token, we create a Secret in Vault called kubeadm_token. For each of the fields token, discovery-token-ca-cert-hash and certificate-key we retrieve the values from the /root/kubeadm_join file created in the previous step and then add them to the secret. In vault, this looks something like the below: -
Once this is done, we move onto the win_prep function. This section does the following: -
- Exports the variable KUBECONFIG, referencing the
admin.confconfiguration created by kubeadm - We retrieve the Flannel CNI (network provider) YAML definition, add in a limit on the VNI (VXLAN network identifier) and port used for VxLAN communication, and apply it
- We retrieve the Windows Kube Proxy YAML definition, update the version to match the Kubernetes version we are using (in this case, v1.19.3) and apply it
- We apply the Flannel Overlay YAML definition directly
These steps are taken from the Adding Windows Nodes kubeadm documentation. Without these, Windows will not communicate with any of the Linux nodes in the cluster, meaning that it will not function as part of the cluster. As these are defined on the first Control Plane node before any other node joins, all the other nodes will not need to have the configuration reapplied.
Why Cloud-Init and Cloud-Config?
The reason for using Cloud-Init and cloud-config is for two reasons: -
- Simplicity - Any commands we could run at the command line can be ran inside of this template
- Less dependencies - If we were to use another tool (e.g. Ansible), other dependencies would be required
It does have the disadvantage of not being idempotent, in that even if some of the environment variables are already set, some of the configuration has already been applied, or packages have already been installed, it will try again anyway.
In a production scenario, a configuration management tool like Ansible would allow for idempotence, dependency checking, interacting directly with the Kubernetes API after the initialization stages are complete and more. However as this is simply to show the basics of getting this up and running, I have forgone this step for now.
Creating the other Control Plane nodes
The other Control Plane nodes are configured very similarly to the first Control Plane: -
resource "libvirt_volume" "k8s-cp-02" {
  name = "k8s-cp-02"
  pool = libvirt_pool.libvirt-default-pool.name
  source = "/var/lib/libvirt/images/debian10-kube.qcow2"
  format = "qcow2"
}

data "template_file" "k8s-cp-02" {
  template = file("${path.module}/cloud-init/debian-secondary.cfg")
  vars = {
    SSH_KEY = file("~/.ssh/id_rsa.pub")
    VAULT_KR_ROLE_ID = vault_approle_auth_backend_role.kubeadm_read.role_id
    VAULT_KR_SECRET_ID = vault_approle_auth_backend_role_secret_id.kubeadm_read.secret_id
    HOSTNAME = "k8s-cp-02"
  }
}

resource "libvirt_cloudinit_disk" "k8s-cp-02" {
  name           = "k8s-cp-02.iso"
  user_data      = data.template_file.k8s-cp-02.rendered
  pool           = libvirt_pool.libvirt-default-pool.name
}

resource "libvirt_domain" "k8s-cp-02" {
  name   = "k8s-cp-02"
  memory = "4096"
  vcpu   = 2

  cloudinit = libvirt_cloudinit_disk.k8s-cp-02.id

  network_interface {
    network_name = "mgmt-bridge"
    mac          = "52:54:00:FE:80:02"
  }

  # IMPORTANT: this is a known bug on cloud images, since they expect a console
  # we need to pass it
  # https://bugs.launchpad.net/cloud-images/+bug/1573095
  console {
    type        = "pty"
    target_port = "0"
    target_type = "serial"
  }

  console {
    type        = "pty"
    target_type = "virtio"
    target_port = "1"
  }

  disk {
    volume_id = libvirt_volume.k8s-cp-02.id
  }

  graphics {
    type        = "vnc"
    listen_type = "address"
    autoport    = true
  }

  depends_on = [
    libvirt_domain.k8s-cp-01
  ]
}
The main difference you will see here is that we use a different Cloud-Init template (debian-secondary.cfg rather than debian-primary.cfg), and that we are supplying the Vault Role ID and Secret ID for the kubeadm-read app role. This is because the subsequent Control Plane nodes only need to read the secret we created in the previous step, not write or update it.
Other than that, all the other details are the same.
Cloud-Init Template
The template to build our subsequent Control Plane nodes looks like the below: -
#cloud-config
ssh_pwauth: true
fqdn: ${HOSTNAME}.behemoth.yetiops.lab

packages:
 - prometheus-node-exporter
 - sudo

users:
  - name: yetiops
    groups: sudo
    shell: /bin/bash
    sudo: ['ALL=(ALL) NOPASSWD:ALL']
    ssh-authorized-keys:
      - ${SSH_KEY}


write_files:
  - path: /usr/local/bin/vault_kube.sh
    owner: root
    permissions: '755'
    content: |
     #!/bin/bash

     while true; do

     echo "Check for token in Vault"

     vault kv get -field=discovery-token-ca-cert-hash secret/kubeadm_token

     if [ $? == 0 ]; then
     echo "Token found"
     break
     fi

     echo "Token not found"
     sleep 10

     done

vault_kubetoken:
  - &vaultkubetoken |
    export VAULT_ADDR="https://10.15.32.240:8200"
    export VAULT_SKIP_VERIFY=true
    export VAULT_TOKEN=$(vault write -field=token auth/approle/login role_id=${VAULT_KR_ROLE_ID} secret_id=${VAULT_KR_SECRET_ID})
    bash /usr/local/bin/vault_kube.sh


kubeadm_join:
  - &kubeadmjoin |
    export VAULT_ADDR="https://10.15.32.240:8200"
    export VAULT_SKIP_VERIFY=true
    export VAULT_TOKEN=$(vault write -field=token auth/approle/login role_id=${VAULT_KR_ROLE_ID} secret_id=${VAULT_KR_SECRET_ID})
    export KUBEADM_DISCOVERY_TOKEN=$(vault kv get -field=discovery-token-ca-cert-hash secret/kubeadm_token)
    export KUBEADM_TOKEN=$(vault kv get -field=token secret/kubeadm_token)
    export KUBEADM_CERT_KEY=$(vault kv get -field=certificate-key secret/kubeadm_token)
    kubeadm join k8s-api.behemoth.yetiops.lab:6443 --token $KUBEADM_TOKEN --discovery-token-ca-cert-hash $KUBEADM_DISCOVERY_TOKEN --control-plane --certificate-key $KUBEADM_CERT_KEY


runcmd:
 - [ sh, -c, *vaultkubetoken ]
 - [ sh, -c, *kubeadmjoin ]
In addition to the users, packages and setting the hostname of the node, we also create a script (using write_files called vault_kube.sh. This is a small script that checks the contents of the kubeadm_token secret in Vault. If it is empty, or the command fails for any other reason, it sleeps for 10 seconds and then checks the contents again. If the secret contains the discovery-token-ca-cert-hash field, the loop breaks and ends the script.
The reason for creating this script is so that rather than having to start the nodes in a certain order (i.e. create the Control Plane node, and then only bring up the other nodes when it is finished configuring itself), we can bring all the nodes up at once. Only once the Vault secret is populated will the subsequent nodes (Control Plane and Workers) join the cluster.
Before we run this script, we perform the same steps as we did in creating the first node to retrieve our Vault token.
After this, we then move on to joining the cluster. First, we login to Vault again (because the environment variables may have been cleared when the previous function ends). We then retrieve all of the fields and create corresponding environment variables. Finally, we use the kubeadm join command, supplying the token, discovery-token-ca-cert-hash and certicate-key, along with the --control-plane flag to note that this node will form part of the Control Plane (rather than being a worker).
Once all this is complete, the Control Plane nodes will join the cluster, providing a highly available Control Plane (i.e. if one goes down, the others still function as the Control Plane).
Creating the Linux Workers
The Linux worker node configuration is very similar to what we use in the previous two steps: -
  name = "k8s-worker-01"
  pool = libvirt_pool.libvirt-default-pool.name
  source = "/var/lib/libvirt/images/debian10-kube.qcow2"
  format = "qcow2"
}

data "template_file" "k8s-worker-01" {
  template = file("${path.module}/cloud-init/debian-workers.cfg")
  vars = {
    SSH_KEY = file("~/.ssh/id_rsa.pub")
    VAULT_KR_ROLE_ID = vault_approle_auth_backend_role.kubeadm_read.role_id
    VAULT_KR_SECRET_ID = vault_approle_auth_backend_role_secret_id.kubeadm_read.secret_id
    HOSTNAME = "k8s-worker-01"
  }
}

resource "libvirt_cloudinit_disk" "k8s-worker-01" {
  name           = "k8s-worker-01.iso"
  user_data      = data.template_file.k8s-worker-01.rendered
  pool           = libvirt_pool.libvirt-default-pool.name
}

resource "libvirt_domain" "k8s-worker-01" {
  name   = "k8s-worker-01"
  memory = "4096"
  vcpu   = 2

  cloudinit = libvirt_cloudinit_disk.k8s-worker-01.id

  network_interface {
    network_name = "mgmt-bridge"
    mac          = "52:54:00:FE:80:04"
  }

  # IMPORTANT: this is a known bug on cloud images, since they expect a console
  # we need to pass it
  # https://bugs.launchpad.net/cloud-images/+bug/1573095
  console {
    type        = "pty"
    target_port = "0"
    target_type = "serial"
  }

  console {
    type        = "pty"
    target_type = "virtio"
    target_port = "1"
  }

  disk {
    volume_id = libvirt_volume.k8s-worker-01.id
  }

  graphics {
    type        = "vnc"
    listen_type = "address"
    autoport    = true
  }

  depends_on = [
    libvirt_domain.k8s-cp-01
  ]
}
The only difference between this, and how we created the other control plane nodes (i.e. not the first node) is that we are using a slightly different Cloud-Init template (debian-workers.cfg rather than debian-secondary.cfg). All other details are the same.
Cloud-Init Template
The Cloud-Init template for the Workers is almost identical to what we use for the other control plane nodes: -
#cloud-config
ssh_pwauth: true
fqdn: ${HOSTNAME}.behemoth.yetiops.lab

packages:
 - prometheus-node-exporter
 - sudo

users:
  - name: yetiops
    groups: sudo
    shell: /bin/bash
    sudo: ['ALL=(ALL) NOPASSWD:ALL']
    ssh-authorized-keys:
      - ${SSH_KEY}


write_files:
  - path: /usr/local/bin/vault_kube.sh
    owner: root
    permissions: '755'
    content: |
     #!/bin/bash

     while true; do

     echo "Check for token in Vault"

     vault kv get -field=discovery-token-ca-cert-hash secret/kubeadm_token

     if [ $? == 0 ]; then
     echo "Token found"
     break
     fi

     echo "Token not found"
     sleep 10

     done

vault_kubetoken:
  - &vaultkubetoken |
    export VAULT_ADDR="https://10.15.32.240:8200"
    export VAULT_SKIP_VERIFY=true
    export VAULT_TOKEN=$(vault write -field=token auth/approle/login role_id=${VAULT_KR_ROLE_ID} secret_id=${VAULT_KR_SECRET_ID})
    bash /usr/local/bin/vault_kube.sh


kubeadm_join:
  - &kubeadmjoin |
    export VAULT_ADDR="https://10.15.32.240:8200"
    export VAULT_SKIP_VERIFY=true
    export VAULT_TOKEN=$(vault write -field=token auth/approle/login role_id=${VAULT_KR_ROLE_ID} secret_id=${VAULT_KR_SECRET_ID})
    export KUBEADM_DISCOVERY_TOKEN=$(vault kv get -field=discovery-token-ca-cert-hash secret/kubeadm_token)
    export KUBEADM_TOKEN=$(vault kv get -field=token secret/kubeadm_token)
    kubeadm join k8s-api.behemoth.yetiops.lab:6443 --token $KUBEADM_TOKEN --discovery-token-ca-cert-hash $KUBEADM_DISCOVERY_TOKEN


runcmd:
 - [ sh, -c, *vaultkubetoken ]
 - [ sh, -c, *kubeadmjoin ]
The only difference is that we do not need to specify the certificate key at any point in the join command, so we do not retrieve it. As with the control plane nodes created in the previous section, the Vault secret is checked every 10 seconds, and when it is populated, it will begin the process of joining the cluster.
Creating the Windows workers
Creating the Windows workers, at least in terms of Terraform configuration, is similar to what we use for our Linux workers: -
resource "libvirt_volume" "k8s-winworker-01" {
  name = "k8s-winworker-01t"
  pool = libvirt_pool.libvirt-default-pool.name
  source = "/var/lib/libvirt/images/win2019-kube.qcow2"
  format = "qcow2"
}

data "template_file" "k8s-winworker-01" {
  template = file("${path.module}/cloud-init/windows-workers.cfg")
  vars = {
    VAULT_KR_ROLE_ID = vault_approle_auth_backend_role.kubeadm_read.role_id
    VAULT_KR_SECRET_ID = vault_approle_auth_backend_role_secret_id.kubeadm_read.secret_id
    HOSTNAME = "k8s-winworker-01"
  }
}

resource "libvirt_cloudinit_disk" "k8s-winworker-01" {
  name           = "k8s-winworker-01.iso"
  user_data      = data.template_file.k8s-winworker-01.rendered
  meta_data      = jsonencode({
    "instance-id": random_id.instance_id.hex,
  })
  pool           = libvirt_pool.libvirt-default-pool.name
}

resource "random_id" "instance_id" {
  byte_length = 10
}

resource "libvirt_domain" "k8s-winworker-01" {
  name   = "k8s-winworker-01"
  memory = "4096"
  vcpu   = 2

  cloudinit = libvirt_cloudinit_disk.k8s-winworker-01.id

  network_interface {
    network_name = "mgmt-bridge"
    mac          = "52:54:00:FE:80:07"
  }


  # IMPORTANT: this is a known bug on cloud images, since they expect a console
  # we need to pass it
  # https://bugs.launchpad.net/cloud-images/+bug/1573095
  console {
    type        = "pty"
    target_port = "0"
    target_type = "serial"
  }

  console {
    type        = "pty"
    target_type = "virtio"
    target_port = "1"
  }

  disk {
    volume_id = libvirt_volume.k8s-winworker-01.id
  }

  graphics {
    type        = "vnc"
    listen_type = "address"
    autoport    = true
  }
}
The only major differences here are: -
- We use a different source image for our volume (
win2019-kube.qcow2rather thandeb10-kube.qcow2) - We create a randomly generated instance ID
- We supply this instance ID as part of the
meta_dataCloud-Init configuration
The reason for the latter is that Cloudbase-Init (the Windows-equivalent of Cloud-Init) expects to see an Instance ID in the metadata section of the Cloud-Init disk. Without this, Cloudbase-Init will fail. The instance ID is not used in our configuration, so creating a randomly-generated ID is fine.
One point to note with the hostname is that due to NETBIOS limitations, the hostname will be constrained to 15 characters. If your hostname is longer than this, it will be trimmed down to the first 15 characters.
Cloud-Init Template
In the Cloud-Init definition, we supply part of it in the cloud-config format, and most of it in the Powershell format. The reason is because the PrepareNode.ps1 script provided by the Kubernetes Windows Special Interest Group (windows-sig) is what we based most of our Packer image upon. We can remove all the parts which install dependencies, create directories and such, and keep only the node-specific sections.
This could have been rewritten in cloud-config, or even using an Ansible script, but for the purposes of this post I just used a trimmed down version of the script. It also means that if it changes in future (i.e. the windows-sig team make improvements to it), it will be much easier to implement them as part of this.
The following template will configure our Windows 2019-based node as a Kubernetes worker in our cluster: -
Content-Type: multipart/mixed; boundary="===============1598784645116016685=="
MIME-Version: 1.0

--===============1598784645116016685==
Content-Type: text/cloud-config; charset="us-ascii"
MIME-Version: 1.0
Content-Transfer-Encoding: 7bit
Content-Disposition: attachment; filename="cloud-config"
# cloud-config
set_hostname: ${HOSTNAME}

--===============1598784645116016685==
Content-Type: text/x-cfninitdata; charset="us-ascii"
MIME-Version: 1.0
Content-Transfer-Encoding: 7bit
Content-Disposition: attachment; filename="cfn-userdata"
#ps1

$global:Powershell = (Get-Command powershell).Source
$global:PowershellArgs = "-ExecutionPolicy Bypass -NoProfile"
$global:StartKubeletScript = "C:\k\StartKubelet.ps1"

$StartKubeletFileContent = '$FileContent = Get-Content -Path "/var/lib/kubelet/kubeadm-flags.env"

$global:KubeletArgs = $FileContent.TrimStart(''KUBELET_KUBEADM_ARGS='').Trim(''"'')

docker network create -d nat host

$cmd = "C:\k\kubelet.exe $global:KubeletArgs --cert-dir=$env:SYSTEMDRIVE\var\lib\kubelet\pki --config=/var/lib/kubelet/config.yaml --bootstrap-kubeconfig=/etc/kubernetes/bootstrap-kubelet.conf --kubeconfig=/etc/kubernetes/kubelet.conf --hostname-override=$(hostname) --pod-infra-container-image=`"mcr.microsoft.com/oss/kubernetes/pause:1.4.1`" --enable-debugging-handlers --cgroups-per-qos=false --enforce-node-allocatable=`"`" --network-plugin=cni --resolv-conf=`"`" --log-dir=/var/log/kubelet --logtostderr=false --image-pull-progress-deadline=20m"

Invoke-Expression $cmd'
Set-Content -Path $global:StartKubeletScript -Value $StartKubeletFileContent

Write-Host "Registering kubelet service"
nssm install kubelet $global:Powershell $global:PowershellArgs $global:StartKubeletScript
nssm set kubelet DependOnService docker

$env:VAULT_ADDR = "https://10.15.32.240:8200"
$env:VAULT_SKIP_VERIFY = "true"
$env:VAULT_TOKEN = vault write -field=token auth/approle/login role_id=${VAULT_KR_ROLE_ID} secret_id=${VAULT_KR_SECRET_ID}

while($true)
{
     vault kv get -field=discovery-token-ca-cert-hash secret/kubeadm_token
     If ($lastExitCode -eq "0") {
       break
     }
     Start-Sleep -s 10
}

$env:KUBEADM_DISCOVERY_TOKEN = vault kv get -field=discovery-token-ca-cert-hash secret/kubeadm_token
$env:KUBEADM_TOKEN = vault kv get -field=token secret/kubeadm_token
kubeadm join --ignore-preflight-errors=SystemVerification k8s-api.behemoth.yetiops.lab:6443 --token $env:KUBEADM_TOKEN --discovery-token-ca-cert-hash $env:KUBEADM_DISCOVERY_TOKEN
This uses the Cloudbase-Init multipart support, to allow multiple formats (i.e. cloud-config and powershell) in the same Cloud-Init script. Setting the hostname via cloud-config is quite straightforward, meaning that we do not need to use Powershell to do so.
After this, we use the relevant sections of the PrepareNode.ps1 script: -
- We set the absolute path of Powershell as a variable
- We set the Powershell arguments as a variable (bypassing Execution Policies) allowing us to avoid any prompts/administrative logins to allow certain commands to work
- We create a
StartKubelet.ps1script that contains ourkubeadm-flags- This script ensures the Docker host network is created, and runs Kubelet with the correct arguments
- We create a service using nssm that will start the Kubelet
- This service depends upon the Docker service starting and running
Once all of the above is done, the following steps are similar to the previous templates (other than using Powershell syntax). We login to Vault, start a loop that checks to see if our Vault secret is populated, and break out of the loop once it is. We then retrieve the discovery-token-ca-cert-hash and token fields from the secret and use them in our kubeadm join command.
The reason we use --ignore-preflight-errors=SystemVerification is because we have installed the latest version of Docker for Windows in our Packer image. This is a few point releases higher than the current verified version of Docker that kubeadm supports, meaning it will fail to run without this argument. In a production scenario, install the verified version and then pin it, so that you are always running the verified version.
Once this is complete, the Windows node will join the cluster.
Points to note
When joining a Windows node to Kubernetes, you’ll need to be aware of a couple of things.
First, if you need to debug the node you will need to use RDP (unless you install OpenSSH during the Packer image creation).
Secondly, Windows-based containers are usually quite large. Some of the images can be multiple gigabytes in size to run a basic web server. Compared to something like a CentOS, Ubuntu or Debian-based image that is in the hundreds of megabytes typically, or even a “scratch” container running a Go binary that is 15-20 megabytes in size, Windows containers are orders of magnitude larger. This includes the Kubernetes images (i.e. the kube-proxy and kube-flannel containers, which are both around 5Gb in size.
You can use the Windows Nano Server images, which are around a hundred megabytes in size. However, they run a very stripped down version of Windows. Depending on what your application requires, it may not be enough “Windows” (i.e. missing dependencies or APIs) to be able to run it.
It is also worth noting that if your applications are written in DotNet Core, they are compatible with Linux (see here for official DotNet Linux Docker images). If this is the case, you may not need to run Windows workers at all.
Cluster Creation
The below video covers the creation of the cluster. This includes the Terraform configuration and application, monitoring the Cloud-Init logs, and then monitoring kubectl to see when the other nodes join. There is also a comparison of how long it takes for a Linux node to be ready to serve traffic, and the same for a Windows node (note the image size discussion in the previous section!).
Summary
We now have a working Kubernetes cluster, and can begin to think about how to add workloads to it. As we will see in the next part of this series, there are still a few extra steps required to enable access to services outside of the cluster. Once these are complete, we can serve our applications, regardless of whether it is NGINX, IIS, Go or DotNet.
Being able to use the libvirt Terraform provider to achieve all this means that we have very few (if any) manual steps to bring up a multi-operating system Kubernetes cluster.
devops kubernetes kvm linux windows terraform packer ansible
technical kubernetes packer terraform
5554 Words
2020-12-08 18:25 +0000