21 minutes
Kubernetes - Building a Mixed Linux and Windows Cluster using Packer, Terraform, Ansible and KVM - Part 1: Image Preparation
Kubernetes has established itself as the container orchestration platform of choice across a number of organisations, and is well supported on a number of different cloud providers. Everywhere from AWS and Google Cloud Platform to Linode and Digital Ocean has their own Kubernetes offering.
Kubernetes began as a Linux-only project. However a number of improvements within the Windows operating system (including native Container support) mean that it is now possible to run Kubernetes workloads on either Linux or Windows. Windows is currently not supported as the control plane (i.e. what controls the container orchestration), but can run as a Kubernetes worker.
In a short series of posts, I am going to cover how to build a Kubernetes cluster that includes both Linux and Windows workers. This series will cover: -
- Initial image creation (this post)
- Deploying the images and creating a cluster with Terraform, KVM and Cloud-Init
- Deploying applications to the cluster and making them externally available
Environment
Rather than running this on a specific cloud provider (and getting into specifics about each provider’s managed Kubernetes implementation), this will be deployed on the KVM virtualisation environment on Linux. This means that while we may need to do a little more work up front, many of the lessons learned will be applicable to all Kubernetes implementations.
We will use Packer and Ansible to generate the base images for both Linux and Windows. Packer will create the images, whereas Ansible will manage the configuration and dependencies. This will decrease the time it takes to spin up a new node into the cluster, as all the necessary features and applications are installed. They will only require the cluster-specific details to be able to join.
We will also make use of Terraform (with the Terraform Libvirt provider and Cloud-Init (native Cloud-Init for Linux, Cloudbase-Init for Windows) to deploy the control plane nodes and the workers.
To provide a highly-available control plane we will use OpenBSD’s relayd(8) to provide basic loadbalancing for the Kubernetes API. The reason for using OpenBSD is that I always have an OpenBSD virtual machine running in my lab to provide DNS, DHCP and basic firewalling, so adding basic loadbalancing functionality here makes sense. In your own scenarios you can use any loadbalancer of your choice (NGINX, HAProxy, Cloud load balancers etc).
Why Packer?
Packer can build images across cloud providers, virtualisation environments, Docker, Vagrant and more. This means that the Packer configuration we will use will be easily transferable to your provider of choice. If your preferred platform is VMWare, then you can adapt the configuration to see fit. If you choose AWS or Azure, then you can remove most of the configuration and still build a similar cluster.
You can look at the list of Packer builders here.
Why Ansible?
Ansible was built from day one as an agentless configuration management system. Given that the Packer images are going to cloned, we do not want to register the images with a configuration management system only to then require unregistering afterwards.
Also, Ansible has very good support for managing Windows as well as Linux, which works for our scenario.
Other configuration management tools (Chef, Puppet and Saltstack) do support agentless operation now, so if you are more comfortable with them then you can use them instead with Packer.
Why Cloud-Init and Cloudbase-Init?
Rather than creating each individual node’s image separately in Packer, we can create two images (a Linux image and a Windows image) that can be customized at first boot. The images will be prepared with all the common dependencies (i.e. base package installation, container support, Kubernetes binaries), and then any cluster-specific details can be supplied on the next boot.
This means that the images are reusable across many clusters, rather than being specific to one cluster.
Packer
I have covered Packer previously as well as how to use Ansible to customize the images that Packer builds.
With this being the case, we will cover the specifics for how to use it with KVM, as well as some of the quirks with building Windows images for KVM using Packer.
QEMU Builder
To build images for KVM, we use the Packer QEMU Builder. This will generate a qcow2-based image that KVM will use as the root disk of the Kubernetes virtual machines.
Unlike the builders for AWS, Google Cloud, Azure, DigitalOcean or otherwise, we do not use a pre-installed image that you can then customize. Instead we treat the installation as if it was a headless install of the machine from an ISO. This requires the use of preseed files (Debian Preseed, CentOS/RHEL Kickstart or Ubuntu Autoinstall) to provide answers to the questions in the ISO installers.
On Windows, this requires using Autounattend files. Also because Windows does not have virtio drivers by default, we need to provide drivers at install time so that it can access the storage controller.
Linux Build
We build the Linux images using Debian Buster. Most of the Packer configuration file was sourced from this repository by Goffinet, with some changes based upon my environment.
{
  "builders": [
    {
      "name": "debian10",
      "type": "qemu",
      "format": "qcow2",
      "accelerator": "kvm",
      "qemu_binary": "/usr/bin/qemu-system-x86_64",
      "net_device": "virtio-net",
      "disk_interface": "virtio",
      "disk_cache": "none",
      "cpus:": "2",
      "memory": "2048",
      "ssh_wait_timeout": "30m",
      "http_directory": "http",
      "ssh_username": "root",
      "ssh_password": "testtest",
      "iso_urls": "https://cdimage.debian.org/debian-cd/current/amd64/iso-cd/debian-10.6.0-amd64-netinst.iso",
      "iso_checksum": "2af8f43d4a7ab852151a7f630ba596572213e17d3579400b5648eba4cc974ed0",
      "boot_wait": "15s",
      "boot_command": [
                "<esc><wait>",
                "auto <wait>",
                "console-keymaps-at/keymap=us <wait>",
                "console-setup/ask_detect=false <wait>",
                "debconf/frontend=noninteractive <wait>",
                "debian-installer=en_US <wait>",
                "fb=false <wait>",
                "install <wait>",
                "kbd-chooser/method=us <wait>",
                "keyboard-configuration/xkb-keymap=us <wait>",
                "locale=en_US <wait>",
                "netcfg/get_hostname=debian10 <wait>",
                "preseed/url=http://{{ .HTTPIP }}:{{ .HTTPPort }}/deb10-kube/debian-preseed.cfg <wait>",
                "<enter><wait>"
      ],
      "disk_size": "40000",
      "disk_discard": "unmap",
      "disk_compression": true,
      "headless": "true",
      "vnc_bind_address": "0.0.0.0",
      "shutdown_command": "echo 'testtest' | sudo -S shutdown -P now",
      "output_directory": "artifacts/qemu/debian10-kube"
    }
  ],
  "provisioners": [
    {
         "type": "ansible",
         "extra_arguments": [
                "--extra-vars",
                "ansible_python_interpreter=/usr/bin/python"
              ],
         "playbook_file": "ansible/deb10-kubernetes/main.yml",
         "user": "root"
    }
  ]
}
Some points to note in this are: -
- We set the type to qemu (which informs Packer which builder to use)
- We set the format to qcow2 (the native disk format for KVM)
- We set the accelerator to KVM so that the machine can make native use of the (much quicker) KVM acceleration than the native QEMU emulation for building our image
- The qemu_binary location may differ depending upon your distribution (check the location with
which qemu-system-x86_64) - We use virtio based network and disks as they are much quicker than any other emulated interface
- We supply the ISO and checksum so that Packer can source the ISO from Debian directly, rather than relying on a local copy
- We supply the vnc_bind_address as
0.0.0.0so that we can monitor the build even if running on a headless server
The major part that automates the installation is the boot_command section. The list of commands provide keyboard input to the installer (as if someone was typing these commands) so that it knows to use the preseed file, as well as setting keymaps, the hostname and more.
When supplying the http_directory field, Packer will run a HTTP server that exposes the directories (and contents) provided. This means that you can serve a preseed.cfg file over HTTP (in our case, this is called debian-preseed.cfg, n the http directory) rather than having to supply it on a disk image.
The contents of the preseed file are: -
d-i pkgsel/install-language-support boolean false

# locale
d-i debian-installer/locale string en_GB.UTF-8

# keyboard
d-i keyboard-configuration/xkb-keymap   select  us

# timezone
d-i time/zone string Europe/London

# Controls whether to use NTP to set the clock during the install
d-i clock-setup/ntp boolean true

# apt
d-i mirror/country string manual
d-i mirror/http/hostname string deb.debian.org
d-i mirror/http/directory string /debian
d-i mirror/http/proxy string
d-i apt-setup/use_mirror boolean true

# users
d-i passwd/root-password password testtest
d-i passwd/root-password-again password testtest
d-i passwd/make-user boolean false

# partitioning
d-i partman-auto/method string regular
d-i partman-auto/choose_recipe select atomic
d-i partman-partitioning/confirm_write_new_label boolean true
d-i partman/choose_partition select finish
d-i partman/confirm boolean true
d-i partman/confirm_nooverwrite boolean true

apt-cdrom-setup apt-setup/cdrom/set-first boolean false

# software
tasksel tasksel/first multiselect standard
d-i pkgsel/include string qemu-guest-agent wget openssh-server vim sudo cloud-init
popularity-contest popularity-contest/participate boolean false

# grub
d-i grub-installer/only_debian boolean true
d-i grub-installer/bootdev  string /dev/vda

# script
d-i preseed/late_command in-target sed -i 's/#PermitRootLogin prohibit-password/PermitRootLogin yes/' /target/etc/ssh/sshd_config

# finish
d-i finish-install/reboot_in_progress note
To build this with Packer, you use packer build $NAME_OF_FILE.json. This will start the build process, which you can then view over VNC: -
$ packer build debian-10-kube.json
debian10: output will be in this color.

==> debian10: Retrieving ISO
==> debian10: Trying https://cdimage.debian.org/debian-cd/current/amd64/iso-cd/debian-10.6.0-amd64-netinst.iso
==> debian10: Trying https://cdimage.debian.org/debian-cd/current/amd64/iso-cd/debian-10.6.0-amd64-netinst.iso?checksum=sha256%3A2af8f43d4a7ab852151a7f630ba596572213e17d3579400b5648eba4cc974ed0
==> debian10: https://cdimage.debian.org/debian-cd/current/amd64/iso-cd/debian-10.6.0-amd64-netinst.iso?checksum=sha256%3A2af8f43d4a7ab852151a7f630ba596572213e17d3579400b5648eba4cc974ed0 => /home/stuh84/git/packer/packer_cache/c9149179a5e3b2d2360476806e9a5d30854c84ea.iso
==> debian10: Creating required virtual machine disks
==> debian10: Starting HTTP server on port 8435
==> debian10: Found port for communicator (SSH, WinRM, etc): 3270.
==> debian10: Looking for available port between 5900 and 6000 on 0.0.0.0
==> debian10: Starting VM, booting from CD-ROM
    debian10: The VM will be run headless, without a GUI. If you want to
    debian10: view the screen of the VM, connect via VNC without a password to
    debian10: vnc://0.0.0.0:5924
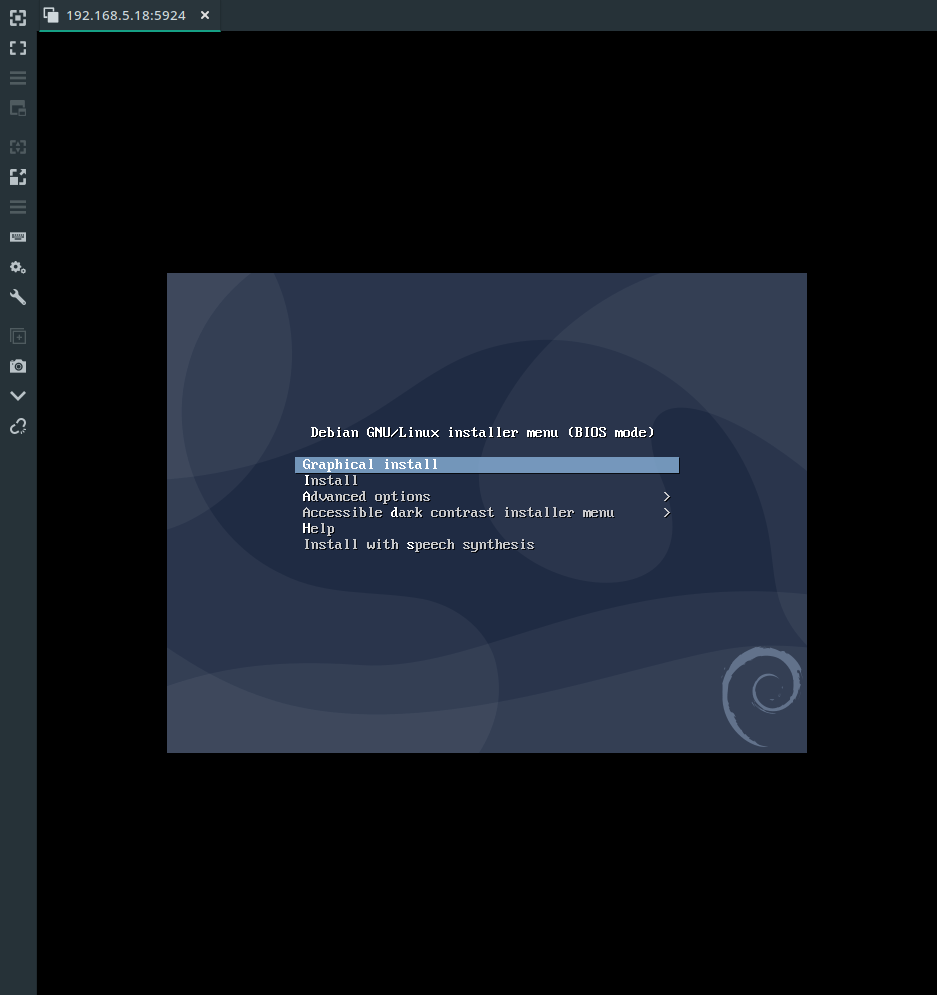
Connect over VNC to this port, and we can see the image being built: -
Once the install is finished, Ansible will apply the steps to customize the image and install the relevant dependencies.
Windows Build
Windows Container support for Kubernetes was first made available in Windows Server 2019, so we target that as our base operating system.
Most of the configuration was sourced from Stefan Scherer’s packer-windows repository, with a few changes made to suit my environment.
{
  "builders": [
    {
      "type": "qemu",
      "accelerator": "kvm",
      "communicator": "winrm",
      "format":"qcow2",
      "cpus": "2",
      "disk_size": "51200",
      "disk_interface":"virtio",
      "floppy_files": [
        "http/windows-2019/Autounattend.xml",
        "scripts/win-common/SetUpWinRM.ps1"
      ],
      "qemuargs": [
        [
          "-drive",
          "file=artifacts/qemu/win2019-kube/{{ .Name }},if=virtio,cache=writeback,discard=ignore,format=qcow2,index=1"
        ],
        [
          "-drive",
          "file=isos/17763.737.190906-2324.rs5_release_svc_refresh_SERVER_EVAL_x64FRE_en-us_1.iso,media=cdrom,index=2"
        ],
        [
          "-drive",
          "file=isos/virtio-win.iso,media=cdrom,index=3"
        ]
      ],
      "headless": true,
      "vnc_bind_address": "0.0.0.0",
      "iso_checksum": "549bca46c055157291be6c22a3aaaed8330e78ef4382c99ee82c896426a1cee1",
      "iso_url": "https://software-download.microsoft.com/download/pr/17763.737.190906-2324.rs5_release_svc_refresh_SERVER_EVAL_x64FRE_en-us_1.iso",
      "iso_target_path": "isos/17763.737.190906-2324.rs5_release_svc_refresh_SERVER_EVAL_x64FRE_en-us_1.iso",
      "memory": "4096",
      "output_directory": "artifacts/qemu/win2019-kube",
      "shutdown_command": "shutdown /s /t 30 /f",
      "shutdown_timeout": "15m",
      "vm_name": "windows-server-2019-standard-x64-eval",
      "winrm_password": "adm!nadm!n",
      "winrm_username": "Administrator",
      "winrm_timeout": "2h",
      "winrm_insecure": true,
      "winrm_use_ssl": true
    }
  ],
  "provisioners": [
    {
     "type": "ansible",
     "extra_arguments": [
       "-e",
       "kubernetes_version=v1.19.1",
       "-e",
       "ansible_shell_type=powershell",
       "-e",
       "ansible_shell_executable=None",
       "-e",
       "ansible_winrm_server_cert_validation=ignore"
     ],
     "use_proxy": false,
     "playbook_file": "ansible/windows-2019-kubernetes/main.yml",
     "user": "Administrator"
    },
    {
      "type": "powershell",
      "inline": [
        "C:\\Windows\\System32\\Sysprep\\sysprep.exe /quiet /generalize /oobe  /unattend:C:\\Program Files\\Cloudbase Solutions\\Cloudbase-Init\\conf\\Unattend.xml"
      ]
    }
  ]
}
A lot of this is very similar to the Debian image, with some exceptions. Some important points to note in this are: -
- We use the
floppy_filesdirective for supplying theAutounattendfile- We cannot guarantee that the network drivers work correctly pre-install (due to using VirtIO drivers)
- We supply a script to setup WinRM (taken from here)
- Ansible uses WinRM for Windows, so this is required for us to make changes to the machine post-install
- We present the
virtio-win.isoISO so that the machine can load drivers at install time - We customize the
winrmparameters (including timeouts and whether we use SSL, and also ignoring if a cert is unsigned)
One interesting point for the Ansible stage is that we use use_proxy: false. This means that Ansible bypasses the Packer connection to the machine, and talks to it directly. This is based upon a comment I received on my Building Windows AWS AMIs using Packer and Ansible from James Sturtevant. Previously I used an Ansible connection plugin to effectively piggyback onto the Packer connection to the virtual machine. Avoiding the Packer proxy means that we do not need any custom plugins to interact with the machine.
Finally, we add a step at the end to sysprep the machine (i.e. generalize it ready for being cloned) using the Cloudbase-Init provided Unattend.xml. This ensures that Cloudbase-Init will run on the next boot of the machine (i.e. when it is cloned) so that we can customize the image with cluster-specific parameters.
The contents of the Autounattend.xml file that is used to install Windows in the first place looks like the below: -
<?xml version="1.0" encoding="utf-8"?>
<unattend xmlns="urn:schemas-microsoft-com:unattend">
    <settings pass="windowsPE">
        <component name="Microsoft-Windows-PnpCustomizationsWinPE"
            publicKeyToken="31bf3856ad364e35" language="neutral"
            versionScope="nonSxS" processorArchitecture="amd64"
            xmlns:wcm="http://schemas.microsoft.com/WMIConfig/2002/State">

            <!--
                 This makes the VirtIO drivers available to Windows, assuming that
                 the VirtIO driver disk at https://fedorapeople.org/groups/virt/virtio-win/direct-downloads/stable-virtio/virtio-win.iso
                 (see https://docs.fedoraproject.org/en-US/quick-docs/creating-windows-virtual-machines-using-virtio-drivers/index.html#virtio-win-direct-downloads)
                 is available as drive E:
            -->
            <DriverPaths>
                <PathAndCredentials wcm:action="add" wcm:keyValue="2">
                    <Path>E:\viostor\2k19\amd64</Path>
                </PathAndCredentials>

                <PathAndCredentials wcm:action="add" wcm:keyValue="3">
                    <Path>E:\NetKVM\2k19\amd64</Path>
                </PathAndCredentials>

                <PathAndCredentials wcm:action="add" wcm:keyValue="4">
                    <Path>E:\Balloon\2k19\amd64</Path>
                </PathAndCredentials>

                <PathAndCredentials wcm:action="add" wcm:keyValue="5">
                    <Path>E:\pvpanic\2k19\amd64</Path>
                </PathAndCredentials>

                <PathAndCredentials wcm:action="add" wcm:keyValue="6">
                    <Path>E:\qemupciserial\2k19\amd64</Path>
                </PathAndCredentials>

                <PathAndCredentials wcm:action="add" wcm:keyValue="7">
                    <Path>E:\qxldod\2k19\amd64</Path>
                </PathAndCredentials>

                <PathAndCredentials wcm:action="add" wcm:keyValue="8">
                    <Path>E:\vioinput\2k19\amd64</Path>
                </PathAndCredentials>

                <PathAndCredentials wcm:action="add" wcm:keyValue="9">
                    <Path>E:\viorng\2k19\amd64</Path>
                </PathAndCredentials>

                <PathAndCredentials wcm:action="add" wcm:keyValue="10">
                    <Path>E:\vioscsi\2k19\amd64</Path>
                </PathAndCredentials>

                <PathAndCredentials wcm:action="add" wcm:keyValue="11">
                    <Path>E:\vioserial\2k19\amd64</Path>
                </PathAndCredentials>
            </DriverPaths>
        </component>

        <component xmlns:wcm="http://schemas.microsoft.com/WMIConfig/2002/State" xmlns:xsi="http://www.w3.org/2001/XMLSchema-instance" name="Microsoft-Windows-International-Core-WinPE" processorArchitecture="amd64" publicKeyToken="31bf3856ad364e35" language="neutral" versionScope="nonSxS">
            <SetupUILanguage>
                <UILanguage>en-US</UILanguage>
            </SetupUILanguage>
            <InputLocale>en-US</InputLocale>
            <SystemLocale>en-US</SystemLocale>
            <UILanguage>en-US</UILanguage>
            <UILanguageFallback>en-US</UILanguageFallback>
            <UserLocale>en-US</UserLocale>
        </component>
        <component xmlns:wcm="http://schemas.microsoft.com/WMIConfig/2002/State" xmlns:xsi="http://www.w3.org/2001/XMLSchema-instance" name="Microsoft-Windows-Setup" processorArchitecture="amd64" publicKeyToken="31bf3856ad364e35" language="neutral" versionScope="nonSxS">
            <DiskConfiguration>
                <Disk wcm:action="add">
                    <CreatePartitions>
                        <CreatePartition wcm:action="add">
                            <Type>Primary</Type>
                            <Order>1</Order>
                            <Size>350</Size>
                        </CreatePartition>
                        <CreatePartition wcm:action="add">
                            <Order>2</Order>
                            <Type>Primary</Type>
                            <Extend>true</Extend>
                        </CreatePartition>
                    </CreatePartitions>
                    <ModifyPartitions>
                        <ModifyPartition wcm:action="add">
                            <Active>true</Active>
                            <Format>NTFS</Format>
                            <Label>boot</Label>
                            <Order>1</Order>
                            <PartitionID>1</PartitionID>
                        </ModifyPartition>
                        <ModifyPartition wcm:action="add">
                            <Format>NTFS</Format>
                            <Label>Windows 2019</Label>
                            <Letter>C</Letter>
                            <Order>2</Order>
                            <PartitionID>2</PartitionID>
                        </ModifyPartition>
                    </ModifyPartitions>
                    <DiskID>0</DiskID>
                    <WillWipeDisk>true</WillWipeDisk>
                </Disk>
            </DiskConfiguration>
            <ImageInstall>
                <OSImage>
                    <InstallFrom>
                        <MetaData wcm:action="add">
                            <Key>/IMAGE/NAME</Key>
                            <Value>Windows Server 2019 SERVERDATACENTERCORE</Value>
                        </MetaData>
                    </InstallFrom>
                    <InstallTo>
                        <DiskID>0</DiskID>
                        <PartitionID>2</PartitionID>
                    </InstallTo>
                </OSImage>
            </ImageInstall>
            <UserData>
                <ProductKey>
                    <!--
                        Windows Server Insider product key
                        See https://blogs.windows.com/windowsexperience/2017/07/13/announcing-windows-server-insider-preview-build-16237/
                    -->
                    <!--<Key></Key>-->
                    <WillShowUI>OnError</WillShowUI>
                </ProductKey>
                <AcceptEula>true</AcceptEula>
                <FullName>Vagrant</FullName>
                <Organization>Vagrant</Organization>
            </UserData>
        </component>
    </settings>
    <settings pass="specialize">
        <component xmlns:wcm="http://schemas.microsoft.com/WMIConfig/2002/State" xmlns:xsi="http://www.w3.org/2001/XMLSchema-instance" name="Microsoft-Windows-Shell-Setup" processorArchitecture="amd64" publicKeyToken="31bf3856ad364e35" language="neutral" versionScope="nonSxS">
            <OEMInformation>
                <HelpCustomized>false</HelpCustomized>
            </OEMInformation>
            <ComputerName>vagrant-2019</ComputerName>
            <TimeZone>Pacific Standard Time</TimeZone>
            <RegisteredOwner/>
        </component>
        <component xmlns:wcm="http://schemas.microsoft.com/WMIConfig/2002/State" xmlns:xsi="http://www.w3.org/2001/XMLSchema-instance" name="Microsoft-Windows-ServerManager-SvrMgrNc" processorArchitecture="amd64" publicKeyToken="31bf3856ad364e35" language="neutral" versionScope="nonSxS">
            <DoNotOpenServerManagerAtLogon>true</DoNotOpenServerManagerAtLogon>
        </component>
        <component xmlns:wcm="http://schemas.microsoft.com/WMIConfig/2002/State" xmlns:xsi="http://www.w3.org/2001/XMLSchema-instance" name="Microsoft-Windows-IE-ESC" processorArchitecture="amd64" publicKeyToken="31bf3856ad364e35" language="neutral" versionScope="nonSxS">
            <IEHardenAdmin>false</IEHardenAdmin>
            <IEHardenUser>false</IEHardenUser>
        </component>
        <component xmlns:wcm="http://schemas.microsoft.com/WMIConfig/2002/State" xmlns:xsi="http://www.w3.org/2001/XMLSchema-instance" name="Microsoft-Windows-OutOfBoxExperience" processorArchitecture="amd64" publicKeyToken="31bf3856ad364e35" language="neutral" versionScope="nonSxS">
            <DoNotOpenInitialConfigurationTasksAtLogon>true</DoNotOpenInitialConfigurationTasksAtLogon>
        </component>
        <component xmlns:wcm="http://schemas.microsoft.com/WMIConfig/2002/State" xmlns:xsi="http://www.w3.org/2001/XMLSchema-instance" name="Microsoft-Windows-Security-SPP-UX" processorArchitecture="amd64" publicKeyToken="31bf3856ad364e35" language="neutral" versionScope="nonSxS">
            <SkipAutoActivation>true</SkipAutoActivation>
        </component>
    </settings>
    <settings pass="oobeSystem">
        <component xmlns:wcm="http://schemas.microsoft.com/WMIConfig/2002/State" xmlns:xsi="http://www.w3.org/2001/XMLSchema-instance" name="Microsoft-Windows-Shell-Setup" processorArchitecture="amd64" publicKeyToken="31bf3856ad364e35" language="neutral" versionScope="nonSxS">
            <AutoLogon>
                <Password>
                    <Value>adm!nadm!n</Value>
                    <PlainText>true</PlainText>
                </Password>
                <Enabled>true</Enabled>
                <Username>Administrator</Username>
            </AutoLogon>
            <FirstLogonCommands>
                <SynchronousCommand wcm:action="add">
                    <CommandLine>cmd.exe /c powershell -Command "Set-ExecutionPolicy -ExecutionPolicy RemoteSigned -Force"</CommandLine>
                    <Description>Set Execution Policy 64 Bit</Description>
                    <Order>1</Order>
                    <RequiresUserInput>true</RequiresUserInput>
                </SynchronousCommand>
                <SynchronousCommand wcm:action="add">
                    <CommandLine>C:\Windows\SysWOW64\cmd.exe /c powershell -Command "Set-ExecutionPolicy -ExecutionPolicy RemoteSigned -Force"</CommandLine>
                    <Description>Set Execution Policy 32 Bit</Description>
                    <Order>2</Order>
                    <RequiresUserInput>true</RequiresUserInput>
                </SynchronousCommand>
                <SynchronousCommand wcm:action="add">
                    <CommandLine>C:\Windows\System32\WindowsPowerShell\v1.0\powershell.exe -File a:\SetUpWinRM.ps1</CommandLine>
                    <Description>Setup WinRM</Description>
                    <Order>3</Order>
                    <RequiresUserInput>true</RequiresUserInput>
                </SynchronousCommand>
                <SynchronousCommand wcm:action="add">
                    <CommandLine>%SystemRoot%\System32\reg.exe ADD HKCU\SOFTWARE\Microsoft\Windows\CurrentVersion\Explorer\Advanced\ /v HideFileExt /t REG_DWORD /d 0 /f</CommandLine>
                    <Order>4</Order>
                    <Description>Show file extensions in Explorer</Description>
                </SynchronousCommand>
                <SynchronousCommand wcm:action="add">
                    <CommandLine>%SystemRoot%\System32\reg.exe ADD HKCU\Console /v QuickEdit /t REG_DWORD /d 1 /f</CommandLine>
                    <Order>5</Order>
                    <Description>Enable QuickEdit mode</Description>
                </SynchronousCommand>
                <SynchronousCommand wcm:action="add">
                    <CommandLine>%SystemRoot%\System32\reg.exe ADD HKCU\SOFTWARE\Microsoft\Windows\CurrentVersion\Explorer\Advanced\ /v Start_ShowRun /t REG_DWORD /d 1 /f</CommandLine>
                    <Order>6</Order>
                    <Description>Show Run command in Start Menu</Description>
                </SynchronousCommand>
                <SynchronousCommand wcm:action="add">
                    <CommandLine>%SystemRoot%\System32\reg.exe ADD HKCU\SOFTWARE\Microsoft\Windows\CurrentVersion\Explorer\Advanced\ /v StartMenuAdminTools /t REG_DWORD /d 1 /f</CommandLine>
                    <Order>7</Order>
                    <Description>Show Administrative Tools in Start Menu</Description>
                </SynchronousCommand>
                <SynchronousCommand wcm:action="add">
                    <CommandLine>%SystemRoot%\System32\reg.exe ADD HKLM\SYSTEM\CurrentControlSet\Control\Power\ /v HibernateFileSizePercent /t REG_DWORD /d 0 /f</CommandLine>
                    <Order>8</Order>
                    <Description>Zero Hibernation File</Description>
                </SynchronousCommand>
                <SynchronousCommand wcm:action="add">
                    <CommandLine>%SystemRoot%\System32\reg.exe ADD HKLM\SYSTEM\CurrentControlSet\Control\Power\ /v HibernateEnabled /t REG_DWORD /d 0 /f</CommandLine>
                    <Order>9</Order>
                    <Description>Disable Hibernation Mode</Description>
                </SynchronousCommand>
                <!-- END WITH WINDOWS UPDATES -->
            </FirstLogonCommands>
            <OOBE>
                <HideEULAPage>true</HideEULAPage>
                <HideLocalAccountScreen>true</HideLocalAccountScreen>
                <HideOEMRegistrationScreen>true</HideOEMRegistrationScreen>
                <HideOnlineAccountScreens>true</HideOnlineAccountScreens>
                <HideWirelessSetupInOOBE>true</HideWirelessSetupInOOBE>
                <NetworkLocation>Home</NetworkLocation>
                <ProtectYourPC>1</ProtectYourPC>
            </OOBE>
            <UserAccounts>
                <AdministratorPassword>
                    <Value>adm!nadm!n</Value>
                    <PlainText>true</PlainText>
                </AdministratorPassword>
            </UserAccounts>
            <RegisteredOwner/>
        </component>
    </settings>
    <settings pass="offlineServicing">
        <component xmlns:wcm="http://schemas.microsoft.com/WMIConfig/2002/State" xmlns:xsi="http://www.w3.org/2001/XMLSchema-instance" name="Microsoft-Windows-LUA-Settings" processorArchitecture="amd64" publicKeyToken="31bf3856ad364e35" language="neutral" versionScope="nonSxS">
            <EnableLUA>false</EnableLUA>
        </component>
    </settings>
    <cpi:offlineImage xmlns:cpi="urn:schemas-microsoft-com:cpi" cpi:source="wim:c:/wim/install.wim#Windows Server 2019 SERVERSTANDARD"/>
</unattend>
This was again taken from Stefan Scherer’s repository (here) but with a few changes (removing some of the scripts used, and making sure we run the SetUpWinRM.ps1 script).
We can now build this with Packer, and then watch the install take place over VNC: -
$ packer build windows-2019-kube.json
qemu: output will be in this color.

==> qemu: Retrieving ISO
==> qemu: Trying https://software-download.microsoft.com/download/pr/17763.737.190906-2324.rs5_release_svc_refresh_SERVER_EVAL_x64FRE_en-us_1.iso
==> qemu: Trying https://software-download.microsoft.com/download/pr/17763.737.190906-2324.rs5_release_svc_refresh_SERVER_EVAL_x64FRE_en-us_1.iso?checksum=sha256%3A549bca46c055157291be6c22a3aaaed8330e78ef4382c99ee82c896426a1cee1
==> qemu: https://software-download.microsoft.com/download/pr/17763.737.190906-2324.rs5_release_svc_refresh_SERVER_EVAL_x64FRE_en-us_1.iso?checksum=sha256%3A549bca46c055157291be6c22a3aaaed8330e78ef4382c99ee82c896426a1cee1 => isos/17763.737.190906-2324.rs5_release_svc_refresh_SERVER_EVAL_x64FRE_en-us_1.iso
==> qemu: Creating floppy disk...
    qemu: Copying files flatly from floppy_files
    qemu: Copying file: http/windows-2019/Autounattend.xml
    qemu: Copying file: scripts/win-common/SetUpWinRM.ps1
    qemu: Done copying files from floppy_files
    qemu: Collecting paths from floppy_dirs
    qemu: Resulting paths from floppy_dirs : []
    qemu: Done copying paths from floppy_dirs
==> qemu: Creating required virtual machine disks
==> qemu: Found port for communicator (SSH, WinRM, etc): 3887.
==> qemu: Looking for available port between 5900 and 6000 on 0.0.0.0
==> qemu: Starting VM, booting from CD-ROM
    qemu: The VM will be run headless, without a GUI. If you want to
    qemu: view the screen of the VM, connect via VNC without a password to
    qemu: vnc://0.0.0.0:5987
==> qemu: Overriding default Qemu arguments with QemuArgs...
==> qemu: Waiting 10s for boot...
==> qemu: Connecting to VM via VNC (0.0.0.0:5987)
==> qemu: Typing the boot command over VNC...
    qemu: Not using a NetBridge -- skipping StepWaitGuestAddress
==> qemu: Using winrm communicator to connect: 127.0.0.1
==> qemu: Waiting for WinRM to become available...

Once the install is finished, Ansible will apply the steps to customize the image.
Ansible
As noted, we are using Ansible to customize the images after the operating system has been installed. This installs the correct dependencies (e.g. Docker, Kubernetes, Cloudbase-Init for Windows), ensures we have the correct paths and creates the relevant configuration files.
We make use of roles so that they can be reused for other purposes. Each role is created using ansible-galaxy init $ROLE_NAME (although we are not submitting these to Ansible Galaxy), which will create the following directory structure: -
$ROLE_NAME
├── defaults
├── files
├── handlers
├── meta
├── README.md
├── tasks
├── templates
├── tests
└── vars
This allows us to create our tasks in the correct place, create handlers, files and tests should we wish in the correct structure.
Linux Ansible Roles
The Linux deployment uses the following roles: -
base- This covers base packages that will be used either during install, or during day-to-day management of the clusterdocker- This installs the Docker engine which Kubernetes will use for deploying containerskubernetes- This installs all the relevant Kubernetes dependencies
Base
For the base role, we have the following tasks in our tasks/main.yml file: -
---
# tasks file for docker
- name: Install base dependencies
  package:
    name:
      - apt-transport-https
      - ca-certificates
      - curl
      - gnupg2
      - software-properties-common
      - tcpdump
      - wget
      - telnet
      - vim
      - dnsutils
      - mtr-tiny
      - python3-pip
    state: present
    update_cache: yes
The first 5 dependencies are used when adding other repositories (in the docker and kubernetes roles), whereas the rest are useful if any troubleshooting of the cluster is required.
Docker
The Docker role has the following tasks in our tasks/main.yml file: -
---
# tasks file for docker
- name: Add Docker Repository key
  apt_key:
    url: https://download.docker.com/linux/debian/gpg
    state: present

- name: Add Docker Repository
  apt_repository:
    repo: deb [arch=amd64] https://download.docker.com/linux/debian buster stable
    state: present

- name: Install Docker
  package:
    name:
      - docker-ce
      - docker-ce-cli
      - containerd.io
    state: present
    update_cache: yes
This adds the Docker APT repository GPG key, adds the Debian Buster Docker repository, and then installs the latest version of Docker Community Edition, the Docker CLI and containerd.
Kubernetes
The Kubernetes role has the following tasks in our tasks/main.yml file: -
---
# tasks file for kubernetes
- name: Add Kubernetes Repository key
  apt_key:
    url: https://packages.cloud.google.com/apt/doc/apt-key.gpg
    state: present

- name: Add Kubernetes
  apt_repository:
    repo: deb https://apt.kubernetes.io/ kubernetes-xenial main
    state: present

- name: Install Kubernetes
  package:
    name:
      - kubelet
      - kubeadm
      - kubectl
    state: present
    update_cache: yes

- name: Disable Swap
  shell: |
    swapoff -a

- name: Remove swap in fstab
  replace:
    path: /etc/fstab
    regexp: '^([^#].*?\sswap\s+sw\s+.*)$'
    replace: '# \1'

- name: Bridge NF Filter sysctl IPv4
  ansible.posix.sysctl:
    name: net.bridge.bridge-nf-call-iptables
    value: '1'
    state: present

- name: Bridge NF Filter sysctl IPv6
  ansible.posix.sysctl:
    name: net.bridge.bridge-nf-call-ip6tables
    value: '1'
    state: present
Similar to the Docker role, we add the Kubernetes APT repository GPG key, add the Kubernetes repository (the kubernetes-xenial repository works for all recent versions of Debian and Ubuntu), and installs kubelet (the Kubernetes agent), kubeadm (the Admin tool to create Kubernetes clusters with) and kubectl (the Kubernetes CLI tool).
After this, we disable swap and comment out any swap entries in /etc/fstab as Kubernetes does not allow running with swap partitions enabled.
Finally, we use enable packets that traverse bridges in Linux to be evaluated by IPTables for both IPv4 and IPv6. A lot of the Docker and Kubernetes networking relies on IPTables manipulation, so the packets traversing bridges must go through IPTables as well.
Windows Ansible Roles
The Windows deployment uses the following roles: -
base- This covers setting some default values in the Windows registry for TLScontainers- This installs the Windows Containers feature and the Docker engine which Kubernetes will use for deploying containerskubernetes- This installs all the relevant Kubernetes dependenciescloudbase-init- This installs Cloudbase-Init so that we can leveragecloud-configandcloud-initto customize the machine on first boot
Base
For the base role, we have the following tasks in our tasks/main.yml file: -
---
# tasks file for base
  # Enable Strong security for Powershell (required for NuGet Provider)
  - name: Enable TLS 1.2 for 64-bit .Net Framework
    win_regedit:
      path: HKLM:\SOFTWARE\Wow6432Node\Microsoft\.NetFramework\v4.0.30319
      name: SchUseStrongCrypto
      data: 1
      type: dword

  - name: Enable TLS 1.2 for 32-bit .Net Framework
    win_regedit:
      path: HKLM:\SOFTWARE\Microsoft\.NetFramework\v4.0.30319
      name: SchUseStrongCrypto
      data: 1
      type: dword
This task enables TLS 1.2 support for DotNet in Windows. Without this, NuGet and Invoke-WebRequest will often fail. Powershell by default supports SSLv3 or lower, which many sites now have disabled.
Containers
For the containers role, we have the following tasks in our tasks/main.yml file: -
---
# tasks file for containers
  # Enable Containers feature
  - name: features | Enabling Containers Feature
    win_feature:
      name: Containers
      state: present
    register: windows_container_feature

  - name: reboot | Rebooting Server
    win_reboot:
      reboot_timeout_sec: 3600
    when: windows_container_feature.changed

  # Enable Docker for Windows
  - name: Add Nuget Package provider
    win_shell: Install-PackageProvider -Name NuGet -MinimumVersion 2.8.5.201 -Force

  - name: Install Docker Powershell Module Repository for Windows
    win_psmodule:
      name: DockerMsftProvider
      state: present

  - name: Install Docker for Windows
    win_shell: Install-Package -Name docker -ProviderName DockerMsftProvider -Force
    register: docker_installed

  - name: Enable Docker service
    win_service:
      name: docker
      start_mode: auto
      state: started
    when: docker_installed.changed

  - name: Reboot Windows
    win_reboot:
      reboot_timeout_sec: 3600
    when: docker_installed.changed
The above does the following: -
- Enables the Containers feature
- Reboots the server if the Containers feature was installed (otherwise there is no need for a reboot)
- Adds the ability to use NuGet packages
- Adds the Microsoft Docker provider
- Installs Docker for Windows
- Enables Docker for Windows
- Reboots the machine
After this, the machine will now have Docker installed, using native Windows containers. This is not the same as Docker Desktop, which runs a lightweight Linux virtual machine for creating and interacting with Linux-based containers.
Kubernetes
For the Kubernetes role, we have the following tasks in our tasks/main.yml file: -
---
# tasks file for kubernetes
- name: Create Kubernetes directory
  win_file:
    path: C:\k
    state: directory

- name: Add Kubernetes directory to path
  ansible.windows.win_path:
    elements:
      - 'C:\k'

- name: Download kubelet
  win_get_url:
    url: https://dl.k8s.io/{{ kubernetes_version }}/bin/windows/amd64/kubelet.exe
    dest: C:\k\kubelet.exe

- name: Download kubeadm
  win_get_url:
    url: https://dl.k8s.io/{{ kubernetes_version }}/bin/windows/amd64/kubeadm.exe
    dest: C:\k\kubeadm.exe

- name: Download wins
  win_get_url:
    url: https://github.com/rancher/wins/releases/download/v0.0.4/wins.exe
    dest: C:\k\wins.exe

- name: Create Docker host network
  ansible.windows.win_shell: docker network create -d nat host

- name: Create wins service
  ansible.windows.win_shell: wins.exe srv app run --register

- name: Start wins service
  ansible.windows.win_service:
    name: rancher-wins
    state: restarted

- name: Create other Kubernetes (and related) directories
  win_file:
    path: "{{ item }}"
    state: directory
  loop:
    - 'C:\var\log\kubelet'
    - 'C:\var\lib\kubelet\etc\kubernetes'
    - 'C:\etc\kubernetes\pki'
    - 'C:\Program Files\nssm'
    - 'C:\tmp'

- name: Symbolic Link for PKI directory
  ansible.windows.win_shell: New-Item -path C:\var\lib\kubelet\etc\kubernetes\pki -type SymbolicLink -value C:\etc\kubernetes\pki\

- name: Download nssm
  win_get_url:
    url: https://k8stestinfrabinaries.blob.core.windows.net/nssm-mirror/nssm-2.24.zip
    dest: "C:\\nssm.zip"

- name: Unzip nssm
  community.windows.win_unzip:
    src: "C:\\nssm.zip"
    dest: "C:\\tmp"

- name: Move nssm executable to correct location
  win_copy:
    src: "C:\\tmp\\nssm-2.24\\win64\\nssm.exe"
    dest: "C:\\Program Files\\nssm\\nssm.exe"
    remote_src: true

- name: Add NSSM directory to path
  ansible.windows.win_path:
    elements:
      - "C:\\Program Files\\nssm\\"

- name: Create Kubelet firewall rule
  community.windows.win_firewall_rule:
    name: Kubelet
    localport: 10250
    action: allow
    direction: in
    protocol: tcp
    state: present
    enabled: yes
Most of the steps above are taken from the Windows node preparation Powershell scripts in the Windows SIG Tools repository for Kubernetes. This can be seen here.
Some of the steps differ, in that the Powershell script also starts and registers the Kubelet as a service. It also prepares the Kubelet configuration. These tasks can take place when the node boots for the first time, so they are omitted from this playbook.
To summarize what it does: -
- Creates a directory for Kubernetes binaries called
C:\k - Adds it to the
$PATHvariable - Downloads the Windows version of
kubeletandkubeadm - Downloads
winswinsis a tool from Rancher that allows containers to talk to the Windows host they are running on
- Creates a Docker network in
natmode so that containers can talk to the internet initially - Starts the
winsservice - Creates all the directories we need
- Links
C:\var\lib\kubelet\etc\kubernetes\pkitoC:\etc\kubernetes\pki\ - Downloads
nssm(the Non-Sucking Service Manager) - Unzips
nssm, moves it to the correct directory, and adds the directory to the$PATHvariable - Adds a firewall entry in for the Kubelet on TCP:10250 so that the Control Plane nodes can talk to it
After this, all the relevant dependencies are installed, ready for joining a Kubernetes cluster.
Cloudbase-Init
As noted, Cloudbase-Init provides cloud-init functionality to Windows. This means that we can run commands on first boot of the image, providing customization that is only required once (e.g. setting the hostname, configuring the Kubernetes cluster it will connect to, etc).
For the Cloudbase-Init role, we have the following tasks in our tasks/main.yml file: -
---
# tasks file for cloudbase-init
  - name: Get Cloudbase-Init
    win_get_url:
      url: https://cloudbase.it/downloads/CloudbaseInitSetup_x64.msi
      dest: C:\Users\Administrator\cloudbase-init.msi

  - name: Install Cloudbase-Init
    win_package:
      path: C:\Users\Administrator\cloudbase-init.msi

  - name: Add Cloudbase Init config files
    win_copy:
      src: "{{ item }}"
      dest: "C:\\Program Files\\Cloudbase Solutions\\cloudbase-init\\conf\\{{ item }}"
    loop:
      - cloudbase-init.conf
      - cloudbase-init-unattend.conf
In this we download the Cloudbase-Init MSI, install it, and then provide configuration files that are customized for our purpose. These configuration files customize what kind of cloud-init format, what cloud-init modules are available and more.
For more details on these configuration files, see the Configuring Cloudbase-Init of my “Using Terraform and Cloud-Init to deploy and automatically monitor Proxmox instances - Windows” post.
Once this is installed, Packer will then be able to run the sysprep command using the Cloudbase-Init included Unattend.xml file: -
C:\Windows\System32\Sysprep\sysprep.exe
    /quiet /generalize /oobe
    /unattend:C:\Program Files\Cloudbase Solutions\Cloudbase-Init\conf\Unattend.xml
Videos
Below are a couple of videos/screen captures of the process. Both are quite long, with each install taking around 15 minutes, so feel free to skip to the parts that are relevant to you! Both are best viewed in 1080p resolution, and full screen where possible.
Building a Linux-based Kubernetes image for KVM using Packer and Ansible
Building a Windows-based Kubernetes image for KVM using Packer and Ansible
Next steps
The next step after this will be to move the generated images to your KVM storage location. For me this is in /var/lib/libvirt/images (the default install location).
# Move the Linux image
$ mv artifacts/qemu/debian10-kube/debian10 /var/lib/libvirt/images/debian10-kube.qcow2

# Move the Windows image
$ mv artifacts/qemu/win2019-kube/windows-server-2019-standard-x64-eval /var/lib/libvirt/images/debian2019-kube.qcow2
Once this is done, we can create our Terraform configuration to deploy the Kubernetes cluster. This will be covered in Part 2 of this series.
Summary
In this, we’ve seen how we can use Packer and Ansible to create both Linux and Windows images. While Ansible is well known for configuration management of Linux instances, it is just as capable of managing Windows, BSD, networking equipment and more.
The next part will use our images to create three Kubernetes Control Plane nodes (running Linux), three Linux Kubernetes workers and one Windows Kubernetes worker. This will all be managed by Terraform and Cloud-Init (using the native Cloud-Init packages in Debian, and Cloudbase-Init for Windows).
To see the JSON files, Ansible roles and everything else used in this post, see my Packer Repository on Gitlab
devops kubernetes kvm linux windows terraform packer ansible
technical kubernetes packer terraform
4468 Words
2020-10-25 18:25 +0000