11 minutes
Home and Personal Infrastructure Overhaul: Part 7 - Using Drone with Terraform
This post is the next in the series on how I overhauled my personal infrastructure to make it easier to manage, make changes and integrate new applications.
Previous posts in the series are: -
- Introduction
- Ansible Improvements
- SaltStack Improvements
- Introduction to Drone CI
- Using Drone with Ansible
- Using Drone with Salt
This post will cover using Drone to manage and deploy resources with Terraform.
Background
When I first started using Drone, I wasn’t using it with Terraform. In fact very little of my infrastructure was managed by Terraform. Recently though, I decided to start moving most external services to it. In keeping with my theme of trying to automate my infrastructure and avoid manual changes, it made sense to finally start using Terraform for my personal usage of external services.
Ansible and Salt still control what runs on my machines (including VPSs/instances on cloud providers), but managing external services makes a lot of sense with Terraform. While Ansible and Salt are good at making changes, they don’t manage “desired state” very well, in the sense that Ansible can create a VPS on Hetzner, but it does not know that one may already exist.
With Terraform, it knows what resources it manages (using State management), and whether they should already exist or not. Terraform may still be incorrect as to the state of a resource, but usually only if the resource changed since the last time Terraform ran. Something like Ansible will just try to make the same changes it did last time, which could lead to duplicate resources, or the Playbook failing because it can’t create a resource (because it already exists and can’t be created again).
The following covers what I use: -
- Cloudflare for external DNS
- This includes externally accessibly domains
- It also includes “internal” domains I use that I want valid Let’s Encrypt certificates for
- Digital Ocean and Hetzner for VPSs
- My blog and other external services (RSS, Read-It-Later, Black Box Exporter for monitoring) are hosted on these
- Google Cloud Platform and Oracle Cloud Infrastructure for the always-free virtual machines
- Lab/Proxmox for testing technologies
For most of these, the steps are the same, with some minor differences in variable/secrets for each provider). In some cases, extra steps are required. I’ll first show the most basic pipeline (the one used for Cloudflare DNS) and then show some of the extra steps in others.
Full Drone Pipeline - Cloudflare
kind: pipeline
name: default
type: docker

trigger:
  branch:
    - main

steps:
  - name: Terraform FMT PR
    image: jmccann/drone-terraform:latest
    settings:
      actions:
        - fmt
      fmt_options:
        write: false
        diff: true
        check: true
    when:
      event:
      - pull_request

  - name: Terraform Plan
    image: jmccann/drone-terraform:latest
    settings:
      actions:
        - validate
        - plan
    environment:
      DIGITALOCEAN_TOKEN:
        from_secret: digitalocean_token
      HCLOUD_TOKEN:
        from_secret: hcloud_token
      CLOUDFLARE_API_TOKEN:
        from_secret: cloudflare_api_token
    when:
      event:
      - pull_request

  - name: slack-pr
    image: plugins/slack
    settings:
      webhook:
        from_secret: drone_builds_slack_webhook
      channel: builds
      template: >
        {{#success build.status}}
          {{repo.name}} PR build passed.
          Merge in to apply.
          PR: https://git.noisepalace.co.uk/YetiOps/{{repo.name}}/pulls/{{build.pull}}
          Build: https://drone.noisepalace.co.uk/YetiOps/{{repo.name}}/{{build.number}}
        {{else}}
          {{repo.name}} PR build failed.
          Please investigate.
          PR: https://git.noisepalace.co.uk/YetiOps/{{repo.name}}/pulls/{{build.pull}}
          Build: https://drone.noisepalace.co.uk/YetiOps/{{repo.name}}/{{build.number}}
        {{/success}}
    when:
      status:
      - failure
      - success
      event:
        - pull_request

  - name: slack-push-start
    image: plugins/slack
    settings:
      webhook:
        from_secret: drone_builds_slack_webhook
      channel: builds
      template: >
        {{repo.name}} build is starting.
        Build: https://drone.noisepalace.co.uk/YetiOps/{{repo.name}}/{{build.number}}
    when:
      branch:
      - main
      event:
      - push
      - tag

  - name: Terraform FMT
    image: jmccann/drone-terraform:latest
    settings:
      actions:
        - fmt
      fmt_options:
        write: false
        diff: true
        check: true
    when:
      branch:
      - main
      event:
      - push
      - tag


  - name: Terraform Apply
    image: jmccann/drone-terraform:latest
    settings:
      actions:
        - validate
        - plan
        - apply
    environment:
      DIGITALOCEAN_TOKEN:
        from_secret: digitalocean_token
      HCLOUD_TOKEN:
        from_secret: hcloud_token
      CLOUDFLARE_API_TOKEN:
        from_secret: cloudflare_api_token
    when:
      branch:
      - main
      event:
      - push
      - tag

  - name: slack-push
    image: plugins/slack
    settings:
      webhook:
        from_secret: drone_builds_slack_webhook
      channel: builds
      template: >
        {{#success build.status}}
          {{repo.name}} build passed.
          Build: https://drone.noisepalace.co.uk/YetiOps/{{repo.name}}/{{build.number}}
        {{else}}
          {{repo.name}} build {{build.number}} failed. Please investigate.
          Build: https://drone.noisepalace.co.uk/YetiOps/{{repo.name}}/{{build.number}}
        {{/success}}
    when:
      status:
      - failure
      - success
      branch:
      - main
      event:
      - push
      - tag
This pipeline is very similar to the one used for Ansible. This uses the same Slack notification steps, the same kind of triggers/conditionals for running steps, and runs as a single Docker-based pipeline (rather than the multiple pipelines required for Salt).
The bulk of the Terraform-specific steps in the pipelines use the Terraform Drone plugin. It is possible to use the official Hashicorp Terraform Docker image, but the Drone plugin is a little more convenient. If you use the official Hashicorp Terraform Docker image, you need to define each command you want to run, whereas the plugin reduces most commands to fields.
Steps - Terraform FMT
- name: Terraform FMT PR
  image: jmccann/drone-terraform:latest
  settings:
    actions:
      - fmt
    fmt_options:
      write: false
      diff: true
      check: true
  when:
    event:
    - pull_request
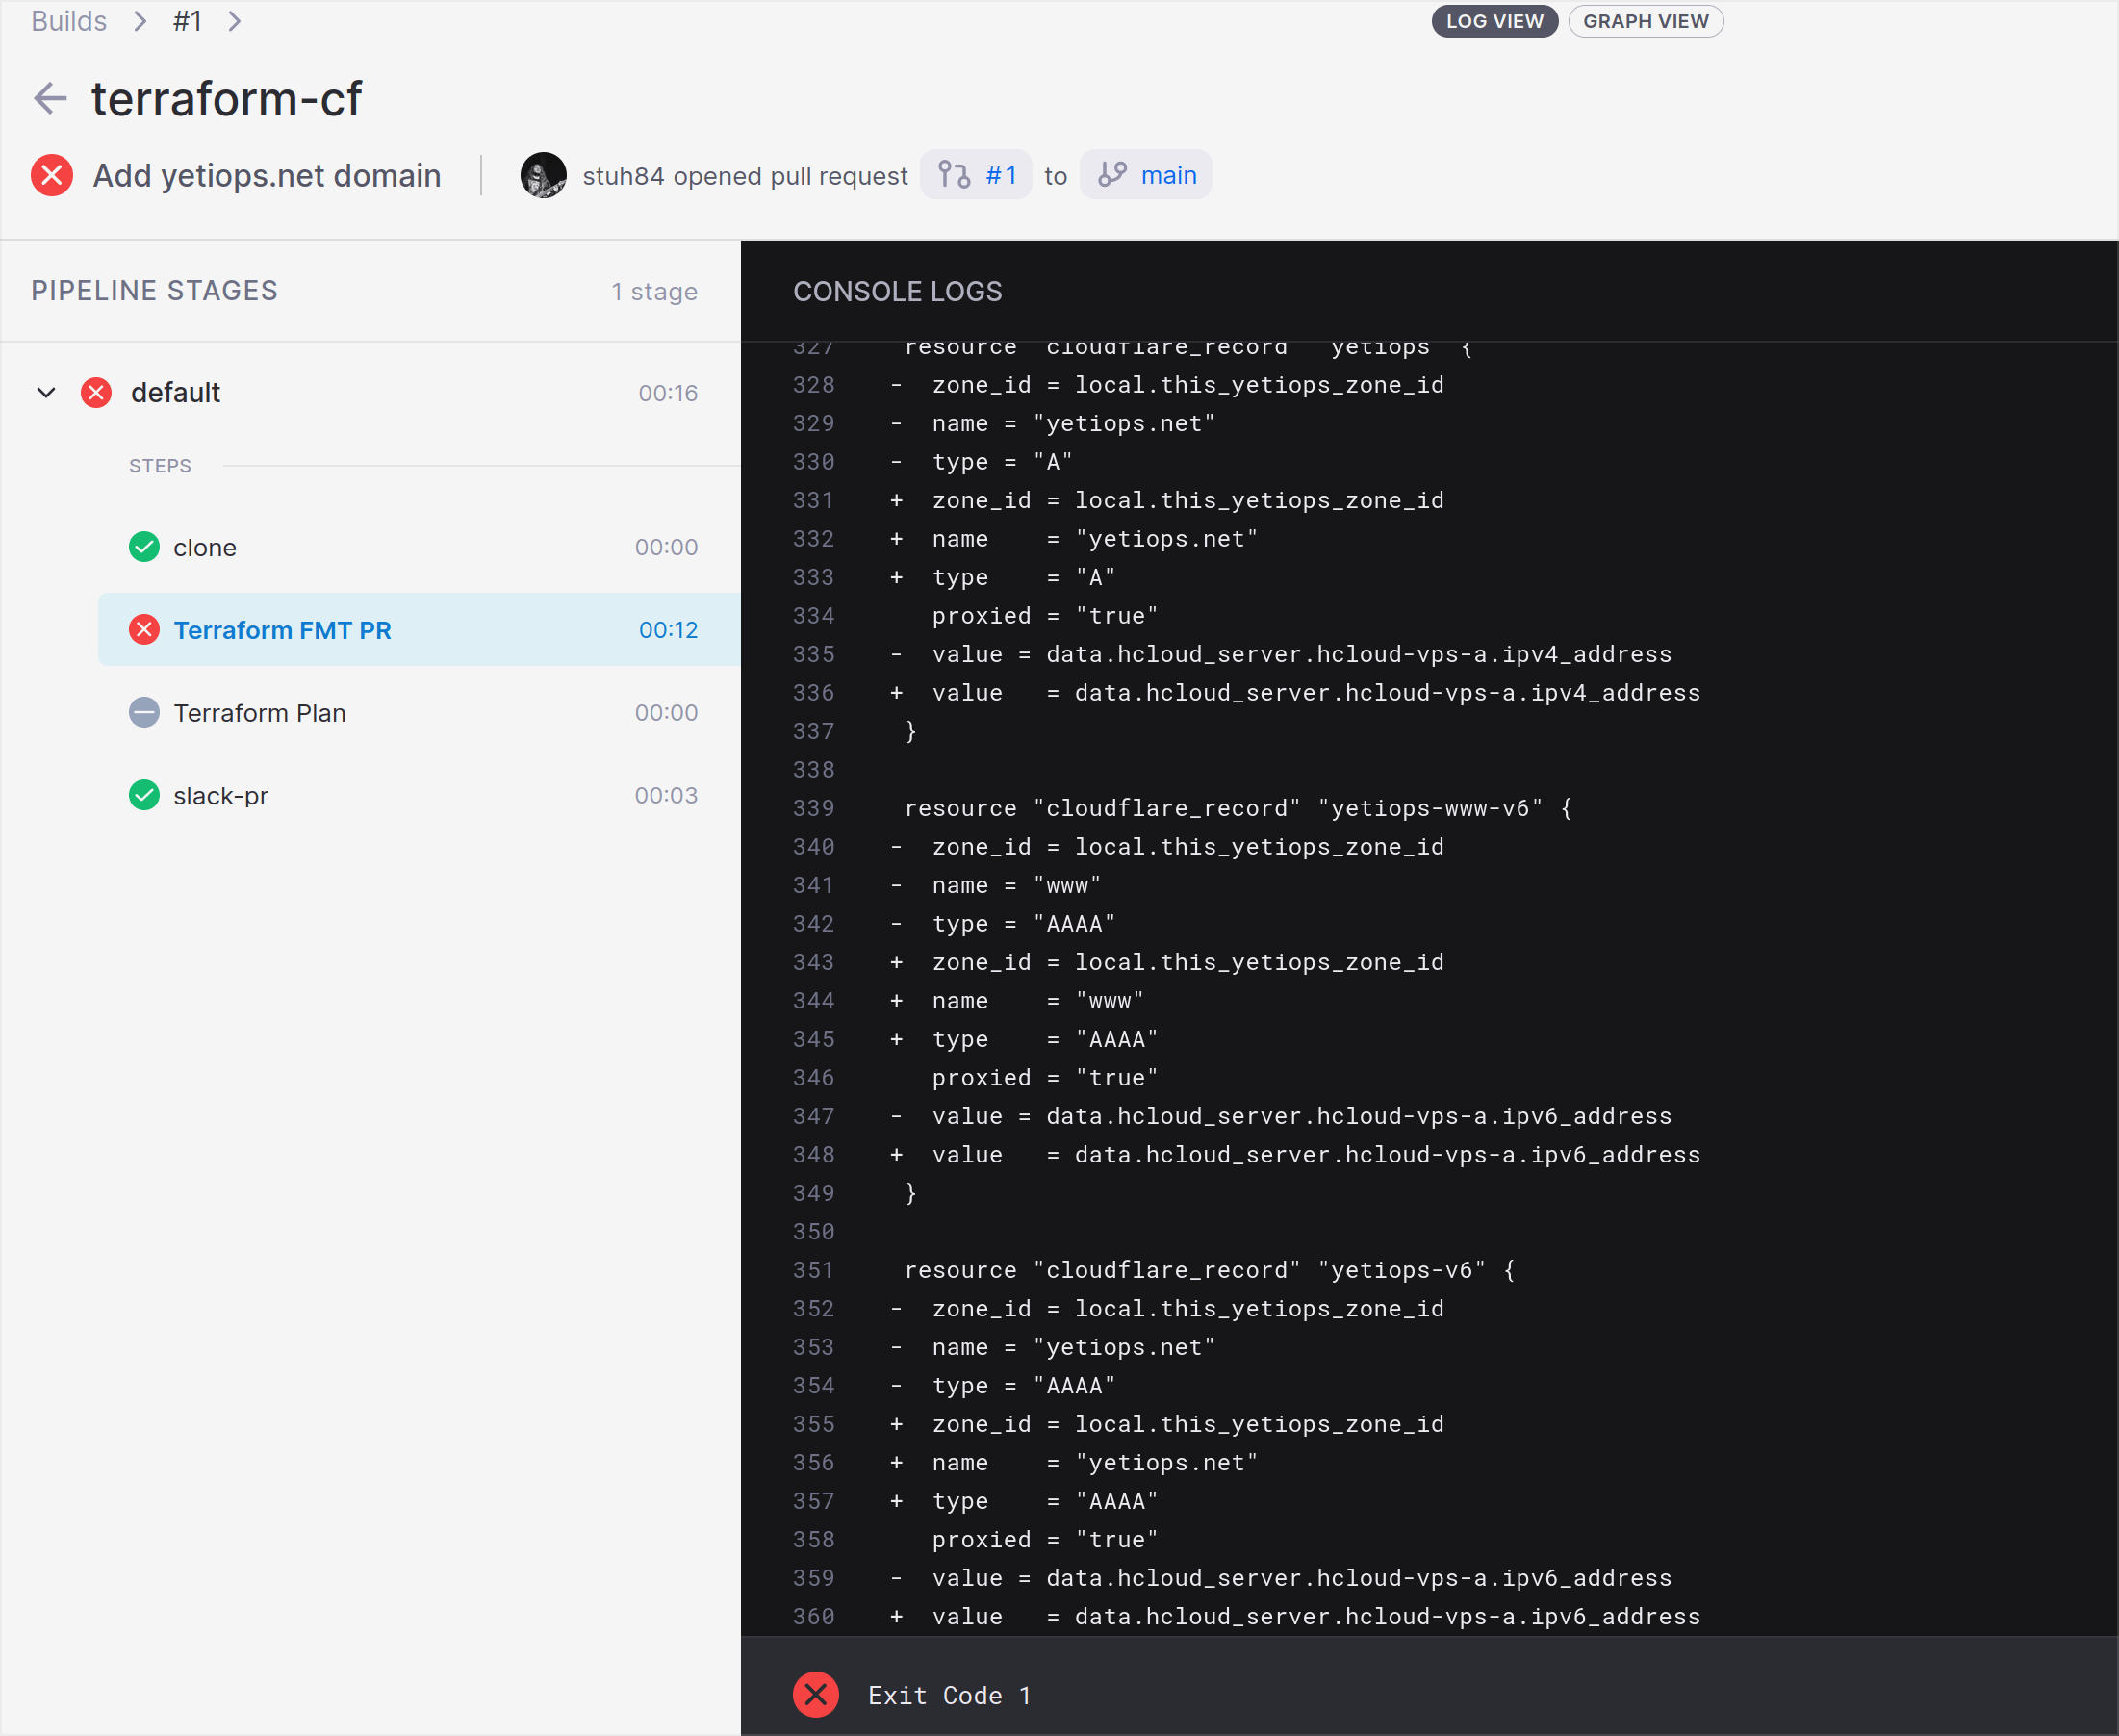
This step is the same as running the terraform fmt command with the flags -diff and -check. While this isn’t a necessary step, it does apply some consistent formatting rules to Terraform files.
In the diff and check mode, it doesn’t make any changes, but will fail if terraform fmt mentions any required changes (as it will exit with a non-zero exit code).
Steps - Terraform Plan
  - name: Terraform Plan
    image: jmccann/drone-terraform:latest
    settings:
      actions:
        - validate
        - plan
    environment:
      DIGITALOCEAN_TOKEN:
        from_secret: digitalocean_token
      HCLOUD_TOKEN:
        from_secret: hcloud_token
      CLOUDFLARE_API_TOKEN:
        from_secret: cloudflare_api_token
    when:
      event:
      - pull_request
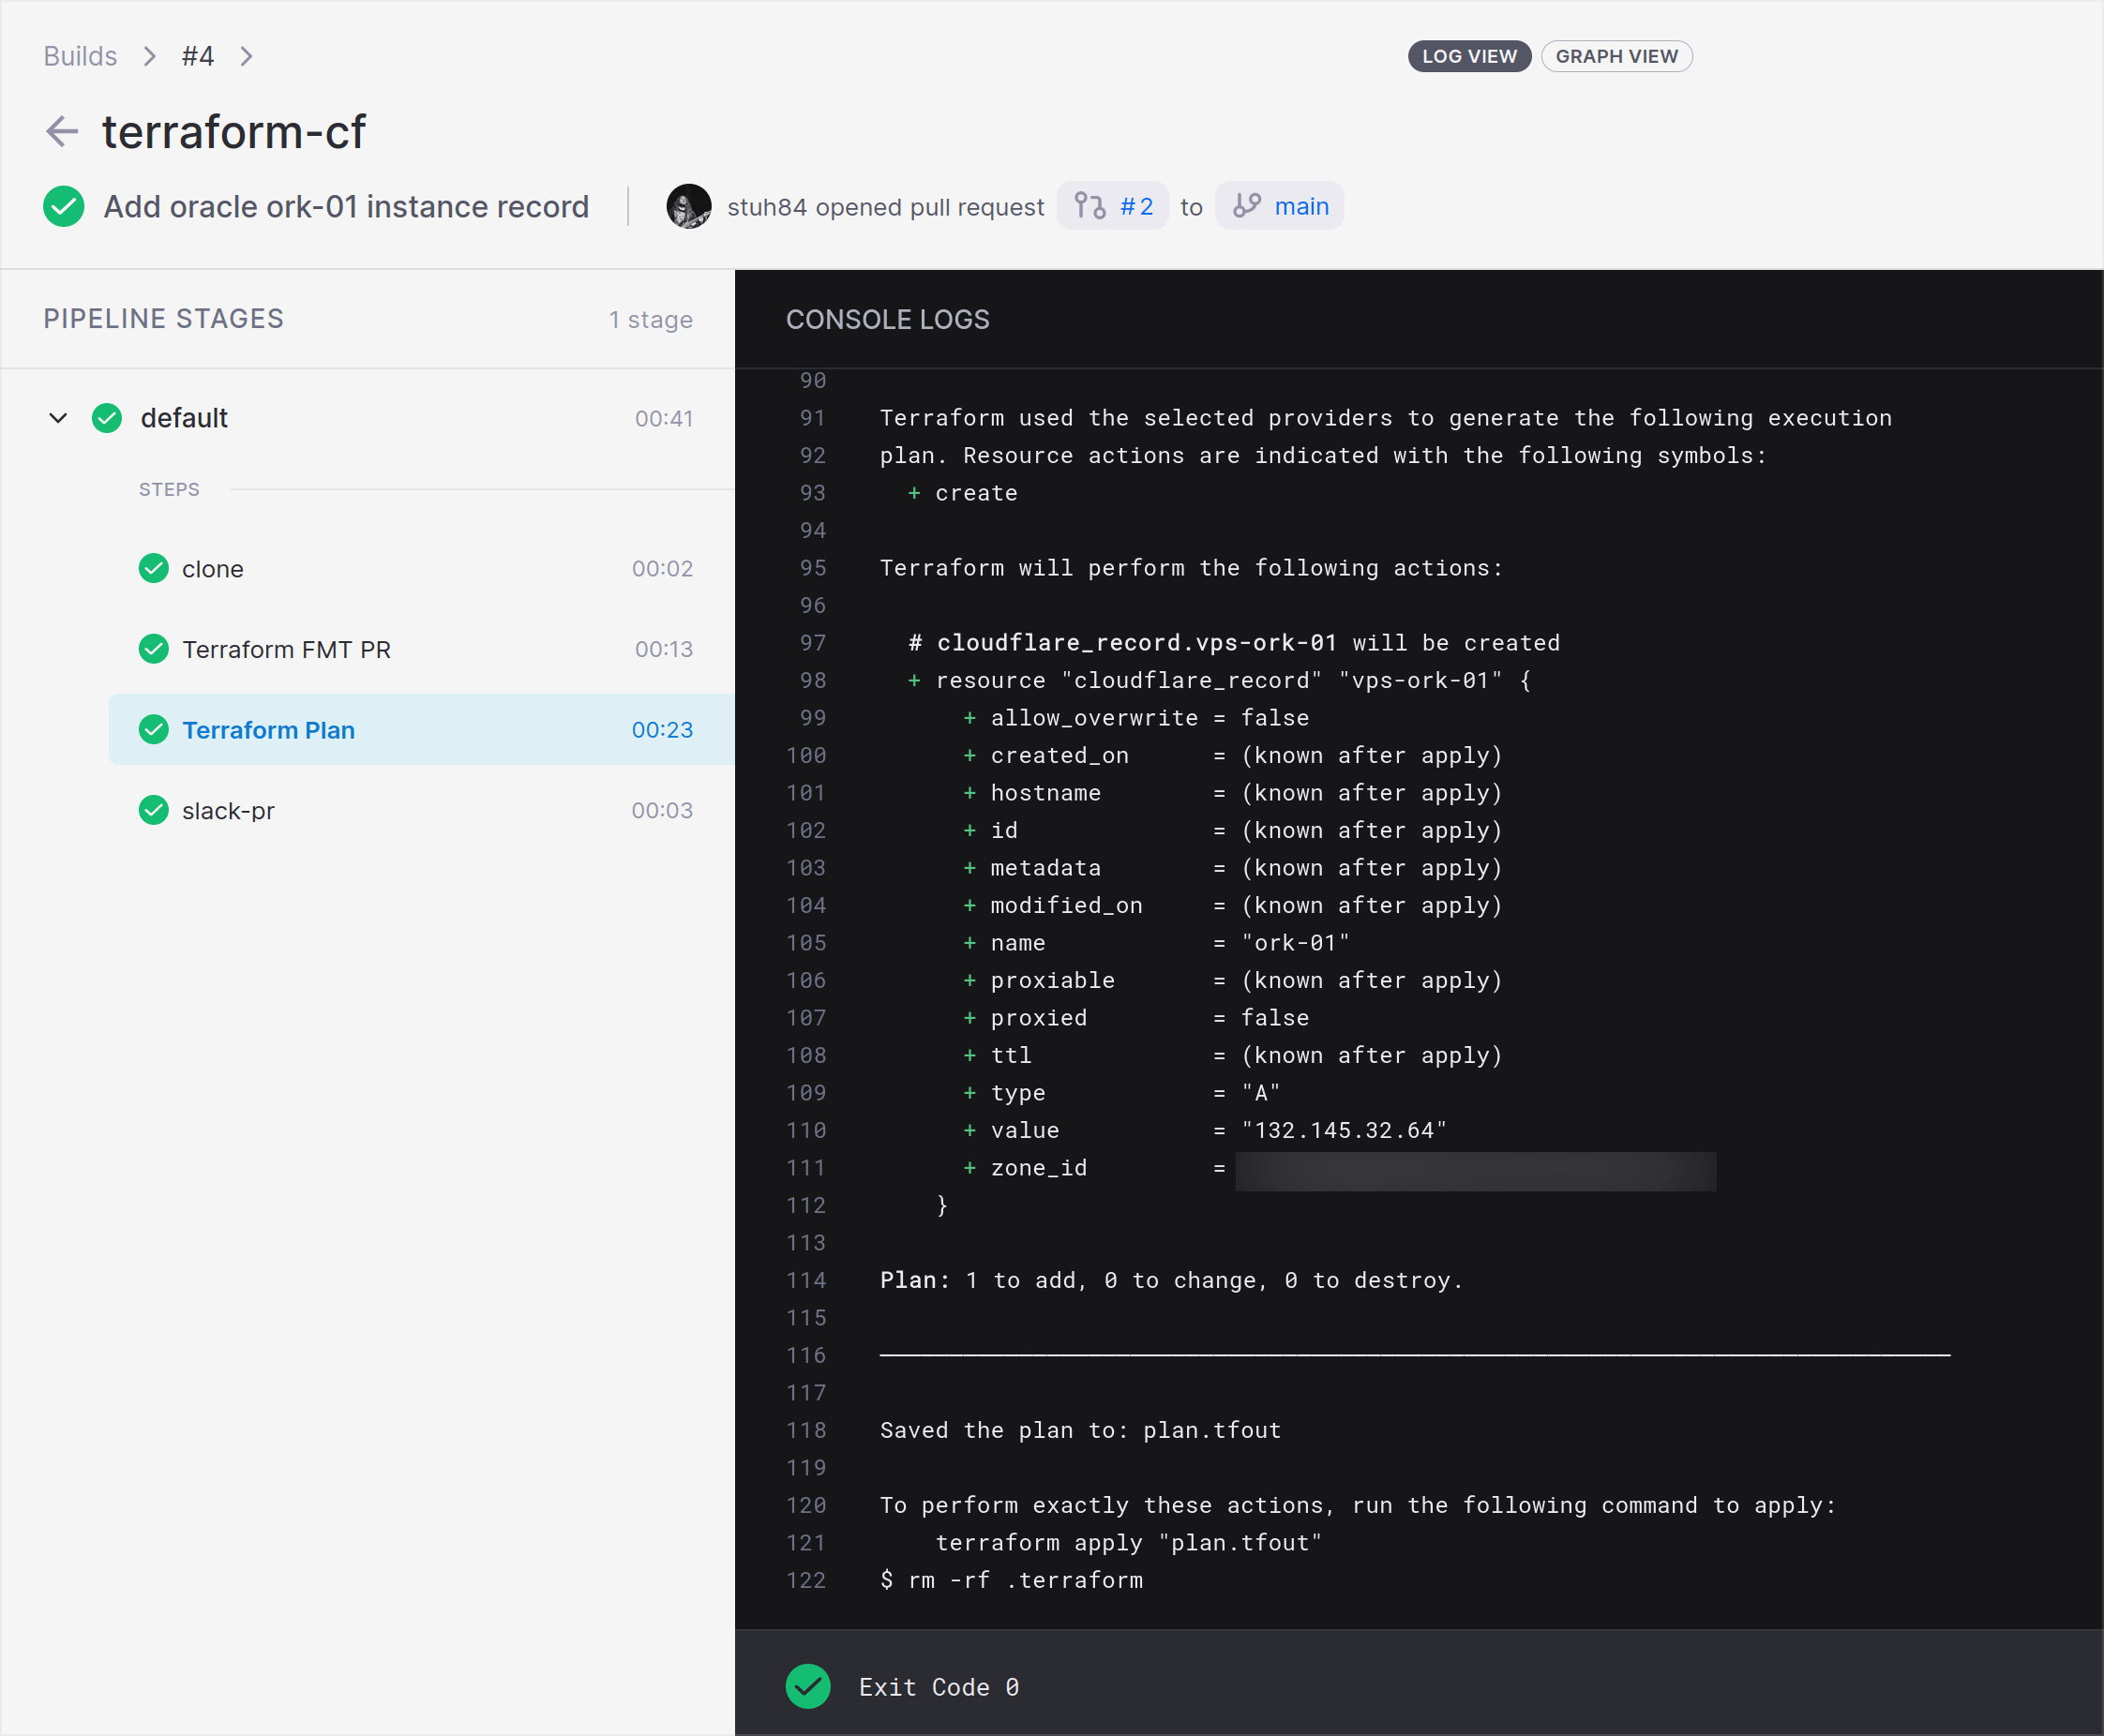
This step runs terraform validate and terraform plan. Validate ensures that the Terraform configuration is correct (i.e. brackets in the correct place, variables defined correctly etc), and the Plan stage shows the changes Terraform wants to make.
In this Drone expose a set of environment variables, namely my Digital Ocean API token, Hetzner HCloud API token and the Cloudflare API token. It uses the Digital Ocean and Hetzner tokens to create DNS records for the public IPs of my VPSs within Hetzner and Digital Ocean, and the Cloudflare API token is used to read/write updates to the Cloudflare API. An example of the relevant Terraform code is shown below: -
data.tf
data "hcloud_server" "hcloud-vps-a" {
  name = "vps-shme-hcloud-a"
}

data "hcloud_server" "hcloud-vps-b" {
  name = "vps-shme-hcloud-b"
}

data "digitalocean_droplet" "vps-shme" {
  name = "vps-shme"
}
main.tf
# VPS Records - IPv4

resource "cloudflare_record" "vps-a" {
  zone_id = local.this_zone_id
  name    = "vps-a"
  type    = "A"
  proxied = "false"
  value   = data.hcloud_server.hcloud-vps-a.ipv4_address
}

resource "cloudflare_record" "vps-b" {
  zone_id = local.this_zone_id
  name    = "vps-b"
  type    = "A"
  proxied = "false"
  value   = data.hcloud_server.hcloud-vps-b.ipv4_address
}

resource "cloudflare_record" "vps-shme" {
  zone_id = local.this_zone_id
  name    = "vps"
  type    = "A"
  proxied = "false"
  value   = data.digitalocean_droplet.vps-shme.ipv4_address
}

# VPS Records - IPv6

resource "cloudflare_record" "vps-a-v6" {
  zone_id = local.this_zone_id
  name    = "vps-a"
  type    = "AAAA"
  proxied = "false"
  value   = data.hcloud_server.hcloud-vps-a.ipv6_address
}

resource "cloudflare_record" "vps-b-v6" {
  zone_id = local.this_zone_id
  name    = "vps-b"
  type    = "AAAA"
  proxied = "false"
  value   = data.hcloud_server.hcloud-vps-b.ipv6_address
}

resource "cloudflare_record" "vps-shme-v6" {
  zone_id = local.this_zone_id
  name    = "vps"
  type    = "AAAA"
  proxied = "false"
  value   = data.digitalocean_droplet.vps-shme.ipv6_address
}
As you can see, this uses data sources to get information from Digital Ocean and Hetzner, and then applies the IPv4/IPv6 addresses as values in cloudflare_record resources.
I also create DNS records for instances within Google Cloud Platform and Oracle Cloud Infrastructure, but with these I use Terraform Remote State. The reason for this is that both of these require extra configuration and files (GPG keys for OCI, a JSON document for GCP) that add extra steps and complication to the pipeline. While this does mean that I am reliant on the Terraform Remote State being up to date (rather than a direct data source like for Digital Ocean or Hetzner), I accept this trade off to avoid the additional complexity.
The relevant Terraform for the GCP and OCI records are shown below: -
data.tf
data "terraform_remote_state" "oracle-ork" {
  backend = "consul"
  config = {
    address = "consul.noisepalace.co.uk"
    scheme  = "https"
    path    = "terraform/oraclecloud/oci"
  }
}

data "terraform_remote_state" "yetiops-goggle" {
  backend = "consul"
  config = {
    address = "consul.noisepalace.co.uk"
    scheme  = "https"
    path    = "terraform/gcp/yetiops-goggle"
  }
}
main.tf
resource "cloudflare_record" "vps-ork-01" {
  zone_id = local.this_zone_id
  name    = "ork-01"
  type    = "A"
  proxied = "false"
  value   = data.terraform_remote_state.oracle-ork.outputs.instance_public_ip
}

resource "cloudflare_record" "vps-gog-01" {
  zone_id = local.this_zone_id
  name    = "gog-01"
  type    = "A"
  proxied = "false"
  value   = data.terraform_remote_state.yetiops-goggle.outputs.gog-01-ipv4
}
These use Consul as the source for Remote State. More details on this are in this section.
The Drone step will run a plan against these resources (and all other defined resources), and show what changes need to be made (if any).
Steps - Terraform Apply
  - name: Terraform Apply
    image: jmccann/drone-terraform:latest
    settings:
      actions:
        - validate
        - plan
        - apply
    environment:
      DIGITALOCEAN_TOKEN:
        from_secret: digitalocean_token
      HCLOUD_TOKEN:
        from_secret: hcloud_token
      CLOUDFLARE_API_TOKEN:
        from_secret: cloudflare_api_token
    when:
      branch:
      - main
      event:
      - push
      - tag
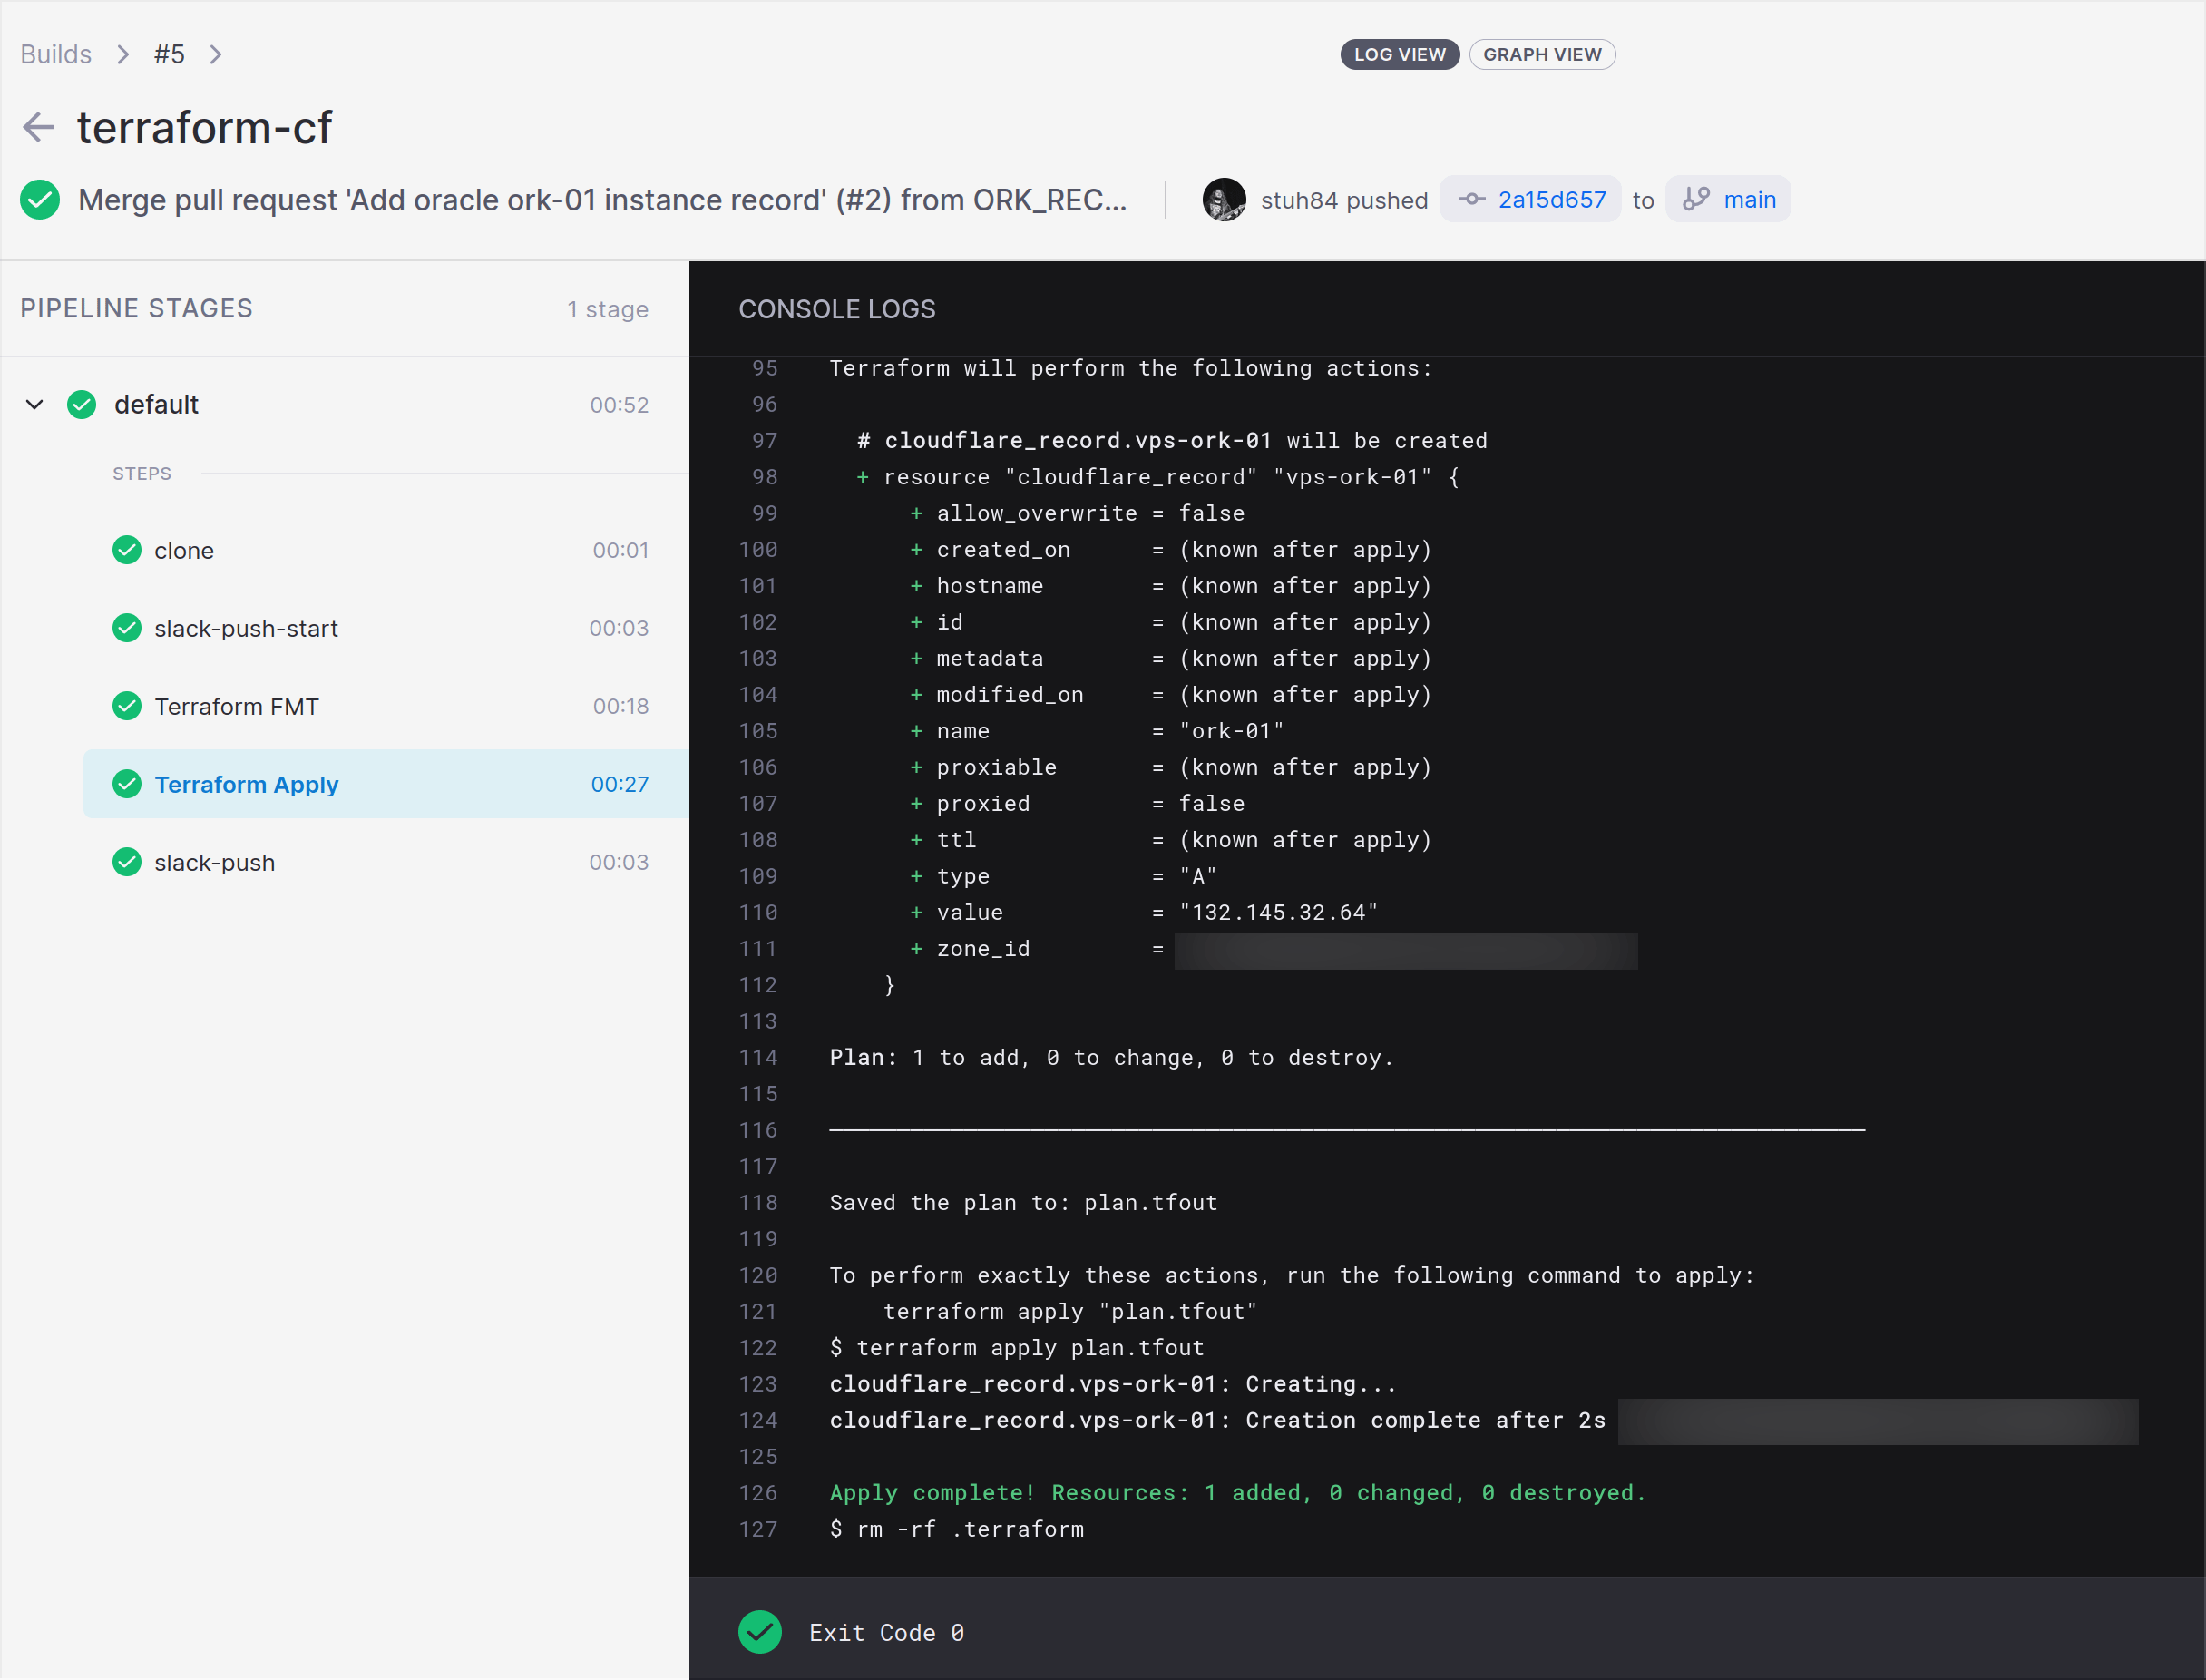
This step is almost identical to the Plan stage. The only difference is that it uses the apply action as well. This runs a validate and a plan action (to ensure that the code is still valid when merged with the main branch) and then applies the changes.
This is all controlled via Gitea pull requests, meaning that any PRs raised will go through all the validation and planning steps. Changes are then applied without any human interaction with the Terraform CLI itself.
For most Terraform code, these are all the steps you will need.
Additional steps
As noted above, most of my Terraform code doesn’t need anything more than the steps covered already. The secrets to expose may differ (based upon the infrastructure used), otherwise everything else is the same.
However for some Terraform code, I need to make files available (e.g. SSH keys, GPG keys, configuration objects). The following step covers how to do this: -
steps:
  - name: Place SSH keys - PR
    image: alpine
    environment:
      SSH_PRIV:
        from_secret: drone_ssh_priv
      SSH_PUB:
        from_secret: drone_ssh_pub
      OCI_PRIVATE_KEY:
        from_secret: oci_private_key
    volumes:
      - name: cache
        path: /ssh
    commands:
      - echo -e "$SSH_PRIV" | tee /ssh/id_rsa
      - echo -e "$SSH_PUB" | tee /ssh/id_rsa.pub
      - echo -e "$OCI_PRIVATE_KEY" | tee /ssh/oci_private_key.pem
      - chmod 644 /ssh/*
    when:
      event:
      - pull_request

[...]

volumes:
  - name: cache
    temp: {}
This step takes the contents of some secrets, and then places them into files. In the above, these are my Drone SSH keys, and also the OCI GPG private key. These are placed in a volume. A volume is a shared directory/path that can be made available to other steps within a pipeline.
For Oracle Cloud Infrastructure, the GPG key is required to authenticate against the API, whereas the SSH keys (specifically the public key) are used in the cloud-init/user data to bootstrap the instances. By default they do not allow password-based authentication to login via SSH, so they need some form of SSH key to allow you to login.
An example of using this is below: -
- name: Terraform Plan
  image: jmccann/drone-terraform:latest
  settings:
    actions:
      - validate
      - plan
    vars:
      ssh_public_key: "/ssh/id_rsa.pub"
  environment:
      TF_VAR_tenancy_ocid:
        from_secret: oci_tenancy_ocid
      TF_VAR_user_ocid:
        from_secret: oci_user_ocid
      TF_VAR_compartment_ocid:
        from_secret: oci_compartment_ocid
      TF_VAR_fingerprint:
        from_secret: oci_fingerprint
      TF_VAR_private_key_path: "/ssh/oci_private_key.pem"
  volumes:
    - name: cache
      path: /ssh
  when:
    event:
    - pull_request
As you can see, the SSH key path is supplied as a variable. We also supply the OCI private key path as a TF_VAR environment variable. The most important part here is the volumes section, as without this the keys created in the previous step would not be available.
Volumes could be used in many different ways (e.g. cached dependencies, creating build artifacts and pushing them). In this case it make files available between steps, allowing authentication to certain providers.
The same step is used in my Lab Terraform when creating Proxmox virtual machines. This is because cloud-init in Proxmox requires adding files directly to the Proxmox host’s file system (rather than being stored in an API). In my case, I use SSH/SCP within Terraform to transfer the files to the Proxmox host(s), using the Drone SSH keys for authentication.
Remote State Backend with Consul
While not specific to Drone, using some form of Remote State Backend within Terraform allows the following: -
- A central place to source state between Drone jobs and local Terraform testing
- Using Remote State as a data source in Terraform code
- State Locking - avoids multiple jobs/people applying changes at the same time (and potentially breaking each others changes)
- Not all backends support this, and some require a separate backend for locking (e.g. AWS S3 for state storage, and DynamoDB for state locking)
- Most importantly, it means Drone does not need to write to a
terraform.tfstatefile in the repository and push it back to the repository after changes are made
The last point is especially pertinent, as without this the following steps would be required: -
- Create a cache/state volume in the pipeline
- Make the Terraform Drone plugin place state files in the volume
- Run a step after each Terraform Apply stage to add, commit and push changes back to the code repository
- This also means giving Drone access to push (and not just pull/clone rights) access to the repository
Instead, using a Remote State Backend means none of these extra steps are required. Many different options for Backends are available (e.g. AWS S3, Azure Blob Storage, etcd, Postgres), but I chose Consul as I already run Consul for Prometheus Service Discovery.
Setting up this backend looks like the below: -
terraform {
  backend "consul" {
    address = "consul.noisepalace.co.uk"
    scheme  = "https"
    path    = "terraform/oraclecloud/oci"
  }
}
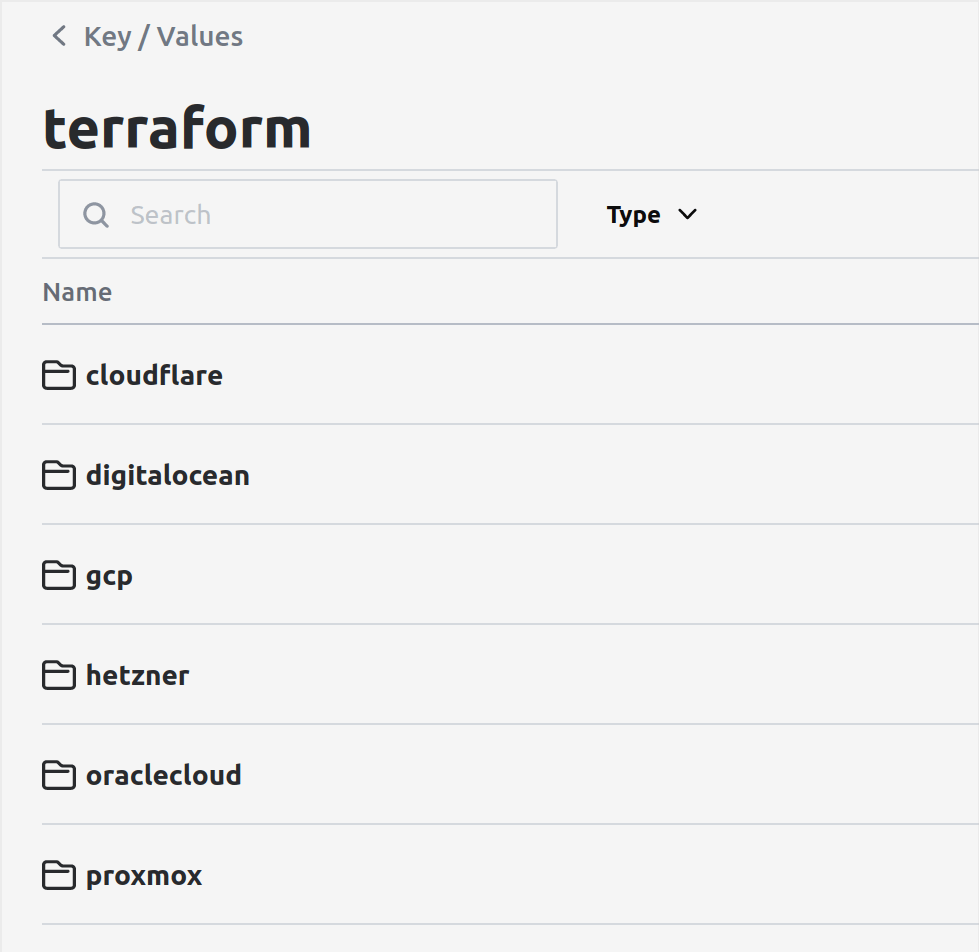
The path structure is arbitrary. I decided to use a $APPLICATION/$PROVIDER/$PURPOSE structure, but you could name each one after characters in Star Wars or Transformers if you wished! This stores state in the Consul KV store, as shown below: -
Demonstration
The below video is a demonstration of making a change to the Terraform repository and committing it. In this step I am going to create a DNS record in Cloudflare: -
Summary
In this, we have seen how to can make use of Drone to apply Terraform configuration.
This has also shown how we can make use of Consul to provide a consistent Backend for Terraform, reducing the need for additional steps to manage Terraform state files with Drone.
In the next post, I’m going to cover using Drone to build Go releases.