46 minutes
Pulumi: Infrastructure as Code meets programming
Infrastructure as Code is the practice of managing your infrastructure (in a cloud provider, on premises, databases, monitoring and more) in a declarative manner. This means that rather than creating resources manually through the provider/server console, or manually setting up individual services on bare metal/virtualised servers, the infrastructure itself is managed using some form of code.
This has many advantages in that: -
- It is repeatable - If your infrastructure is defined in code, then it is easy to rebuild it, or make a copy of it
- It is documented - The code declares the infrastructure, with all the steps required to build it
- It is consistent - You can define modules which build infrastructure in the same way (e.g. required tags, required security group rules, minimum access policies etc), without needing a checklist or relying on an engineer’s memory
- Changes are trackable - If you use version control for your Infrastructure Code, you can see what was changed
- Commit messages will also help you determine why as well
- It is testable - You can build deployment pipelines that will test the code, ensuring it is secure and does what is intended
There are a number of other benefits too, but the above are more than enough to make using IaC (Infrastructure-as-Code) a worthwhile endeavour.
Tooling
In terms of IaC tooling, there are quite a few available.
Configuration management tools like Ansible, Saltstack, Puppet and Chef are used to deploy applications and define how they are configured. This can go a long way to making your builds and applications more consistent. However when you need to manage the underlying infrastructure itself, they are not always as well suited. These tools are examples of “imperative” configuration. They can define how to create the infrastructure and all the steps to get there, but they rarely define the final state.
It is perfectly possible to create an AWS EC2 instance with Ansible for example, but checking whether there is already an instance that matches your desired state is can be very complex. It not only has to build it, but it has to know whether it has built one before, how many have been built already, and whether they are configured correctly.
The better option for this is a “declarative” tool. Rather than telling the tool what to build and how to build it, you define the end state (e.g. “I want a Kubernetes cluster in Google Cloud, with GPU-optimized instances”) and let the tool take care of how to reach that end state. The most popular tool in this space is Hashicorp’s Terraform.
Terraform
Terraform has become very popular in the IaC space, especially in managing cloud infrastructure, for a number of reasons.
First, it is a single binary without any other dependencies. This makes it very easy to install. Secondly, it uses a Domain-Specific Language called HCL (Hashicorp Configuration Language). HCL does not have a lot of features that a newcomer needs to learn to become productive, making the barrier to entry quite low.
HCL also supports the concept of modules, meaning you can have a file that contains the “standard” way you want to build a unit (or units) of infrastructure, with a few parameters to make it unique (e.g. a name, startup scripts etc).
It also maintains a “state” file. This file contains the last known state of the infrastructure, which allows Terraform to reconcile between what it knows the state to be, with what the new desired state is (i.e. what changes are required based upon updates to the HCL files).
Limitations
Over the years since Terraform was introduced, HCL has grown to include features that you would expect in a standard programming language, including dynamic blocks, for loops and operators.
These can add complexity to Terraform code, as sometimes the logic is not immediately obvious. Also, there are limitations to these features, meaning that you sometimes work against HCL to achieve your end state, or have some infrastructure lie outside of it.
To give an example, the below is a dynamic block in Terraform: -
variable "global_replicas" {
  type        = list
  default     = ["eu-west-1", "eu-west-2"]
  description = "Add the ability to define global tables (v2 - 2019.11.21) in DynamoDB"
}

resource "aws_dynamodb_table" "table" {
  dynamic "replica" {
    for_each = var.global_replicas
    content {
      region_name            = replica.value.region_name
    }
  }
Traditionally in a for loop, you would usually expect to reference a variable as the value. That it also references the field name in the value as well is a potential cause for confusion too. If you did something similar in Python, it would look something like this: -
global_replicas = [
  "eu-west-1",
  "eu-west-2"
]

for replica in global_replicas:
  region_name = replica
Compared to the Terraform for loop, this doesn’t take much to comprehend.
Terraform also has other constraints on what can and can’t be dynamically created. Up until the most recent versions of Terraform, resources (i.e. declaring what you want directly) could be created dynamically (i.e. based upon the contents of a list, or a count) but references to modules could not. This added complexity to modules, as they would have to account for multiple resource creations, even if most of the time only 1 resource would be.
In a situation like this, you may find yourself wanting to use a standard programming language. This is where Pulumi comes in.
What is Pulumi?
Pulumi is another IaC tool. Instead of using it’s own Domain-Specific Language, you can use a number of standard programming languages. Currently Pulumi supports Javascript, Typescript (a variant of Javascript that introduces static typing), Python, Go and DotNet.
Pulumi offers an SDK for your programming language of choice, and is usually split into modules/packages. This also allows you to include only the modules you need to use (e.g. only the AWS EC2 module or only the Azure Blob Storage module).
Pulumi uses very similar concepts to Terraform, in that you declare your infrastructure as code, and the tool (Pulumi in this case) ensures the end result matches what you have declared. It also manages state, so that it knows what your infrastructure previously looked like, and what needs to be added/updated/removed to reach the new desired state.
Pulumi introduces the concepts of Projects and Stacks. A Project defines what runtimes are used (i.e. which language) and also specifies detail about your project (e.g. a description, any other metadata). A Stack sits inside a project. It is an instance/environment that you create your infrastructure inside. It usually denotes the stage it is deployed at (e.g. staging, development, production etc).
It uses many of the Terraform providers (i.e. what Terraform uses to communicate with your cloud/infrastructure/application provider of choice). This means Pulumi usually supports the same cloud providers/infrastructure as Terraform, or at least has the capability to.
How do I start using it?
To start using Pulumi, first you need to install the Pulumi tool itself. Follow the instructions here based upon your platform of choice. The CLI itself is used to manage projects and stacks, as well as standing up your infrastructure. If you are familiar with Terraform already, the Pulumi CLI serves the same functions as the Terraform binary, and the code you create is analogous to the resources/modules you create in your HCL-based .tf files.
Once Pulumi is installed, create an empty directory, and run pulumi new $provider-$language --name $stack-name. Replace $provider with the infrastructure/cloud you are targeting (e.g. aws, azure, cloudinit), choose one of typescript, javascript, python, go or csharp as the language, and choose a relevant Stack Name (e.g. my-first-stack or squad-dynamodb-staging). You will be greeted with something like the following: -
$ pulumi new aws-go --name yetiops-blog-aws-staging
This command will walk you through creating a new Pulumi project.

Enter a value or leave blank to accept the (default), and press <ENTER>.
Press ^C at any time to quit.

project description: (A minimal AWS Go Pulumi program) This is for the blog
Created project 'yetiops-blog-aws-staging'

Please enter your desired stack name.
To create a stack in an organization, use the format <org-name>/<stack-name> (e.g. `acmecorp/dev`).
stack name: (dev) yetiops/staging
Created stack 'staging'

aws:region: The AWS region to deploy into: (us-east-1) eu-west-2
Saved config

Installing dependencies...

Finished installing dependencies

Your new project is ready to go! ✨

To perform an initial deployment, run 'pulumi up'
You will then be presented with the following directory structure: -
$ tree
.
|-- Pulumi.staging.yaml
|-- Pulumi.yaml
|-- go.mod
|-- go.sum
`-- main.go

0 directories, 5 files
Each file represents the following: -
Pulumi.staging.yaml- This is configuration specific to the stackPulumi.yaml- This is the project definition, which contains thename,runtimeanddescriptionof the project- As noted, multiple stacks can sit inside a project. You can expect to see one
Pulumi.yaml, and multiplePulumi.$STACK-NAME.yamlfiles
- As noted, multiple stacks can sit inside a project. You can expect to see one
main.go- Define your infrastructure in here, using Gogo.modandgo.sum- These are Go module definitions (see here if you are not familiar)
The contents of each file look like the below: -
Pulumi.staging.yaml
config:
  aws:region: eu-west-2
Pulumi.yaml
name: yetiops-blog-aws-staging
runtime: go
description: This is for the blog
main.go
package main

import (
	"github.com/pulumi/pulumi-aws/sdk/v3/go/aws/s3"
	"github.com/pulumi/pulumi/sdk/v2/go/pulumi"
)

func main() {
	pulumi.Run(func(ctx *pulumi.Context) error {
		// Create an AWS resource (S3 Bucket)
		bucket, err := s3.NewBucket(ctx, "my-bucket", nil)
		if err != nil {
			return err
		}

		// Export the name of the bucket
		ctx.Export("bucketName", bucket.ID())
		return nil
	})
}
go.mod
module yetiops-blog-aws-staging

go 1.14

require (
	github.com/pulumi/pulumi-aws/sdk/v3 v3.26.1
	github.com/pulumi/pulumi/sdk/v2 v2.19.0
)
I won’t include the go.sum file as it is 427 lines long and contains calculated sums of each dependency that the Pulumi modules rely upon.
As you can see, Pulumi already brings in a few base dependencies, and everything you need to start building your infrastructure. We can now run pulumi up to see what will happen: -
$ pulumi up
Previewing update (staging)

View Live: https://app.pulumi.com/yetiops/yetiops-blog-aws-staging/staging/previews/e9bdbddd-90fb-4cb3-b6d3-91d0c3af8199

     Type                 Name                              Plan
 +   pulumi:pulumi:Stack  yetiops-blog-aws-staging-staging  create
 +   └─ aws:s3:Bucket     my-bucket                         create

Resources:
    + 2 to create

Do you want to perform this update? yes
Updating (staging)

View Live: https://app.pulumi.com/yetiops/yetiops-blog-aws-staging/staging/updates/1

     Type                 Name                              Status
 +   pulumi:pulumi:Stack  yetiops-blog-aws-staging-staging  created
 +   └─ aws:s3:Bucket     my-bucket                         created

Outputs:
    bucketName: "my-bucket-00d14a7"

Resources:
    + 2 created

Duration: 9s
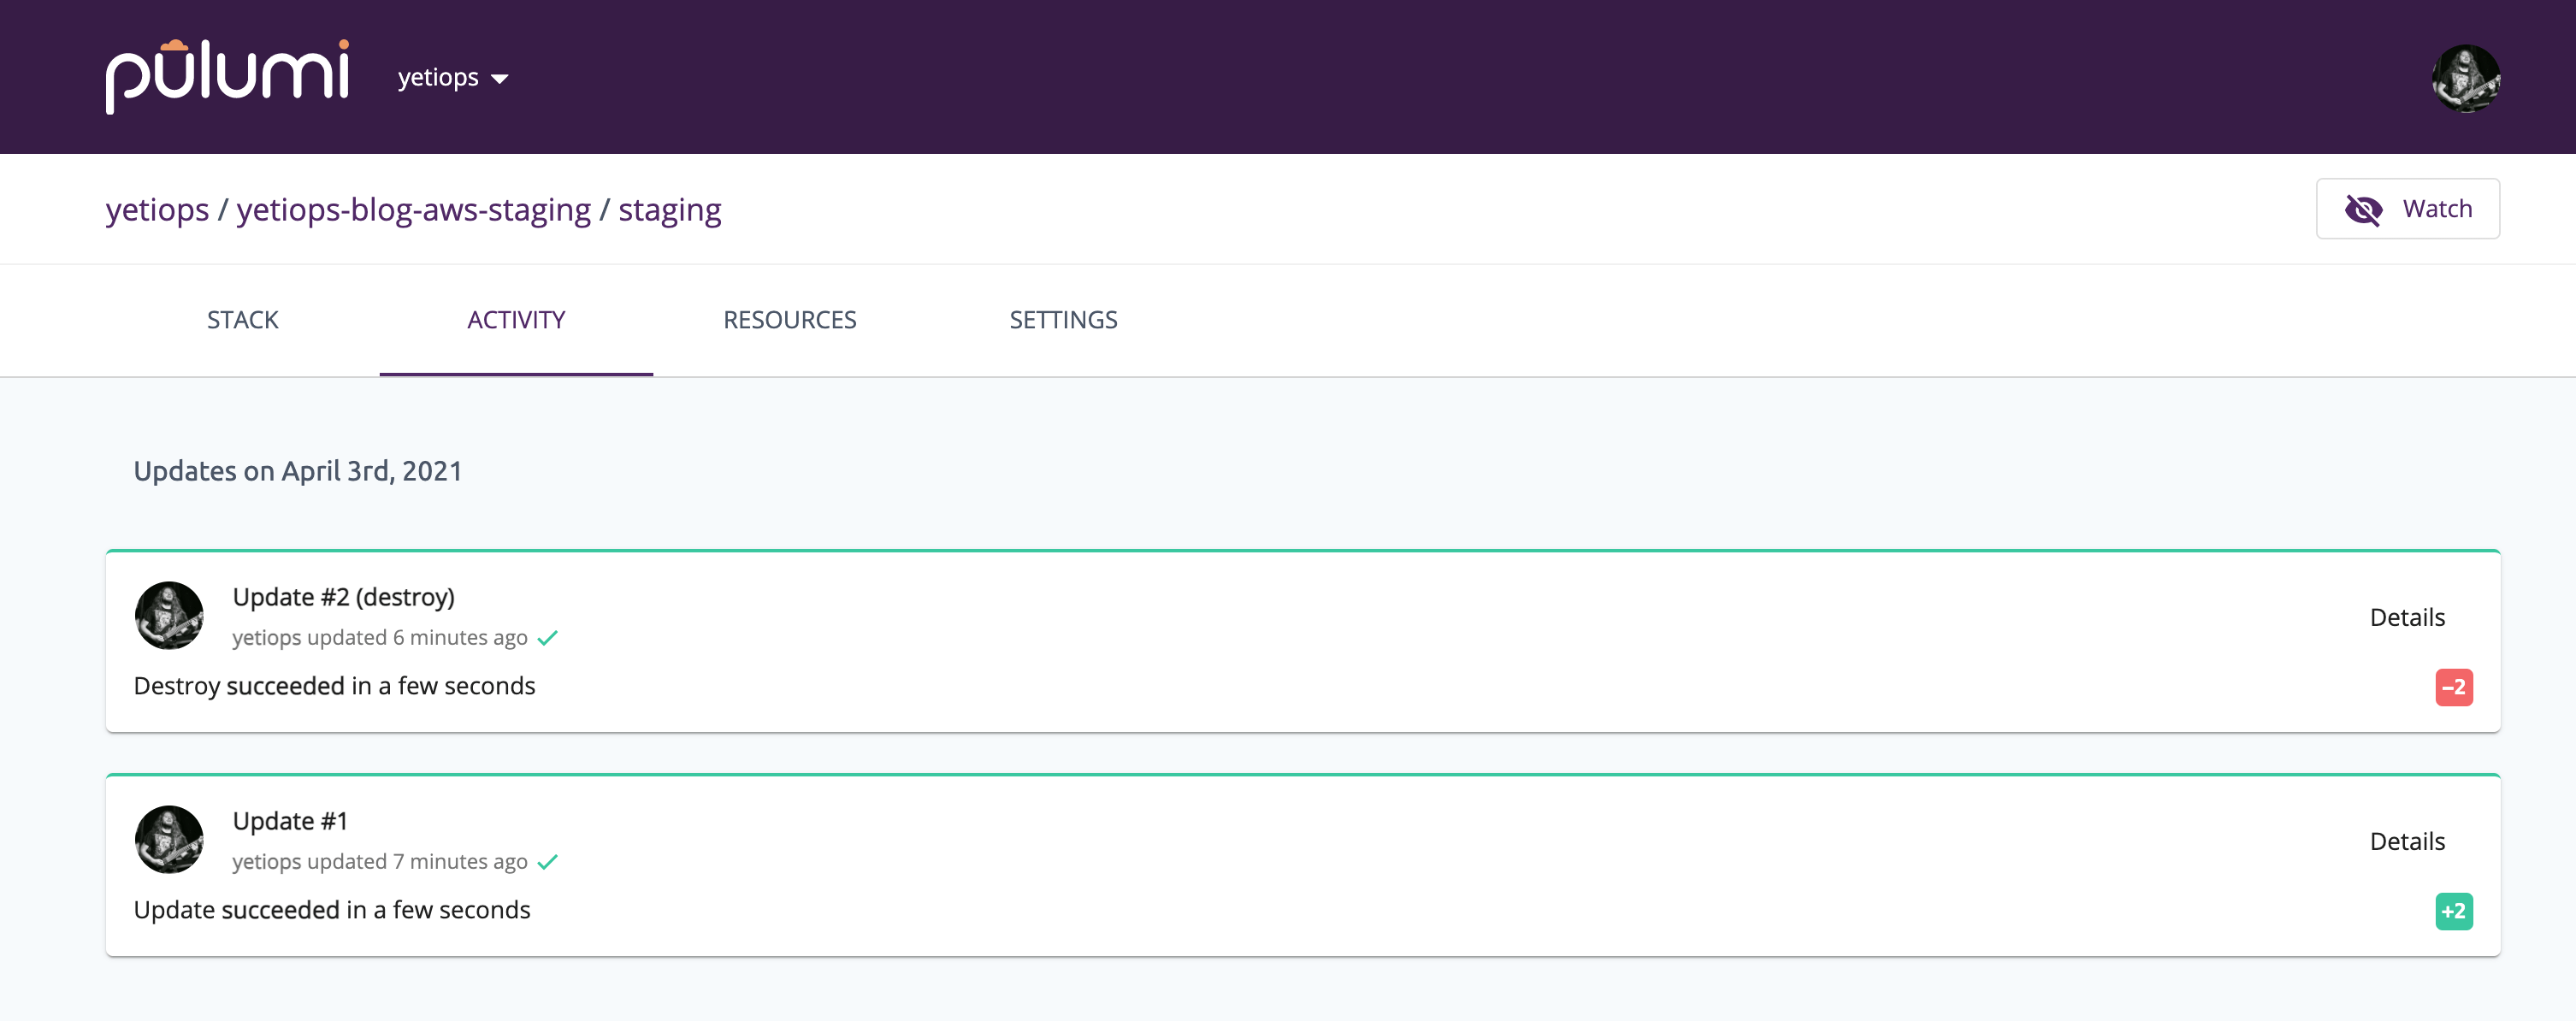
We can also tear it down again using pulumi destroy: -
Previewing destroy (staging)

View Live: https://app.pulumi.com/yetiops/yetiops-blog-aws-staging/staging/previews/4a846464-faa9-4d39-8971-0ec65d130d15

     Type                 Name                              Plan
 -   pulumi:pulumi:Stack  yetiops-blog-aws-staging-staging  delete
 -   └─ aws:s3:Bucket     my-bucket                         delete

Outputs:
  - bucketName: "my-bucket-00d14a7"

Resources:
    - 2 to delete

Do you want to perform this destroy? yes
Destroying (staging)

View Live: https://app.pulumi.com/yetiops/yetiops-blog-aws-staging/staging/updates/2

     Type                 Name                              Status
 -   pulumi:pulumi:Stack  yetiops-blog-aws-staging-staging  deleted
 -   └─ aws:s3:Bucket     my-bucket                         deleted

Outputs:
  - bucketName: "my-bucket-00d14a7"

Resources:
    - 2 deleted

Duration: 4s

The resources in the stack have been deleted, but the history and configuration associated with the stack are still maintained.
If you want to remove the stack completely, run 'pulumi stack rm staging'.
As noted by the message at the end, the stack still exists, we have just destroyed the resources it created.
Also notice that we have a link to https://app.pulumi.com in our output. This is because Pulumi by default uses the Pulumi Service as it’s backend (i.e. Pulumi’s hosted backend) for storing state. Using the Pulumi backend is free for individuals. Alternatively you can use an S3-compatible storage system (e.g. AWS S3, Azure Blob Store, Google Cloud Storage, Minio) instead. Using these backends, you can also see the progress of your services being deployed: -
Finally, if you want to see information on what will be created or destroyed (depending on whether you choose pulumi up or pulumi destroy), select details: -
Do you want to perform this update?  [Use arrows to move, enter to select, type to filter]
  yes
> no
  details

Do you want to perform this update? details
+ pulumi:pulumi:Stack: (create)
    [urn=urn:pulumi:staging::yetiops-blog-aws-staging::pulumi:pulumi:Stack::yetiops-blog-aws-staging-staging]
    + aws:s3/bucket:Bucket: (create)
        [urn=urn:pulumi:staging::yetiops-blog-aws-staging::aws:s3/bucket:Bucket::my-bucket]
        acl         : "private"
        bucket      : "my-bucket-7f03e0b"
        forceDestroy: false
There isn’t much for this stack, but in larger stacks you will see more than enough information to determine whether the infrastructure will be built correctly.
Building some infrastructure
To show the differences between using Terraform and Pulumi for IaC, I’m going to revisit a previous post Prometheus Service Discovery with AWS (and other providers, but I’ll focus on AWS).
If you follow all the steps in the AWS section until Configure EC2s - Terraform, your environment will have all the necessary configuration and credentials that both Terraform and Pulumi require.
Now we will build an Amazon EC2 (a virtual machine for those who are not familiar with AWS) that has the Prometheus node_exporter installed using cloud-config.
Since writing the previous post, Terraform is now on version 0.14, using the new required providers syntax (allowing providers to be downloaded from the Terraform provider registry). The Terraform code in the following section uses this new syntax. Also, mostly out of intrigue, I decided to build using AWS Graviton2-based instances to see if there are any noticeable differences from a t3.micro instance. It helps that t4g.micro instances are free to trial for a few more months at the time of writing too!
Terraform
In our Terraform code, first we define our providers. In this case, we put in a requirement for the AWS provider, and say that the default region is eu-west-2.
providers.tf
terraform {
  required_providers {
    aws = {
      source  = "hashicorp/aws"
      version = "~> 3.0"
    }
  }
}

# AWS Provider
provider "aws" {
  region  = "eu-west-2"
}
After this, we define our user-data. This is what runs on the first boot of the instance, which can include everything from package installs, user creation, configuration files, and even triggering some form of configuration management tool (e.g. Ansible, Chef) to configure the instance.
user_data.tf
data "template_file" "ubuntu" {
  template = "${file("${path.module}/files/ubuntu.tpl")}"
}

data "template_cloudinit_config" "ubuntu" {
  gzip          = false
  base64_encode = false

  part {
    filename     = "init.cfg"
    content_type = "text/cloud-config"
    content      = data.template_file.ubuntu.rendered
  }
}
In the above, we reference a file called ubuntu.tpl. This is a small cloud-config file that installs the Prometheus node_expoter.
files/ubuntu.tpl
#cloud-config
packages:
 - prometheus-node-exporter
Finally, we have our main set of resources which are: -
- An AWS EC2 instance, running as a
t4g.micro(ARM64/Graviton2-based)- This uses the Ubuntu Focal 20.04 ARM64 server image (as reference with the AWS AMI section)
- We create an SSH key pair in AWS (referencing an existing key on our file system) so that we can SSH into the instance
- This will be created in the default AWS VPC, as we aren’t specifying/creating our own
- We create an AWS Security Group to lock down what can talk to this instance
- As I’m only creating it for this blog, I only need to open it up to my home IP address
aws.tf
data "aws_ami" "ubuntu" {
  most_recent = true

  filter {
    name   = "name"
    values = ["ubuntu/images/hvm-ssd/ubuntu-focal-20.04-arm64-server-*"]
  }

  filter {
    name   = "virtualization-type"
    values = ["hvm"]
  }

  owners = ["099720109477"] # Canonical
}

data "aws_vpc" "default" {
  default = true
}

resource "aws_key_pair" "yetiops-aws-prom" {
  key_name = "yetiops-aws-prom"
  public_key = file("~/.ssh/id_rsa.pub")
}

resource "aws_instance" "yetiops-aws-prom" {
  ami           = data.aws_ami.ubuntu.id
  instance_type = "t4g.micro"
  user_data     = data.template_file.ubuntu.template

  key_name = aws_key_pair.yetiops-aws-prom.key_name

  vpc_security_group_ids = [
    aws_security_group.yetiops-aws-prom.id
  ]

  tags = {
    Name = "yetiops-aws-prom"
    prometheus = "true"
    node_exporter = "true"
  }
}

resource "aws_security_group" "yetiops-aws-prom" {
  name        = "yetiops-aws-prom"
  description = "AWS Security Group for yetiops-aws-prom"
  vpc_id      = data.aws_vpc.default.id

  tags = {
    Name = "yetiops-aws-prom"
  }
}

resource "aws_security_group_rule" "ingress_ssh_in" {
  type              = "ingress"
  to_port           = 22
  protocol          = "tcp"
  from_port         = 22
  cidr_blocks       = [
    "$MY-IP/32"
  ]
  security_group_id = aws_security_group.yetiops-aws-prom.id
}

resource "aws_security_group_rule" "ingress_node_exporter_in" {
  type              = "ingress"
  to_port           = 9100
  protocol          = "tcp"
  from_port         = 9100
  cidr_blocks       = [
    "$MY-IP/32"
  ]
  security_group_id = aws_security_group.yetiops-aws-prom.id
}

resource "aws_security_group_rule" "egress_allow_all" {
  type              = "egress"
  to_port           = 0
  protocol          = "-1"
  from_port         = 0
  cidr_blocks       = [
    "0.0.0.0/0"
  ]
  security_group_id = aws_security_group.yetiops-aws-prom.id
}
Using the standard Terraform commands, we create and start the instance, SSH into it, and verify if the Prometheus node_exporter is working: -
$ terraform apply
An execution plan has been generated and is shown below.
Resource actions are indicated with the following symbols:
  + create

Terraform will perform the following actions:

  # aws_instance.yetiops-aws-prom will be created
  + resource "aws_instance" "yetiops-aws-prom" {
      + ami                          = "ami-0368515722c2a5070"
      + arn                          = (known after apply)
      + associate_public_ip_address  = (known after apply)
      + availability_zone            = (known after apply)
      + cpu_core_count               = (known after apply)
      + cpu_threads_per_core         = (known after apply)
      + get_password_data            = false
      + host_id                      = (known after apply)
      + id                           = (known after apply)
      + instance_state               = (known after apply)
      + instance_type                = "t4g.micro"
      + ipv6_address_count           = (known after apply)
      + ipv6_addresses               = (known after apply)
      + key_name                     = "yetiops-aws-prom"
      + outpost_arn                  = (known after apply)
      + password_data                = (known after apply)
      + placement_group              = (known after apply)
      + primary_network_interface_id = (known after apply)
      + private_dns                  = (known after apply)
      + private_ip                   = (known after apply)
      + public_dns                   = (known after apply)
      + public_ip                    = (known after apply)
      + secondary_private_ips        = (known after apply)
      + security_groups              = (known after apply)
      + source_dest_check            = true
      + subnet_id                    = (known after apply)
      + tags                         = {
          + "Name"          = "yetiops-aws-prom"
          + "node_exporter" = "true"
          + "prometheus"    = "true"
        }
      + tenancy                      = (known after apply)
      + user_data                    = "2169d8a3e100623d34bf1a7b2f6bd924a8997bfb"
      + vpc_security_group_ids       = (known after apply)

      + ebs_block_device {
          + delete_on_termination = (known after apply)
          + device_name           = (known after apply)
          + encrypted             = (known after apply)
          + iops                  = (known after apply)
          + kms_key_id            = (known after apply)
          + snapshot_id           = (known after apply)
          + tags                  = (known after apply)
          + throughput            = (known after apply)
          + volume_id             = (known after apply)
          + volume_size           = (known after apply)
          + volume_type           = (known after apply)
        }

      + enclave_options {
          + enabled = (known after apply)
        }

      + ephemeral_block_device {
          + device_name  = (known after apply)
          + no_device    = (known after apply)
          + virtual_name = (known after apply)
        }

      + metadata_options {
          + http_endpoint               = (known after apply)
          + http_put_response_hop_limit = (known after apply)
          + http_tokens                 = (known after apply)
        }

      + network_interface {
          + delete_on_termination = (known after apply)
          + device_index          = (known after apply)
          + network_interface_id  = (known after apply)
        }

      + root_block_device {
          + delete_on_termination = (known after apply)
          + device_name           = (known after apply)
          + encrypted             = (known after apply)
          + iops                  = (known after apply)
          + kms_key_id            = (known after apply)
          + tags                  = (known after apply)
          + throughput            = (known after apply)
          + volume_id             = (known after apply)
          + volume_size           = (known after apply)
          + volume_type           = (known after apply)
        }
    }

  # aws_key_pair.yetiops-aws-prom will be created
  + resource "aws_key_pair" "yetiops-aws-prom" {
      + arn         = (known after apply)
      + fingerprint = (known after apply)
      + id          = (known after apply)
      + key_name    = "yetiops-aws-prom"
      + key_pair_id = (known after apply)
      + public_key  = "ssh-rsa AAAAB3NzaC1yc2EAAAADAQABAAABAQCmU363A+W8ifK9zwmsMSRdvw/++FNsmBxDu16VJGvLc9n7hBgH0w/fzlbBIgwuff1hVRMQ09ZtopEJ0MGYEKo/MtvSMfYEHz4FjQWnir4aBBUjRPDo3KEhJXrZb7tBhACZRiOFfF4e6iw0Veli5dmzrqo7fTwnhHEhggJTUCwUxDm4W08k4g97OrKxrN63tKV3GDdPA3Sv3ukpVwMOzjp6rId5d+TjMYVsfYuY5feKqjhiFZi96BNNaJLfVTRib1H1XarNivSi6I5xQYkMgBXVqSqiyLYuAkxojufPZBtmzQnbO9GRyRr7eg/lz4QpKabhS7TO1bQlZrLYcIWMkGaB [email protected]"
    }

  # aws_security_group.yetiops-aws-prom will be created
  + resource "aws_security_group" "yetiops-aws-prom" {
      + arn                    = (known after apply)
      + description            = "AWS Security Group for yetiops-aws-prom"
      + egress                 = (known after apply)
      + id                     = (known after apply)
      + ingress                = (known after apply)
      + name                   = "yetiops-aws-prom"
      + name_prefix            = (known after apply)
      + owner_id               = (known after apply)
      + revoke_rules_on_delete = false
      + tags                   = {
          + "Name" = "yetiops-aws-prom"
        }
      + vpc_id                 = "vpc-a62062ce"
    }

  # aws_security_group_rule.egress_allow_all will be created
  + resource "aws_security_group_rule" "egress_allow_all" {
      + cidr_blocks              = [
          + "0.0.0.0/0",
        ]
      + from_port                = 0
      + id                       = (known after apply)
      + protocol                 = "-1"
      + security_group_id        = (known after apply)
      + self                     = false
      + source_security_group_id = (known after apply)
      + to_port                  = 0
      + type                     = "egress"
    }

  # aws_security_group_rule.ingress_node_exporter_in will be created
  + resource "aws_security_group_rule" "ingress_node_exporter_in" {
      + cidr_blocks              = [
          + "$MY-IP/32",
        ]
      + from_port                = 9100
      + id                       = (known after apply)
      + protocol                 = "tcp"
      + security_group_id        = (known after apply)
      + self                     = false
      + source_security_group_id = (known after apply)
      + to_port                  = 9100
      + type                     = "ingress"
    }

  # aws_security_group_rule.ingress_ssh_in will be created
  + resource "aws_security_group_rule" "ingress_ssh_in" {
      + cidr_blocks              = [
          + "$MY-IP/32",
        ]
      + from_port                = 22
      + id                       = (known after apply)
      + protocol                 = "tcp"
      + security_group_id        = (known after apply)
      + self                     = false
      + source_security_group_id = (known after apply)
      + to_port                  = 22
      + type                     = "ingress"
    }

Plan: 6 to add, 0 to change, 0 to destroy.


Warning: Interpolation-only expressions are deprecated

  on user_data.tf line 2, in data "template_file" "ubuntu":
   2:   template = "${file("${path.module}/files/ubuntu.tpl")}"

Terraform 0.11 and earlier required all non-constant expressions to be
provided via interpolation syntax, but this pattern is now deprecated. To
silence this warning, remove the "${ sequence from the start and the }"
sequence from the end of this expression, leaving just the inner expression.

Template interpolation syntax is still used to construct strings from
expressions when the template includes multiple interpolation sequences or a
mixture of literal strings and interpolations. This deprecation applies only
to templates that consist entirely of a single interpolation sequence.

Do you want to perform these actions?
  Terraform will perform the actions described above.
  Only 'yes' will be accepted to approve.

  Enter a value: yes

aws_key_pair.yetiops-aws-prom: Creating...
aws_security_group.yetiops-aws-prom: Creating...
aws_key_pair.yetiops-aws-prom: Creation complete after 0s [id=yetiops-aws-prom]
aws_security_group.yetiops-aws-prom: Creation complete after 1s [id=sg-02ce3d10921cf0138]
aws_security_group_rule.egress_allow_all: Creating...
aws_security_group_rule.ingress_node_exporter_in: Creating...
aws_security_group_rule.ingress_ssh_in: Creating...
aws_instance.yetiops-aws-prom: Creating...
aws_security_group_rule.ingress_ssh_in: Creation complete after 0s [id=sgrule-235111840]
aws_security_group_rule.ingress_node_exporter_in: Creation complete after 1s [id=sgrule-1442673345]
aws_security_group_rule.egress_allow_all: Creation complete after 1s [id=sgrule-816809870]
aws_instance.yetiops-aws-prom: Still creating... [10s elapsed]
aws_instance.yetiops-aws-prom: Creation complete after 12s [id=i-07b222c1a42ee0615]

Apply complete! Resources: 6 added, 0 changed, 0 destroyed.

$ ssh -i ~/.ssh/id_rsa [email protected]

 * Documentation:  https://help.ubuntu.com
 * Management:     https://landscape.canonical.com
 * Support:        https://ubuntu.com/advantage

  System information as of Sun Apr  4 18:04:53 UTC 2021

  System load:  0.57              Processes:             150
  Usage of /:   18.2% of 7.59GB   Users logged in:       0
  Memory usage: 25%               IPv4 address for ens5: 172.31.47.158
  Swap usage:   0%

4 updates can be installed immediately.
3 of these updates are security updates.
To see these additional updates run: apt list --upgradable

The programs included with the Ubuntu system are free software;
the exact distribution terms for each program are described in the
individual files in /usr/share/doc/*/copyright.

Ubuntu comes with ABSOLUTELY NO WARRANTY, to the extent permitted by
applicable law.

To run a command as administrator (user "root"), use "sudo <command>".
See "man sudo_root" for details.

$ ss -tlunp
Netid           State            Recv-Q           Send-Q                            Local Address:Port                       Peer Address:Port           Process
udp             UNCONN           0                0                                 127.0.0.53%lo:53                              0.0.0.0:*
udp             UNCONN           0                0                            172.31.47.158%ens5:68                              0.0.0.0:*
tcp             LISTEN           0                4096                              127.0.0.53%lo:53                              0.0.0.0:*
tcp             LISTEN           0                128                                     0.0.0.0:22                              0.0.0.0:*
tcp             LISTEN           0                4096                                          *:9100                                  *:*
tcp             LISTEN           0                128                                        [::]:22                                 [::]:*

$ curl localhost:9100/metrics | grep -i aarch
node_uname_info{domainname="(none)",machine="aarch64",nodename="ip-172-31-47-158",release="5.4.0-1041-aws",sysname="Linux",version="#43-Ubuntu SMP Fri Mar 19 22:06:27 UTC 2021"} 1
All looks good, now to recreate this in Pulumi!
Pulumi using Python
We will go through how to use Pulumi with Python first. Python by nature is a simpler language to read than others, almost reading like how you would describe code.
Python’s requirements on variable types (i.e. whether something is a string, integer, float or otherwise) are much looser than Go and Typescript, which also helps in making a smoother transition from Terraform.
First, we run pulumi new aws-python --name basic-ec2-py in a new directory to create the stack, the project and the example files.
After this, we set a variable for us to use throughout the stack. This provides a common name throughout (in my case, yetiops-prom). This isn’t a requirement, but it means that I can reference this variable in each of the resources I create, and it will always be the same. It also means that if I want to change it later, I only need to make that change in one place (rather than everywhere the name is referenced in code).
$ pulumi config set common_name yetiops-prom
$ cat Pulumi.basic-ec2-py.yaml
config:
  aws:region: eu-west-2
  basic-ec2-py:common_name: yetiops-prom
The code
Now we can start writing our code! The first part references our common_name variable, enabling us to use it in our resources: -
config = pulumi.Config()
common_name = config.require("common_name")
If you had another variable (say, cost_tag), you would reference it in the same way (cost_tag = config.require("cost_tag"))
From now on, when we use the common_name variable, it will use the value we set with the Pulumi command (i.e. yetiops-prom). If you change it in the Pulumi.$STACK-NAME.yaml file, it will pick up these changes too.
Next we define the AMI (Amazon Machine Image) that we want to use: -
ami = aws.get_ami(most_recent="true",
                  owners = [
                    "099720109477"
                  ],
                  filters = [
                    {
                       "name":"name",
                       "values": [
                          "ubuntu/images/hvm-ssd/ubuntu-focal-20.04-arm64-server-*"
                       ]
                    }
                  ])
Like in the Terraform code, we use a filter to find the correct image. We also specify the owner (the owner in question being Canonical) and to use the most_recent image.
For those familiar with Python, you’ll notice that the filters, owners and most_recent fields are arguments to a function.
Next, we will define our SSH key pair: -
homedir = str(Path.home())
sshkey_path = "{}/.ssh/id_rsa.pub".format(
                  homedir
              )
sshkey_file = open(sshkey_path, 'r')


sshkey = aws.ec2.KeyPair(common_name,
  public_key = sshkey_file.read().strip("\n")
)
Here, we use a couple of native Python functions. We discover the current home directory of the user, reading the contents of their SSH key file and strip new lines from the file. We use the aws.ec2.KeyPair function to define our SSH key, providing the common_name variable for naming this resource.
Now we define a security group: -
  group = aws.ec2.SecurityGroup(common_name,
      description="Yetiops Access",
      ingress = [
        {
          'protocol': 'tcp',
          'from_port': 22,
          'to_port': 22,
          'cidr_blocks': [
            myIpCidr
          ]
        },
        {
          'protocol': 'tcp',
          'from_port': 9100,
          'to_port': 9100,
          'cidr_blocks': [
            myIpCidr
          ]
        }
      ],
      egress = [
        {
          'protocol': '-1',
          'from_port': 0,
          'to_port': 0,
          'cidr_blocks': [
            "0.0.0.0/0"
          ]
        }
      ]
    )
As with before, this is a Python function with a list of arguments. We define the name of the resource (common_name), a description, and some ingress and egress rules. Also notice that we have a variable called myIpCidr. Below we’ll show using our own Python function to feed data into Pulumi: -
def GetMyIP():
  request = requests.get("https://ifconfig.co/json")
  request_json = request.json()
  myIp = request_json['ip']
  return myIp

myIpCidr = "{}/32".format(
  GetMyIP().strip("\n")
)
The above function performs an HTTP GET request to ifconfig.co to retrieve our public IPv4 address. We then return this, strip it of any new lines, and append a /32 subnet mask to it. This means that rather than specifying up front what our public IP is, we can calculate it at runtime. This also makes the code more portable as it isn’t relying on a certain users IP address.
In the next section, we define our user-data. In Pulumi, this uses the cloudinit module: -
  cloudconfig = cloudinit.get_config(
      base64_encode = False,
      gzip = False,
      parts = [
        cloudinit.GetConfigPartArgs(
          content = "#cloudconfig\npackages:\n- prometheus-node-exporter",
          content_type = "text/cloud-config",
          filename = "init.cfg"
        )
      ]
    )
Like with the AWS modules, we use a function from the cloudinit module called get_config with a set of arguments. The content is on one line, but could easily reference a file (using a similar technique to what we did in our SSH Key Pair definition) or a multiline variable. If you have quite a complex cloud-config file, trying to fit it all onto one line is probably not the best idea anyway!
When you use pulumi new $provider-$language --new $stack-name command to start a new stack, it will create a Python virtual environment and also install the relevant pip packages for the provider in question. If you want to then use other modules (e.g. the cloudinit module), you’ll also need to install the packages for them too.
To do this, run the following: -
$ cd $PROJECT-DIR <---- replace with the location of your project

$ source venv/bin/activate <---- uses the virtual environment version of Python

$ pip3 install pulumi_cloudinit

$ pip3 freeze > requirements.txt
The last step ensures that your requirements.txt file is up to date, meaning that if you run this project on a different machine, or somebody else needs to use it, they can just run pip3 install -r requirements.txt to get the relevant packages on their system.
Finally, we define our instance: -
size = "t4g.micro"

instance = aws.ec2.Instance(common_name,
  instance_type = size,
  vpc_security_group_ids = [
    group.id
  ],
  ami = ami.id,
  tags = {
    "Name": common_name,
    "prometheus": "true",
    "node_exporter": "true"
  },
  key_name = sshkey.key_name,
  user_data = cloudconfig.rendered
)

pulumi.export('publicIp', instance.public_ip)
pulumi.export('publicHostName', instance.public_dns)
Most of the fields refer to the other functions we defined, referencing their Outputs. For example, rather than typing in the name of the SSH key pair directly, we use sshkey.key_name. Similarly, we reference the user data with cloudconfig.rendered.
Finally, we export some variables that are displayed when we run pulumi up. When the build tasks are complete, it displays the public IP and DNS hostname of the instance. These are like Terraform Outputs.
Running Pulumi
Now we can run pulumi up and see what happens: -
Previewing update (basic-ec2-py)

View Live: https://app.pulumi.com/yetiops/basic-ec2-py/basic-ec2-py/previews/c2a0203c-7ddc-416b-9f4b-365a73fb74fd

     Type                      Name                       Plan       Info
 +   pulumi:pulumi:Stack       basic-ec2-py-basic-ec2-py  create     1 warning
 +   ├─ aws:ec2:KeyPair        yetiops-prom               create
 +   ├─ aws:ec2:SecurityGroup  yetiops-prom               create
 +   └─ aws:ec2:Instance       yetiops-prom               create

Diagnostics:
  pulumi:pulumi:Stack (basic-ec2-py-basic-ec2-py):
    warning: get_ami is deprecated: aws.getAmi has been deprecated in favor of aws.ec2.getAmi


Do you want to perform this update? yes
Updating (basic-ec2-py)

View Live: https://app.pulumi.com/yetiops/basic-ec2-py/basic-ec2-py/updates/5

     Type                      Name                       Status      Info
 +   pulumi:pulumi:Stack       basic-ec2-py-basic-ec2-py  created     1 warning
 +   ├─ aws:ec2:KeyPair        yetiops-prom               created
 +   ├─ aws:ec2:SecurityGroup  yetiops-prom               created
 +   └─ aws:ec2:Instance       yetiops-prom               created

Diagnostics:
  pulumi:pulumi:Stack (basic-ec2-py-basic-ec2-py):
    warning: get_ami is deprecated: aws.getAmi has been deprecated in favor of aws.ec2.getAmi

Outputs:
    publicHostName: "ec2-18-134-179-124.eu-west-2.compute.amazonaws.com"
    publicIp      : "18.134.179.124"

Resources:
    + 4 created

Duration: 23s

$ ssh -i ~/.ssh/id_rsa [email protected]

Welcome to Ubuntu 20.04.2 LTS (GNU/Linux 5.4.0-1041-aws aarch64)

 * Documentation:  https://help.ubuntu.com
 * Management:     https://landscape.canonical.com
 * Support:        https://ubuntu.com/advantage

  System information as of Mon Apr  5 09:34:36 UTC 2021

  System load:  0.23              Processes:             155
  Usage of /:   17.3% of 7.59GB   Users logged in:       0
  Memory usage: 28%               IPv4 address for ens5: 172.31.35.165
  Swap usage:   0%

0 updates can be installed immediately.
0 of these updates are security updates.


The list of available updates is more than a week old.
To check for new updates run: sudo apt update


The programs included with the Ubuntu system are free software;
the exact distribution terms for each program are described in the
individual files in /usr/share/doc/*/copyright.

Ubuntu comes with ABSOLUTELY NO WARRANTY, to the extent permitted by
applicable law.

To run a command as administrator (user "root"), use "sudo <command>".
See "man sudo_root" for details.

$ ss -tlunp
Netid             State              Recv-Q             Send-Q                              Local Address:Port                         Peer Address:Port             Process
udp               UNCONN             0                  0                                   127.0.0.53%lo:53                                0.0.0.0:*
udp               UNCONN             0                  0                              172.31.35.165%ens5:68                                0.0.0.0:*
tcp               LISTEN             0                  4096                                127.0.0.53%lo:53                                0.0.0.0:*
tcp               LISTEN             0                  128                                       0.0.0.0:22                                0.0.0.0:*
tcp               LISTEN             0                  4096                                            *:9100                                    *:*
tcp               LISTEN             0                  128                                          [::]:22                                   [::]:*

$ curl localhost:9100/metrics | grep -i aarch64
node_uname_info{domainname="(none)",machine="aarch64",nodename="ip-172-31-35-165",release="5.4.0-1041-aws",sysname="Linux",version="#43-Ubuntu SMP Fri Mar 19 22:06:27 UTC 2021"} 1
Everything looks good, we can login to the instance, and the node_exporter is installed.
All the code
The full Python file, including modules we imported, is below: -
import pulumi
import requests
import pulumi_aws as aws
import pulumi_cloudinit as cloudinit
from pathlib import Path

def GetMyIP():
  request = requests.get("https://ifconfig.co/json")
  request_json = request.json()
  myIp = request_json['ip']
  return myIp

config = pulumi.Config()
common_name = config.require("common_name")

size = "t4g.micro"

ami = aws.get_ami(most_recent="true",
                  owners = [
                    "099720109477"
                  ],
                  filters = [
                    {
                       "name":"name",
                       "values": [
                          "ubuntu/images/hvm-ssd/ubuntu-focal-20.04-arm64-server-*"
                       ]
                    }
                  ])
homedir = str(Path.home())
sshkey_path = "{}/.ssh/id_rsa.pub".format(
                  homedir
              )
sshkey_file = open(sshkey_path, 'r')


sshkey = aws.ec2.KeyPair(common_name,
  public_key = sshkey_file.read().strip("\n")
)

myIpCidr = "{}/32".format(
  GetMyIP().strip("\n")
)

group = aws.ec2.SecurityGroup(common_name,
    description="Yetiops Access",
    ingress = [
      {
        'protocol': 'tcp',
        'from_port': 22,
        'to_port': 22,
        'cidr_blocks': [
          myIpCidr
        ]
      },
      {
        'protocol': 'tcp',
        'from_port': 9100,
        'to_port': 9100,
        'cidr_blocks': [
          myIpCidr
        ]
      }
    ],
    egress = [
      {
        'protocol': '-1',
        'from_port': 0,
        'to_port': 0,
        'cidr_blocks': [
          "0.0.0.0/0"
        ]
      }
    ]
  )

cloudconfig = cloudinit.get_config(
    base64_encode = False,
    gzip = False,
    parts = [
      cloudinit.GetConfigPartArgs(
        content = "#cloudconfig\npackages:\n- prometheus-node-exporter",
        content_type = "text/cloud-config",
        filename = "init.cfg"
      )
    ]
  )


instance = aws.ec2.Instance(common_name,
  instance_type = size,
  vpc_security_group_ids = [
    group.id
  ],
  ami = ami.id,
  tags = {
    "Name": common_name,
    "prometheus": "true",
    "node_exporter": "true"
  },
  key_name = sshkey.key_name,
  user_data = cloudconfig.rendered
)

pulumi.export('publicIp', instance.public_ip)
pulumi.export('publicHostName', instance.public_dns)
Now we can do the same, but in Go.
Pulumi using Go
Pulumi hasn’t supported Go for as long as it has Typescript, Javascript and Python, so you may find the odd example missing in their documentation (here is a good example). However once you have worked with a few of the providers, you can usually infer what you need to do based upon the fields/inputs mentioned in the provider documentation.
Why Go?
Why would you want to use Go over Python? There are a couple of reasons.
First, because Go uses static typing for variables, you can’t use something like an integer in place of a string without converting it to a string first. This makes you more aware of what values you are passing between functions, and can help avoid cases of a variable being interpreted incorrectly and creating something wildly different from what you intended.
Also, you have to be explicit in how you handle errors in Go. This in turn makes you think about the functions you are using, and what you expect them to return.
Mostly though, it is down to personal preference. I prefer writing in Go, due to the reasons already mentioned. While not relevant to Pulumi, I also like that Go can create a single binary of your application that is easily distributable. With Python you usually ship a requirements.txt file that a user/operator must supply to pip to install all the required modules before the application can run.
For me, if I prefer writing other applications in Go, then also writing my infrastructure code in Go makes a lot of sense too.
The code
As before, we need to run pulumi new aws-go --name basic-ec2-go to instantiate our stack and project. We also run pulumi config set common_name yetiops-prom to set our common_name variable.
After this, we can start building our infrastructure. We first define the AMI: -
		mostRecent := true
		ami, err := aws.GetAmi(ctx, &aws.GetAmiArgs{
			Filters: []aws.GetAmiFilter{
				{
					Name:   "name",
					Values: []string{"ubuntu/images/hvm-ssd/ubuntu-focal-20.04-arm64-server-*"},
				},
			},
			Owners:     []string{"099720109477"},
			MostRecent: &mostRecent,
		})

		if err != nil {
			return err
		}
You may notice that we define some variables (like mostRecent) and then refer to them using the & symbol (ampersand) as a prefix. This is known as a pointer. In Go, a pointer is the variables location in memory. In Python, if you make a change to a variable later in the code, you are usually working on a copy of the variable, not the original. A pointer always works on the originally defined variable itself. If a change is made to the variable later in the code, it will also change everywhere it is used.
In all Pulumi functions in Go, we supply the context (the ctx variable). Context provides information to the function about whether Pulumi has completed/cancelled the operation, and can also pass in values from Pulumi SDK/CLI/API when required.
Like in the Python version, we are defining arguments to a function, but in this case it is more explicit in how we do so. We also return an error if one is found in retrieving this AMI (either through it not existing, or an issue in our code), which will stop the infrastructure from being deployed.
Next, we will define our SSH key pair: -
        user, err := user.Current()

		if err != nil {
			return err
		}

		sshkey_path := fmt.Sprintf("%v/.ssh/id_rsa.pub", user.HomeDir)

		sshkey_file, err := ioutil.ReadFile(sshkey_path)
		if err != nil {
			return err
		}

		sshkey_contents := string(sshkey_file)

		sshkey, err := ec2.NewKeyPair(ctx, commonName, &ec2.KeyPairArgs{
			PublicKey: pulumi.String(sshkey_contents),
		})

		if err != nil {
			return err
		}
Like in the Python example, we reference the user’s home directory, opening the SSH key file, read the contents, and then pass it to the SSH key pair function. We also see our first occurrence of the commonName variable.
Notice the usage of pulumi.String($STRING). This is an example of where types matter in Go. Rather than just expecting Go to handle whether this is a string or not, we must call the pulumi.String function to ensure that the variable being passed in is a string. This is because the PublicKey field requires a string, and would error immediately if you supplied an integer instead.
Like in the Python example, we must create the reference to our configuration: -
		conf := config.New(ctx, "")
		commonName := conf.Require("common_name")
Next, we create our security group: -
		group, err := ec2.NewSecurityGroup(ctx, commonName, &ec2.SecurityGroupArgs{
			Ingress: ec2.SecurityGroupIngressArray{
				ec2.SecurityGroupIngressArgs{
					Protocol: pulumi.String("tcp"),
					FromPort: pulumi.Int(22),
					ToPort:   pulumi.Int(22),
					CidrBlocks: pulumi.StringArray{
						pulumi.String(myIpCidr)},
				},
				ec2.SecurityGroupIngressArgs{
					Protocol: pulumi.String("tcp"),
					FromPort: pulumi.Int(9100),
					ToPort:   pulumi.Int(9100),
					CidrBlocks: pulumi.StringArray{
						pulumi.String(myIpCidr)},
				},
			},
			Egress: ec2.SecurityGroupEgressArray{
				ec2.SecurityGroupEgressArgs{
					Protocol: pulumi.String("-1"),
					FromPort: pulumi.Int(0),
					ToPort:   pulumi.Int(0),
					CidrBlocks: pulumi.StringArray{
						pulumi.String("0.0.0.0/0")},
				},
			},
		})

		if err != nil {
			return err
		}
We can see here that we are using pulumi.Int and pulumiStringArray. This ensures we are passing the right type variable types to each field. Again, we have a myIpCidr variable. We create a function that retrieves our IP for us, so we can use it in this security group: -
func getMyIp() (string, error) {
	resp, err := http.Get("https://ifconfig.co")
	if err != nil {
		return "", err
	}

	body, err := ioutil.ReadAll(resp.Body)
	if err != nil {
		return "", err
	}

	MyIp := strings.TrimSuffix(string(body), "\n")

	return MyIp, nil
}

[...]

		myIp, err := getMyIp()
		if err != nil {
			return err
		}

		myIpCidr := fmt.Sprintf("%v/32", myIp)
Similar to the Python function, we retrieve the IP from https://ifconfig.co. We don’t parse the JSON this time, as the base URL returns just the IP as the body. We also return any errors, in either contacting the ifconfig site or retrieving the body of the function. We also remove any new lines from the string, and then return the IP if no errors were found.
Finally, we call the function, return errors directly if any were found, and then add “/32” to the end of the string so we can use it directly in the security group.
After this, we can look at the user-data creation, using the cloudinit module again: -
          b64encEnable := false
          gzipEnable := false
          contentType := "text/cloud-config"
          fileName := "init.cfg"
          cloudconfig, err := cloudinit.LookupConfig(ctx, &cloudinit.LookupConfigArgs{
              Base64Encode: &b64encEnable,
              Gzip:         &gzipEnable,
              Parts: []cloudinit.GetConfigPart{
�                 cloudinit.GetConfigPart{
                      Content: "#cloud-config\n" +
                          "packages:\n" +
                          "- prometheus-node-exporter",
                      ContentType: &contentType,
                      Filename:    &fileName,
                  },
              },
          }, nil)

          if err != nil {
              return err
          }
As before, we refer to some variables with a pointer. Similar to the Python definition, we are creating the cloud-config file that installs the Prometheus node_exporter. Finally, we check to see if there was an error in this function, and return it if there is.
Again, like in the Python section, we need to install the Go module for cloudinit. This can be done like so: -
$ go get github.com/pulumi/pulumi-cloudinit/sdk/go/cloudinit
This will automatically update the go.mod and go.sum file with the module too.
Last but not least, we define our instance: -
          srv, err := ec2.NewInstance(ctx, commonName, &ec2.InstanceArgs{
              Tags:                pulumi.StringMap{"Name": pulumi.String(commonName)},
              InstanceType:        pulumi.String("t4g.micro"),
              VpcSecurityGroupIds: pulumi.StringArray{group.ID()},
              Ami:                 pulumi.String(ami.Id),
              KeyName:             pulumi.StringOutput(sshkey.KeyName),
              UserData:            pulumi.String(cloudconfig.Rendered),
          })

          ctx.Export("publicIp", srv.PublicIp)
          ctx.Export("publicHostName", srv.PublicDns)

          return nil
Most of the input variables are strings, including reference to the IDs, our commonName and more. However we also need to use the pulumi.StringOutput function for the sshkey.KeyName field. The other fields will return as strings, or at least types that are compatible with a StringMap or a StringArray. However the KeyName returned from the sshkey function is a StringOutput. If we try and treat it as a normal string, this is what you will see: -
$ pulumi up

View Live: https://app.pulumi.com/yetiops/basic-ec2/basic-ec2/previews/2781a4ef-b9c3-461f-934d-6552550b0f5f

     Type                 Name                 Plan     Info
     pulumi:pulumi:Stack  basic-ec2-basic-ec2           1 error; 2 messages

Diagnostics:
  pulumi:pulumi:Stack (basic-ec2-basic-ec2):
    # basic-ec2
    ./main.go:143:38: cannot convert sshkey.KeyName (type pulumi.StringOutput) to type pulumi.String

    error: an unhandled error occurred: program exited with non-zero exit code: 2
As you can see, if we use a pulumi.String function, it returns the wrong type. This is both the advantage of using Go, and the disadvantage if you aren’t used to languages with static types. If you use Python, you don’t tend to think about this kind of issue (and was one of my main issues coming from Python when I first started with Go). It does add an element of safety to what you are building though. At minimum, it at least makes you look to see if you’ve referenced the wrong resource!
Otherwise, this is very similar to how we defined the instance in Python. We also have our outputs too, so we are given the Public IP and Hostname of the instance in our output.
Finally, we end with return nil, which says that if we reached this stage with no problems, there was no error.
Running Pulumi
Now that we have everything defined, we can run pulumi up and see what happens: -
$ pulumi up

Previewing update (basic-ec2)

View Live: https://app.pulumi.com/yetiops/basic-ec2/basic-ec2/previews/6b7f7cfa-58c4-45da-bcce-54b7f046a280

     Type                      Name                 Plan
 +   pulumi:pulumi:Stack       basic-ec2-basic-ec2  create
 +   ├─ aws:ec2:KeyPair        yetiops-prom         create
 +   ├─ aws:ec2:SecurityGroup  yetiops-prom         create
 +   └─ aws:ec2:Instance       yetiops-prom         create

Resources:
    + 4 to create

Do you want to perform this update? yes
Updating (basic-ec2)

View Live: https://app.pulumi.com/yetiops/basic-ec2/basic-ec2/updates/14

     Type                      Name                 Status
 +   pulumi:pulumi:Stack       basic-ec2-basic-ec2  created
 +   ├─ aws:ec2:KeyPair        yetiops-prom         created
 +   ├─ aws:ec2:SecurityGroup  yetiops-prom         created
 +   └─ aws:ec2:Instance       yetiops-prom         created

Outputs:
    publicHostName: "ec2-18-132-12-195.eu-west-2.compute.amazonaws.com"
    publicIp      : "18.132.12.195"

Resources:
    + 4 created

Duration: 32s

$ ssh -i ~/.ssh/id_rsa [email protected]
Welcome to Ubuntu 20.04.2 LTS (GNU/Linux 5.4.0-1041-aws aarch64)

 * Documentation:  https://help.ubuntu.com
 * Management:     https://landscape.canonical.com
 * Support:        https://ubuntu.com/advantage

  System information as of Mon Apr  5 17:48:24 UTC 2021

  System load:  0.6               Processes:             157
  Usage of /:   17.1% of 7.59GB   Users logged in:       0
  Memory usage: 29%               IPv4 address for ens5: 172.31.43.120
  Swap usage:   0%

0 updates can be installed immediately.
0 of these updates are security updates.


The list of available updates is more than a week old.
To check for new updates run: sudo apt update


The programs included with the Ubuntu system are free software;
the exact distribution terms for each program are described in the
individual files in /usr/share/doc/*/copyright.

Ubuntu comes with ABSOLUTELY NO WARRANTY, to the extent permitted by
applicable law.

To run a command as administrator (user "root"), use "sudo <command>".
See "man sudo_root" for details.

$ ss -tlunp
Netid                   State                    Recv-Q                   Send-Q                                          Local Address:Port                                     Peer Address:Port                  Process
udp                     UNCONN                   0                        0                                          172.31.43.120%ens5:68                                            0.0.0.0:*
udp                     UNCONN                   0                        0                                               127.0.0.53%lo:53                                            0.0.0.0:*
tcp                     LISTEN                   0                        4096                                            127.0.0.53%lo:53                                            0.0.0.0:*
tcp                     LISTEN                   0                        128                                                   0.0.0.0:22                                            0.0.0.0:*
tcp                     LISTEN                   0                        4096                                                        *:9100                                                *:*
tcp                     LISTEN                   0                        128                                                      [::]:22                                               [::]:*

$ curl localhost:9100/metrics | grep -i aarch
node_uname_info{domainname="(none)",machine="aarch64",nodename="ip-172-31-43-120",release="5.4.0-1041-aws",sysname="Linux",version="#43-Ubuntu SMP Fri Mar 19 22:06:27 UTC 2021"} 1
Success.
All the code
The full main.go is below: -
package main

import (
	"fmt"
	"io/ioutil"
	"net/http"
	"os/user"
	"strings"

	"github.com/pulumi/pulumi-aws/sdk/v3/go/aws"
	"github.com/pulumi/pulumi-aws/sdk/v3/go/aws/ec2"
	"github.com/pulumi/pulumi-cloudinit/sdk/go/cloudinit"
	"github.com/pulumi/pulumi/sdk/v2/go/pulumi"
	"github.com/pulumi/pulumi/sdk/v2/go/pulumi/config"
)

func getMyIp() (string, error) {
	resp, err := http.Get("https://ifconfig.co")
	if err != nil {
		return "", err
	}

	body, err := ioutil.ReadAll(resp.Body)
	if err != nil {
		return "", err
	}

	MyIp := strings.TrimSuffix(string(body), "\n")

	return MyIp, nil
}

func main() {
	pulumi.Run(func(ctx *pulumi.Context) error {
		conf := config.New(ctx, "")
		commonName := conf.Require("common_name")

		b64encEnable := false
		gzipEnable := false
		contentType := "text/cloud-config"
		fileName := "init.cfg"
		cloudconfig, err := cloudinit.LookupConfig(ctx, &cloudinit.LookupConfigArgs{
			Base64Encode: &b64encEnable,
			Gzip:         &gzipEnable,
			Parts: []cloudinit.GetConfigPart{
				cloudinit.GetConfigPart{
					Content: "#cloud-config\n" +
						"packages:\n" +
						"- prometheus-node-exporter",
					ContentType: &contentType,
					Filename:    &fileName,
				},
			},
		}, nil)

		if err != nil {
			return err
		}

		user, err := user.Current()

		if err != nil {
			return err
		}

		sshkey_path := fmt.Sprintf("%v/.ssh/id_rsa.pub", user.HomeDir)

		sshkey_file, err := ioutil.ReadFile(sshkey_path)
		if err != nil {
			return err
		}

		sshkey_contents := string(sshkey_file)

		sshkey, err := ec2.NewKeyPair(ctx, commonName, &ec2.KeyPairArgs{
			PublicKey: pulumi.String(sshkey_contents),
		})

		if err != nil {
			return err
		}

		myIp, err := getMyIp()
		if err != nil {
			return err
		}

		myIpCidr := fmt.Sprintf("%v/32", myIp)

		group, err := ec2.NewSecurityGroup(ctx, commonName, &ec2.SecurityGroupArgs{
			Ingress: ec2.SecurityGroupIngressArray{
				ec2.SecurityGroupIngressArgs{
					Protocol: pulumi.String("tcp"),
					FromPort: pulumi.Int(22),
					ToPort:   pulumi.Int(22),
					CidrBlocks: pulumi.StringArray{
						pulumi.String(myIpCidr)},
				},
				ec2.SecurityGroupIngressArgs{
					Protocol: pulumi.String("tcp"),
					FromPort: pulumi.Int(9100),
					ToPort:   pulumi.Int(9100),
					CidrBlocks: pulumi.StringArray{
						pulumi.String(myIpCidr)},
				},
			},
			Egress: ec2.SecurityGroupEgressArray{
				ec2.SecurityGroupEgressArgs{
					Protocol: pulumi.String("-1"),
					FromPort: pulumi.Int(0),
					ToPort:   pulumi.Int(0),
					CidrBlocks: pulumi.StringArray{
						pulumi.String("0.0.0.0/0")},
				},
			},
		})

		if err != nil {
			return err
		}

		mostRecent := true
		ami, err := aws.GetAmi(ctx, &aws.GetAmiArgs{
			Filters: []aws.GetAmiFilter{
				{
					Name:   "name",
					Values: []string{"ubuntu/images/hvm-ssd/ubuntu-focal-20.04-arm64-server-*"},
				},
			},
			Owners:     []string{"099720109477"},
			MostRecent: &mostRecent,
		})

		if err != nil {
			return err
		}

		srv, err := ec2.NewInstance(ctx, commonName, &ec2.InstanceArgs{
			Tags:                pulumi.StringMap{"Name": pulumi.String(commonName)},
			InstanceType:        pulumi.String("t4g.micro"),
			VpcSecurityGroupIds: pulumi.StringArray{group.ID()},
			Ami:                 pulumi.String(ami.Id),
			KeyName:             pulumi.StringOutput(sshkey.KeyName),
			UserData:            pulumi.String(cloudconfig.Rendered),
		})

		if err != nil {
			return err
		}

		ctx.Export("publicIp", srv.PublicIp)
		ctx.Export("publicHostName", srv.PublicDns)

		return nil

	})
}
The code is definitely more verbose than the Python code, which is an artifact of Go (e.g. explicit rather than implicit error handling, defining types and context etc). It is down to your preference and which language you are most comfortable as to whether you choose Go or not for use with Pulumi.
Pulumi using Typescript
Typescript was one of the first languages that Pulumi supported, and if you use their documentation, the primary language examples are shown in is usually Typescript. For those who are not aware, Typescript is a superset of Javascript, developed by Microsoft. One of the main benefits is that it adds the ability to support static typing.
To install and use Typescript, you can use npm. This is the package manager for NodeJS, which means you will also want to install NodeJS as well (instructions available here). Once NodeJS and npm are installed, run npm install -g typescript, and you will be able to run tsc commands. More importantly for this post, you’ll be able to define your resources using Typescript.
Why Typescript?
Javascript, and even Typescript, are very popular. As of 2020, Javascript and Typescript were the 1st and 4th most used languages on GitHub. While this doesn’t cover every project in existence (e.g. those on other version control providers, internal applications), it covers enough code that these numbers mean something!
With that being the case, it makes sense that the most popular language in the world (Javascript) is supported by Pulumi. With Typescript also offering static typing, it adds some of the safety elements that you get with something like Go as well.
Why did I put it last after Python and Go given it’s relative popularity? Because I’ve never actually written anything in it before! Most of what I have written in this section is based upon existing examples, and changing to match what I am trying to achieve.
The code
Like Python and Go, we initialize our stack and project using pulumi new aws-typescript --name basic-ec2-tsc in a new directory. We also set our common_name variable using pulumi config set common_name yetiops-prom so that we can use it in our stack.
After this, we can start building our infrastructure. We first define the AMI: -
const ami = pulumi.output(aws.ec2.getAmi({
    filters: [{
        name: "name",
        values: [
            "ubuntu/images/hvm-ssd/ubuntu-focal-20.04-arm64-server-*"
        ]
    }],
    owners: [
        "099720109477"
    ],
    mostRecent: true,
}));
This isn’t too far removed from the Python code that defines the AMI. We define filters, the owner, the correct image, and to use the most recent AMI.
Now we’ll define the reference to our configuration values: -
let config = new pulumi.Config();

let common_name = config.require("common_name");
We can now use the common_name variable in the other functions.
Now we will define the security group: -
const group = new aws.ec2.SecurityGroup(common_name, {
    ingress: [
        {
            protocol: "tcp",
            fromPort: 22,
            toPort: 22,
            cidrBlocks: [
                "$MY-IP/32"
            ]
        },
        {
            protocol: "tcp",
            fromPort: 9100,
            toPort: 9100,
            cidrBlocks: [
                "$MY-IP/32"
            ]
        },
    ],
    egress: [
        {
            protocol: "-1",
            fromPort: 0,
            toPort: 0,
            cidrBlocks: [
                "0.0.0.0/0"
            ]
        }
    ]
});
Unfortunately due to my lack of experience with Typescript, I wasn’t able to replicate the function that calls to https://ifconfig.co so I have used my IP address directly in the rule definitions. If you already know Typescript, this shouldn’t be much of a challenge to implement.
Now we can define our SSH key pair: -
const homedir = require('os').homedir();

var sshkey_path = `${homedir}/.ssh/id_rsa.pub`;

const sshkey_file = fs.readFileSync(sshkey_path, 'utf8');

const sshkey = new aws.ec2.KeyPair(common_name, {
    keyName: common_name,
    publicKey: sshkey_file
});
Like the others, this references our home directory, and puts the contents of the file in as our public key contents.
Next, we cover the user-data: -
const cloudconfig = pulumi.output(cloudinit.getConfig({
    base64Encode: false,
    gzip: false,
    parts: [{
        content: "#cloudconfig\npackages:\n- prometheus-node-exporter",
        contentType: "text/cloud-config",
        filename: "init.cfg"
    }],
}, { async: true }));
Again, this is similar to the Python and Go resource definitions. Finally, we can now define the instance: -
const size = "t4g.micro";

const instance = new aws.ec2.Instance(common_name, {
    instanceType: size,
    vpcSecurityGroupIds: [
        group.id
    ],
    ami: ami.id,
    tags: {
        Name: common_name,
        node_exporter: "true",
        prometheus: "true"
    },
    keyName: sshkey.keyName,
    userData: cloudconfig.rendered
});

export const publicIp = instance.publicIp;
export const publicHostName = instance.publicDns;
Similar to the Python and Go definitions, we reference the security group IDs, SSH key names, and also export some variables for us to see in the pulumi up output.
Running Pulumi
We’ll now run pulumi up and see whether an instance is created: -
$ pulumi up
Previewing update (basic-ec2-tsc)

View Live: https://app.pulumi.com/yetiops/basic-ec2-tsc/basic-ec2-tsc/previews/fc1e60e1-d5bf-41f8-8524-a8090795dce4

     Type                      Name                         Plan
 +   pulumi:pulumi:Stack       basic-ec2-tsc-basic-ec2-tsc  create
 +   ├─ aws:ec2:KeyPair        yetiops-prom                 create
 +   ├─ aws:ec2:SecurityGroup  yetiops-prom                 create
 +   └─ aws:ec2:Instance       yetiops-prom                 create

Resources:
    + 4 to create

Do you want to perform this update? Yes
Updating (basic-ec2-tsc)

View Live: https://app.pulumi.com/yetiops/basic-ec2-tsc/basic-ec2-tsc/updates/5

     Type                      Name                         Status
 +   pulumi:pulumi:Stack       basic-ec2-tsc-basic-ec2-tsc  created
 +   ├─ aws:ec2:SecurityGroup  yetiops-prom                 created
 +   ├─ aws:ec2:KeyPair        yetiops-prom                 created
 +   └─ aws:ec2:Instance       yetiops-prom                 created

Outputs:
    publicHostName: "ec2-3-8-56-15.eu-west-2.compute.amazonaws.com"
    publicIp      : "3.8.56.15"

Resources:
    + 4 created

Duration: 20s

$ ssh -i ~/.ssh/id_rsa [email protected]
Welcome to Ubuntu 20.04.2 LTS (GNU/Linux 5.4.0-1041-aws aarch64)

 * Documentation:  https://help.ubuntu.com
 * Management:     https://landscape.canonical.com
 * Support:        https://ubuntu.com/advantage

  System information as of Mon Apr  5 18:41:35 UTC 2021

  System load:  0.16              Processes:             150
  Usage of /:   18.2% of 7.59GB   Users logged in:       0
  Memory usage: 25%               IPv4 address for ens5: 172.31.41.195
  Swap usage:   0%

4 updates can be installed immediately.
3 of these updates are security updates.
To see these additional updates run: apt list --upgradable


The programs included with the Ubuntu system are free software;
the exact distribution terms for each program are described in the
individual files in /usr/share/doc/*/copyright.

Ubuntu comes with ABSOLUTELY NO WARRANTY, to the extent permitted by
applicable law.

To run a command as administrator (user "root"), use "sudo <command>".
See "man sudo_root" for details.

$ ss -tlunp
Netid                   State                    Recv-Q                   Send-Q                                          Local Address:Port                                     Peer Address:Port                  Process
udp                     UNCONN                   0                        0                                               127.0.0.53%lo:53                                            0.0.0.0:*
udp                     UNCONN                   0                        0                                          172.31.41.195%ens5:68                                            0.0.0.0:*
tcp                     LISTEN                   0                        4096                                            127.0.0.53%lo:53                                            0.0.0.0:*
tcp                     LISTEN                   0                        128                                                   0.0.0.0:22                                            0.0.0.0:*
tcp                     LISTEN                   0                        128                                                      [::]:22                                               [::]:*
tcp                     LISTEN                   0                        4096                                                        *:9100                                                *:*

$ curl localhost:9100/metrics | grep -i aarch
node_uname_info{domainname="(none)",machine="aarch64",nodename="ip-172-31-41-195",release="5.4.0-1041-aws",sysname="Linux",version="#43-Ubuntu SMP Fri Mar 19 22:06:27 UTC 2021"} 1
There we go, everything we asked for!
All the code
The full index.ts is below: -
import * as pulumi from "@pulumi/pulumi";
import * as aws from "@pulumi/aws";
import * as awsx from "@pulumi/awsx";
import * as cloudinit from "@pulumi/cloudinit";
import * as fs from "fs";

let config = new pulumi.Config();

let common_name = config.require("common_name");

const size = "t4g.micro";

const ami = pulumi.output(aws.ec2.getAmi({
    filters: [{
        name: "name",
        values: [
            "ubuntu/images/hvm-ssd/ubuntu-focal-20.04-arm64-server-*"
        ]
    }],
    owners: [
        "099720109477"
    ],
    mostRecent: true,
}));

const group = new aws.ec2.SecurityGroup(common_name, {
    ingress: [
        {
            protocol: "tcp",
            fromPort: 22,
            toPort: 22,
            cidrBlocks: [
                "86.29.247.18/32"
            ]
        },
        {
            protocol: "tcp",
            fromPort: 9100,
            toPort: 9100,
            cidrBlocks: [
                "86.29.247.18/32"
            ]
        },
    ],
    egress: [
        {
            protocol: "-1",
            fromPort: 0,
            toPort: 0,
            cidrBlocks: [
                "0.0.0.0/0"
            ]
        }
    ]
});

const homedir = require('os').homedir();

var sshkey_path = `${homedir}/.ssh/id_rsa.pub`;

const sshkey_file = fs.readFileSync(sshkey_path, 'utf8');

const sshkey = new aws.ec2.KeyPair(common_name, {
    keyName: common_name,
    publicKey: sshkey_file
});

const cloudconfig = pulumi.output(cloudinit.getConfig({
    base64Encode: false,
    gzip: false,
    parts: [{
        content: "#cloudconfig\npackages:\n- prometheus-node-exporter",
        contentType: "text/cloud-config",
        filename: "init.cfg"
    }],
}, { async: true }));

const instance = new aws.ec2.Instance(common_name, {
    instanceType: size,
    vpcSecurityGroupIds: [
        group.id
    ],
    ami: ami.id,
    tags: {
        Name: common_name,
        node_exporter: "true",
        prometheus: "true"
    },
    keyName: sshkey.keyName,
    userData: cloudconfig.rendered
});

export const publicIp = instance.publicIp;
export const publicHostName = instance.publicDns;
Compared to the Python and Go code, it is probably of a similar verbosity to the Python code, but does have the ability to add static types to it. While we haven’t used them here, we can gain that safety if we so choose.
What else can we do?
This post just touches the surface of what Pulumi can do. Remember that one of the benefits here is that you are using a standard programming language. Whatever you can build in the language, you can probably use with Pulumi. Whether this is more natural looping, calling APIs, and potentially even providing your own API to Pulumi.
A very rudimentary example is below: -
		instances := []string{'a', 'b', 'b'}

		srvMap := make([]*ec2.Instance, 3)

		for _, v := range instances {
			index := strconv.Itoa(i)
			srv, err := ec2.NewInstance(ctx, commonName+v, &ec2.InstanceArgs{
				Tags:                pulumi.StringMap{"Name": pulumi.String(commonName + v)},
				InstanceType:        pulumi.String("t4g.micro"),
				VpcSecurityGroupIds: pulumi.StringArray{group.ID()},
				Ami:                 pulumi.String(ami.Id),
				KeyName:             pulumi.StringOutput(sshkey.KeyName),
				UserData:            pulumi.String(cloudconfig.Rendered),
			})

			if err != nil {
				return err
			}

			srvMap[v] = srv
		}

		var srvPublicIPs pulumi.StringArray

		for _, srv := range srvMap {
			srvPublicIPs = append(srvPublicIPs, srv.PublicIp)
		}

		ctx.Export("publicIps", srvPublicIPs)
The equivalent Terraform would be: -
variable "instances" {
  type = "list(string)"
  default = ["a", "b", "c"]
}

resource "aws_instance" "yetiops-aws-prom" {
  ami           = data.aws_ami.ubuntu.id
  count         = length(instances)
  instance_type = "t4g.micro"
  user_data     = data.template_file.ubuntu.template

  key_name = aws_key_pair.yetiops-aws-prom.key_name

  vpc_security_group_ids = [
    aws_security_group.yetiops-aws-prom.id
  ]

  tags = {
    Name = "yetiops-aws-prom-${[count.index]}"
    prometheus = "true"
    node_exporter = "true"
  }
}

output "ip" {
  value = aws_instance.yetiops-aws-prom.*.public_ip
}
There is less code, but I personally find it less obvious to read what is happening here.
We can see that in the output of pulumi up, it will create three instances: -
$ pulumi up
Previewing update (basic-ec2)

View Live: https://app.pulumi.com/yetiops/basic-ec2/basic-ec2/previews/4fb79336-452e-4b78-a7cb-bf1a699001d3

     Type                      Name                 Plan
 +   pulumi:pulumi:Stack       basic-ec2-basic-ec2  create
 +   ├─ aws:ec2:KeyPair        yetiops-prom         create
 +   ├─ aws:ec2:SecurityGroup  yetiops-prom         create
 +   ├─ aws:ec2:Instance       yetiops-proma        create
 +   ├─ aws:ec2:Instance       yetiops-promb        create
 +   └─ aws:ec2:Instance       yetiops-promc        create

Resources:
    + 6 to create

Do you want to perform this update? yes
Updating (basic-ec2)

View Live: https://app.pulumi.com/yetiops/basic-ec2/basic-ec2/updates/22

     Type                      Name                 Status
 +   pulumi:pulumi:Stack       basic-ec2-basic-ec2  created
 +   ├─ aws:ec2:KeyPair        yetiops-prom         created
 +   ├─ aws:ec2:SecurityGroup  yetiops-prom         created
 +   ├─ aws:ec2:Instance       yetiops-proma        created
 +   ├─ aws:ec2:Instance       yetiops-promc        created
 +   └─ aws:ec2:Instance       yetiops-promb        created

Outputs:
    publicIps: [
        [0]: "3.10.55.200"
        [1]: "18.132.17.85"
        [c]: "18.134.206.111"
    ]

Resources:
    + 6 created

Duration: 26s

$ curl 3.10.55.200:9100/metrics | grep -i aarch
100  116k    0  116k    0     0   694k      0 --:--:-- --:--:-- --:--:--  698k
node_uname_info{domainname="(none)",machine="aarch64",nodename="ip-172-31-34-49",release="5.4.0-1041-aws",sysname="Linux",version="#43-Ubuntu SMP Fri Mar 19 22:06:27 UTC 2021"} 1

$ curl 18.132.17.85:9100/metrics | grep -i aarch
node_uname_info{domainname="(none)",machine="aarch64",nodename="ip-172-31-38-67",release="5.4.0-1041-aws",sysname="Linux",version="#43-Ubuntu SMP Fri Mar 19 22:06:27 UTC 2021"} 1

$ curl 18.134.206.111:9100/metrics | grep -i aarch
node_uname_info{domainname="(none)",machine="aarch64",nodename="ip-172-31-46-14",release="5.4.0-1041-aws",sysname="Linux",version="#43-Ubuntu SMP Fri Mar 19 22:06:27 UTC 2021"} 1
How about checking to see if we have a certain named SSH key, and uses that if it exists? We then can fallback to our default RSA key if it doesn’t: -
yetissh_path = "{}/.ssh/ssh_yetiops.pub".format(homedir)

if os.path.isfile(yetissh_path):
    sshkey_path = yetissh_path
else:
    sshkey_path = "{}/.ssh/id_rsa.pub".format(
                      homedir
                  )
sshkey_file = open(sshkey_path, 'r')

sshkey = aws.ec2.KeyPair(common_name,
  public_key = sshkey_file.read().strip("\n")
)
The equivalent Terraform would be: -
variable "yetissh_path" {
  type = "string"
  default = "~/.ssh/yetiops.pub"
}

variable "rsa_ssh_path" {
  type = "string"
  default = "~/.ssh/yetiops.pub"
}

resource "aws_key_pair" "yetiops-aws-prom" {
  key_name = "yetiops-aws-prom"
  public_key = fileexists(var.yetissh_path) ? file(var.yetissh_path) : var.rsa_ssh_path
}
Again, less code, but not as easy to ready (in my opinion).
We can prove the Python version works with: -
$ pulumi up

Previewing update (basic-ec2-py)

View Live: https://app.pulumi.com/yetiops/basic-ec2-py/basic-ec2-py/previews/b1ee9964-f8e7-45fa-990b-94f7fbff0fca

     Type                      Name                       Plan       Info
 +   pulumi:pulumi:Stack       basic-ec2-py-basic-ec2-py  create     1 warning
 +   ├─ aws:ec2:KeyPair        yetiops-prom               create
 +   ├─ aws:ec2:SecurityGroup  yetiops-prom               create
 +   └─ aws:ec2:Instance       yetiops-prom               create

Diagnostics:
  pulumi:pulumi:Stack (basic-ec2-py-basic-ec2-py):
    warning: get_ami is deprecated: aws.getAmi has been deprecated in favor of aws.ec2.getAmi


Do you want to perform this update? yes
Updating (basic-ec2-py)

View Live: https://app.pulumi.com/yetiops/basic-ec2-py/basic-ec2-py/updates/11

     Type                      Name                       Status      Info
 +   pulumi:pulumi:Stack       basic-ec2-py-basic-ec2-py  created     1 warning
 +   ├─ aws:ec2:KeyPair        yetiops-prom               created
 +   ├─ aws:ec2:SecurityGroup  yetiops-prom               created
 +   └─ aws:ec2:Instance       yetiops-prom               created

Diagnostics:
  pulumi:pulumi:Stack (basic-ec2-py-basic-ec2-py):
    warning: get_ami is deprecated: aws.getAmi has been deprecated in favor of aws.ec2.getAmi

Outputs:
    publicHostName: "ec2-18-134-210-137.eu-west-2.compute.amazonaws.com"
    publicIp      : "18.134.210.137"

Resources:
    + 4 created

Duration: 24s

$ ssh -i ~/.ssh/ssh_yetiops [email protected]

Welcome to Ubuntu 20.04.2 LTS (GNU/Linux 5.4.0-1041-aws aarch64)

 * Documentation:  https://help.ubuntu.com
 * Management:     https://landscape.canonical.com
 * Support:        https://ubuntu.com/advantage

  System information as of Tue Apr  6 08:11:15 UTC 2021

  System load:  0.32              Processes:             148
  Usage of /:   18.1% of 7.59GB   Users logged in:       0
  Memory usage: 25%               IPv4 address for ens5: 172.31.42.129
  Swap usage:   0%

4 updates can be installed immediately.
3 of these updates are security updates.
To see these additional updates run: apt list --upgradable


The programs included with the Ubuntu system are free software;
the exact distribution terms for each program are described in the
individual files in /usr/share/doc/*/copyright.

Ubuntu comes with ABSOLUTELY NO WARRANTY, to the extent permitted by
applicable law.

To run a command as administrator (user "root"), use "sudo <command>".
See "man sudo_root" for details.

$
Even these arbitrary examples show what is possible. If you can build it in your chosen language, you can make use of it in Pulumi. The fact you can integrate the modules directly into your code gives a lot of options for how, when and why you might build your infrastructure.
Summary
Infrastructure-as-Code is fast becoming the defacto way to build, define and deploy your infrastructure. Given the support that many of these tools have for a varying array of cloud providers, applications, network hardware, monitoring solutions, it is becoming hard to justify not using this approach.
In many ways, Terraform is already becoming the go-to tool for this. For example, even though AWS already has IaC tools (CloudFormation, AWS CDK), they include Terraform in their own documentation examples (like here.
However, there are times when trying to describe your end state in Terraform can become very unwieldy, or at least not obvious. Using Pulumi, especially if you have skills/background in development provides an alternative approach. Want to create an EC2 instance per AWS region? Query the AWS API, and loop over the result in Pulumi to create the instances. Want to define your AWS/Azure/GCP users and their roles based upon an internal database? Query the database, and create the users based upon the query results.
Pulumi is very powerful. If you find Terraform is making it difficult to define some parts of your infrastructure, it is definitely worth a look!